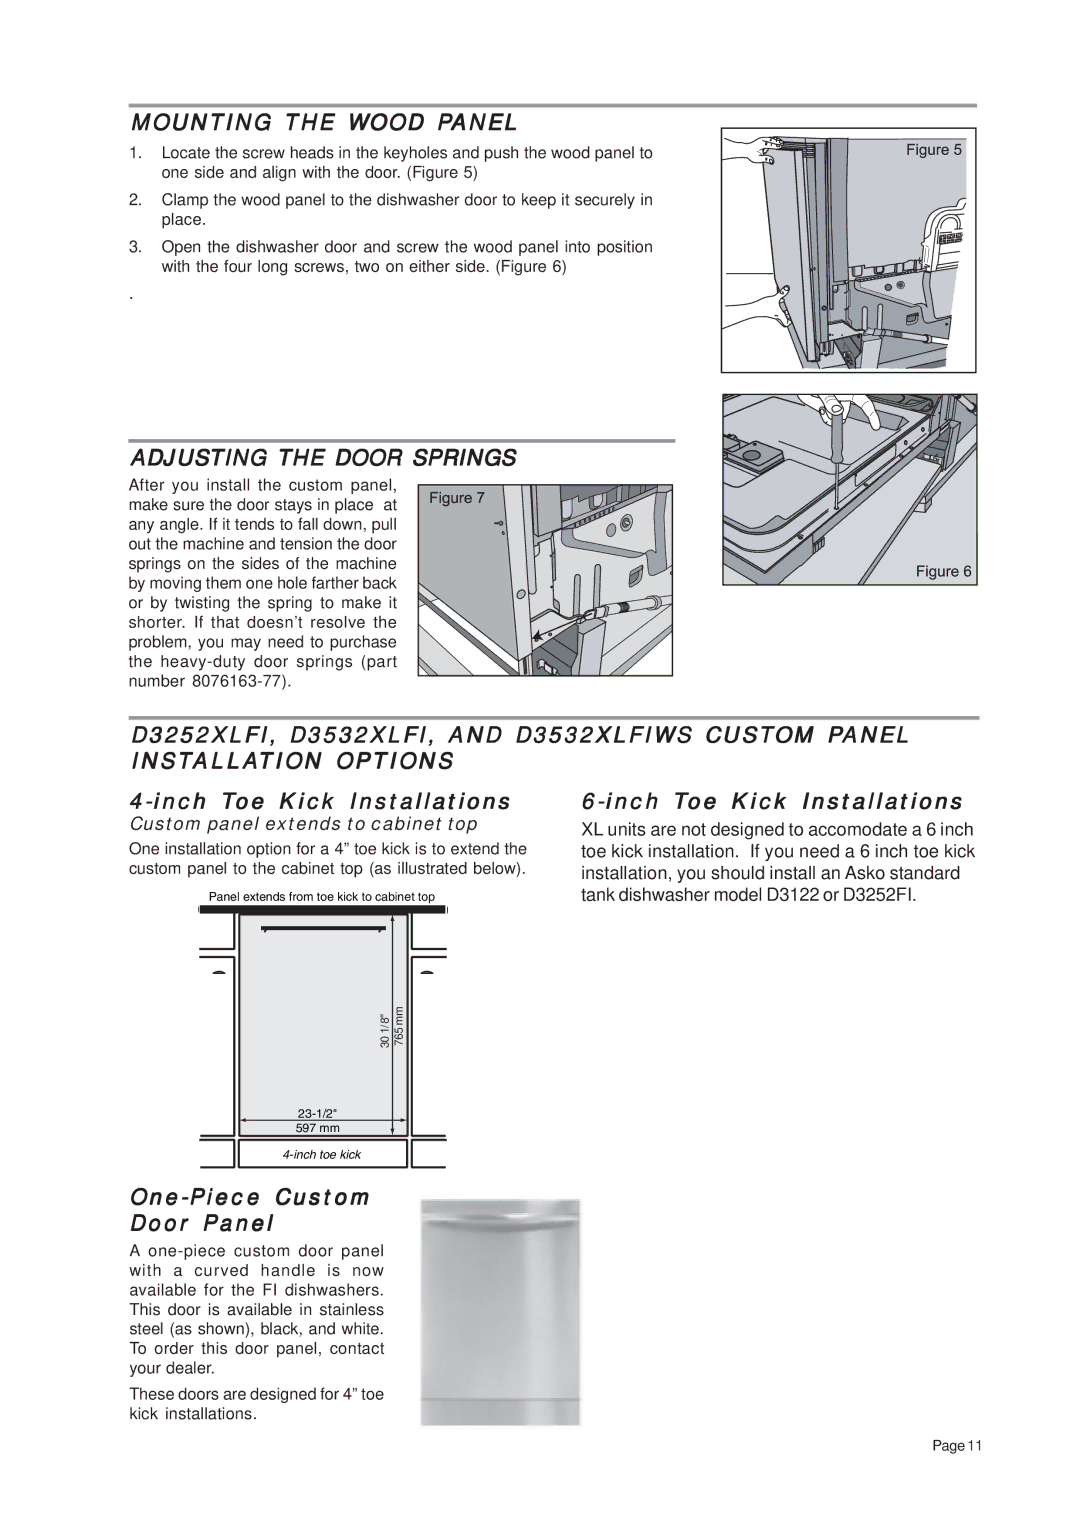
MOUNTING THE WOOD PANEL
1. Locate the screw heads in the keyholes and push the wood panel to one side and align with the door. (Figure 5)
2.Clamp the wood panel to the dishwasher door to keep it securely in place.
3.Open the dishwasher door and screw the wood panel into position
with the four long screws, two on either side. (Figure 6)
.
ADJUSTING THE DOOR SPRINGS
After you install the custom panel, make sure the door stays in place at any angle. If it tends to fall down, pull out the machine and tension the door springs on the sides of the machine by moving them one hole farther back or by twisting the spring to make it shorter. If that doesn’t resolve the problem, you may need to purchase the
D3252XLFI, D3532XLFI, AND D3532XLFIWS CUSTOM PANEL INSTALLATION OPTIONS
4-inch Toe Kick Installations
Custom panel extends to cabinet top
One installation option for a 4” toe kick is to extend the custom panel to the cabinet top (as illustrated below).
Panel extends from toe kick to cabinet top
30 1/8" 765 mm
597 mm
One-Piece Custom
Door Panel
A
These doors are designed for 4” toe kick installations.
XL units are not designed to accomodate a 6 inch toe kick installation. If you need a 6 inch toe kick installation, you should install an Asko standard tank dishwasher model D3122 or D3252FI.
Page 11