INTRODUCTION
Read these instructions carefully and completely before you install the machine. The installation should be carried out by a qualified person who is familiar with all local codes and ordinances for electrical and plumbing connections.
If a dishwasher is being installed in this area for the first time, most of the cabinet work, plumbing, and electrical has to be done before you move the machine into place.
If you are replacing an old dishwasher, you must check the plumbing connection and wiring before you move the new dishwasher into place.
NOTE: Cosmetic damage must be reported to the ASKO dealer within five days from the date of purchase. As soon as you unpack the dishwasher, thoroughly check it for cosmetic damage.
WHAT YOU NEED
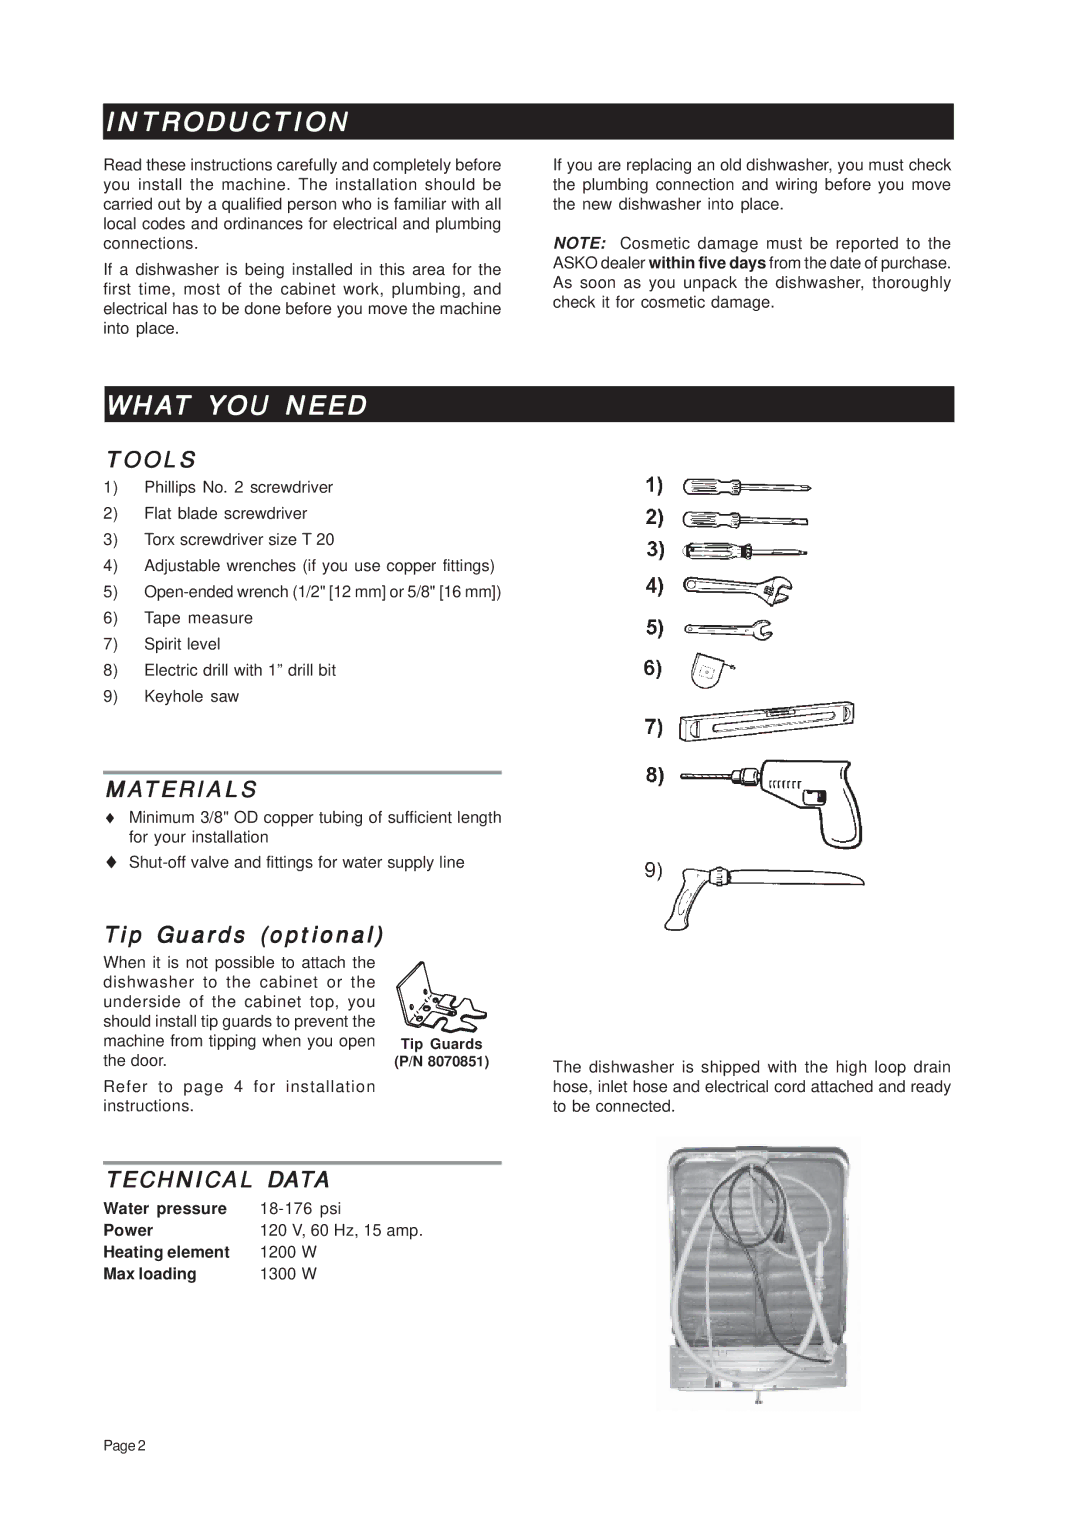
TOOLS
1)Phillips No. 2 screwdriver
2)Flat blade screwdriver
3)Torx screwdriver size T 20
4)Adjustable wrenches (if you use copper fittings)
5)
6)Tape measure
7)Spirit level
8)Electric drill with 1” drill bit
9)Keyhole saw
MATERIALS
♦Minimum 3/8" OD copper tubing of sufficient length for your installation
♦
Tip Guards (optional)
When it is not possible to attach the dishwasher to the cabinet or the underside of the cabinet top, you should install tip guards to prevent the machine from tipping when you open the door.
Refer to page 4 for installation instructions.
Tip Guards
(P/N 8070851)
The dishwasher is shipped with the high loop drain hose, inlet hose and electrical cord attached and ready to be connected.
TECHNICAL DATA
Water pressure | |
Power | 120 V, 60 Hz, 15 amp. |
Heating element | 1200 W |
Max loading | 1300 W |
Page 2