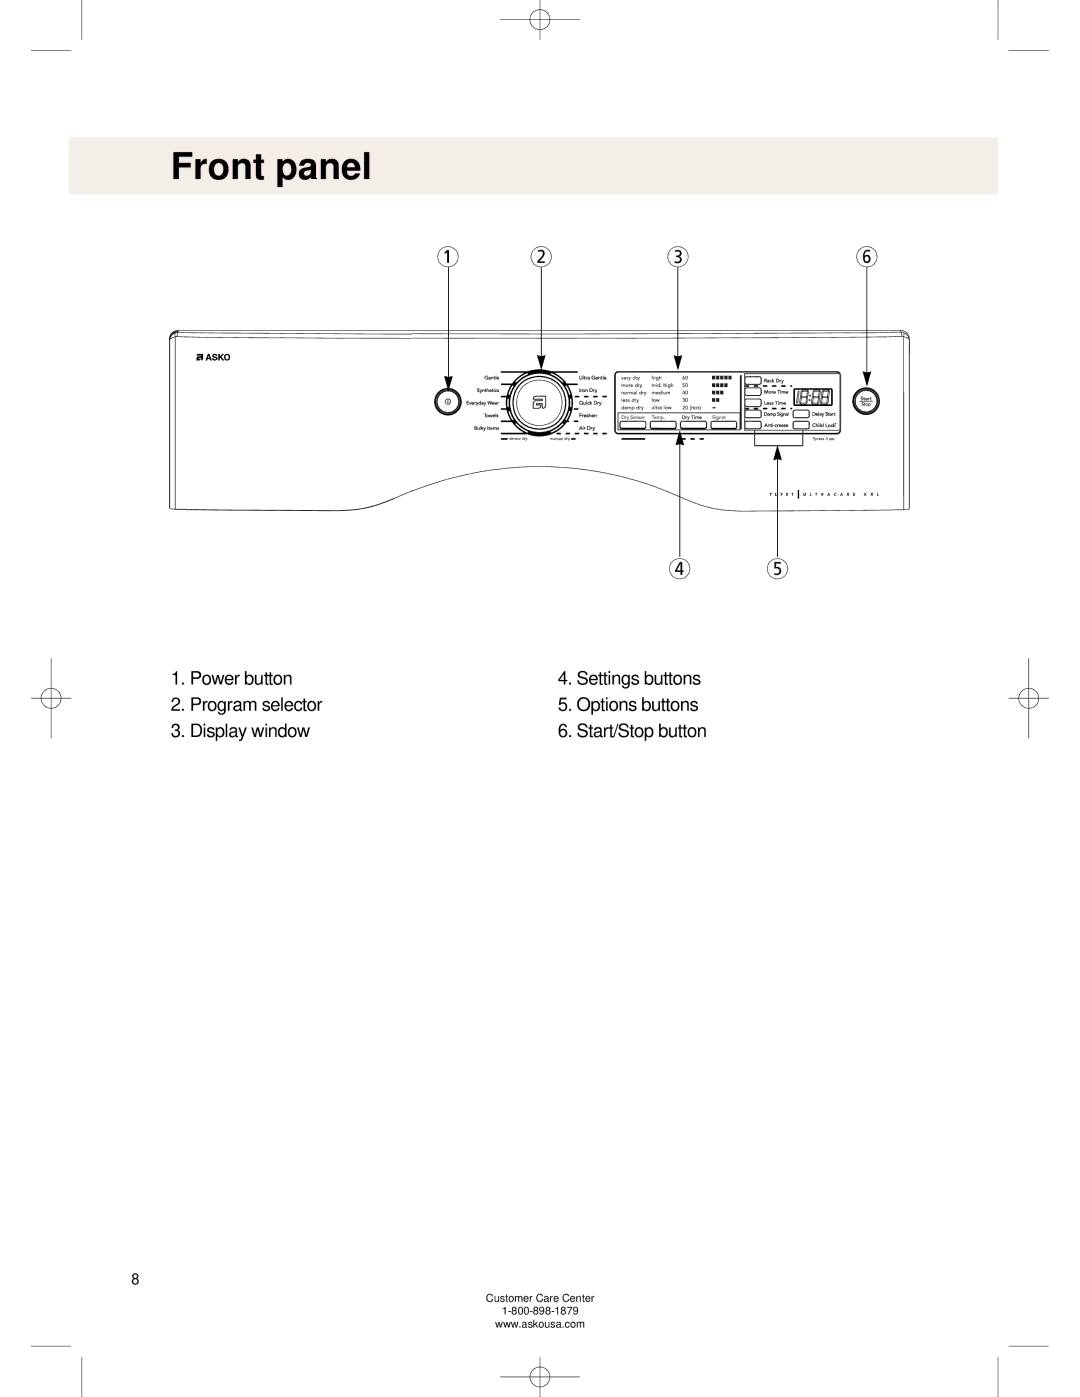
Manuals
/
Brands
/
Laundry Appliance
/
Clothes Dryer
/
Asko
/
Laundry Appliance
/
Clothes Dryer
Asko
TL751XXL
Front panel
1
9
41
41
Download
41 pages, 1.88 Mb
Front panel
1. Power button
2. Program selector
3. Display window
4. Settings buttons
5. Options buttons
6. Start/Stop button
8
Customer Care Center
1-800-898-1879
www.askousa.com
12
3
4
5
6
Contents
Main
Operating Instructions Tumble dryer
Save these instructions for future reference
Asko TL751 XXLW
Page
Contents
Before using your machine for the first time
Do not tumble dry
Important safety instructions
Grounding instruction
Warning!
Caution! Warning!
Important safety instructions
B) Grounding instructions for a permanently connected appliance:
Interrupting a program
Packing material
Recycling
Child safety
Do not allow children to play with the Tumble dryer.
Description of the tumble dryer
Front panel
Advice and tips before you tumble dry
Have the clothes been spun?
Warning!
Laundry labels
Do not tumble dry
Page
Sensor Dry Preset Program Settings
2) Manual Dry programs
Manual Dry Preset Program Settings
Quick Dry
Freshen
Programed settings and options guide
Press the Start button
Loading or removing laundry
Caution!
Dry program finished
Cleaning the lint filter
Selecting Settings
Dry Sensor
Temp.
Dry Time
Signal
Selecting Options
Rack Dry
More Time / Less Time
Selecting Options
Important!Note!
Damp Signal
Anti-crease
Delay Start
Care and maintenance instructions
Cleaning the lint filter
Cleaning the door and its opening
Troubleshooting Tip!
3. Problem: There Are Greasy Spots On My Clothes.
4. Problem: My Dryer Displayed An Error Code.
2. Problem: My Dryer Doesnt Heat
5. Problem: There Is Lint On My Clothes
6. Problem: There Is Static In My Clothes After Drying
8. Problem: Water Is Found Around The Cabinet Cover When Opening The Door.
7. Problem: The Drying Time Is Not Consistent
9. Problem: It Takes Too Long For My Clothes To Dry
10. Problem: My Clothes Are Wrinkled
11. Problem: My clothes are shrinking
Technical information
Technical data
Page
Service and guarantee
Step 1. Positioning the tumble dryer
Minimum clearances on above, behind, and sides of the unit, as shown below, are required.
Page
Alternate exhaust directions
DUCT TAPE
Step 3. Electrical plug connections
Step 4. Preparation of the dryer
Step 5. Confirming heat source operation
Step 6. Dryer airflow
Step 7. Additional instructions for installation of your dryer in a manufactured or mobile home
120V/240V, 60 Hertz, 3-wire installation
Important Warning!
Review the following options to determine the appropriate electrical connection for your Home:
4-wire connection: Direct wire
3-wire connection : Direct wire
Option 1: 4-wire connection with a power supply cord
Option 2: 3-Wire connection with a power supply cord
Option 3: Optional 3-wire connection
Important Warning!
User-maintenance instructions
Exhaust requirements and instructions:
Exhaust and dryer maintenance
Exhaust requirements and maintenance
Cleaning the lint screen
Reversing the door
Door hanging
Quick guide