Getting started
Battery installation and charging
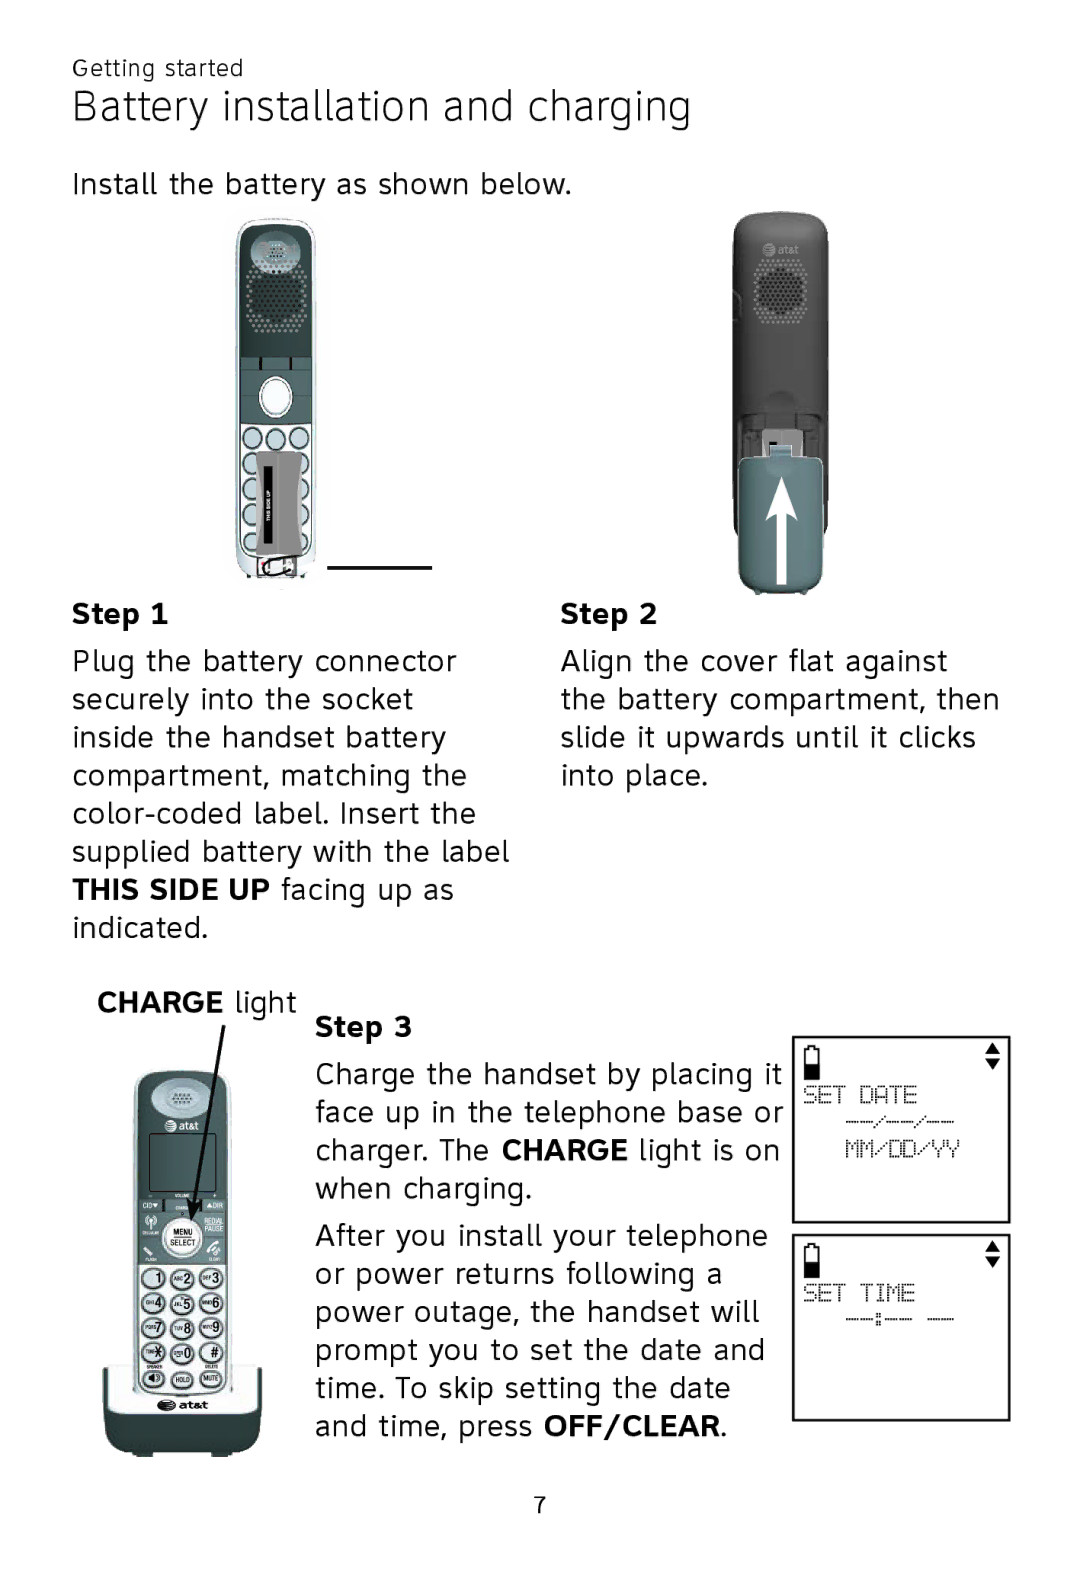
Install the battery as shown below.
Step 1 | Step 2 |
|
|
| ||
Plug the battery connector | Align the cover flat against | |||||
securely into the socket | the battery compartment, then | |||||
inside the handset battery | slide it upwards until it clicks | |||||
compartment, matching the | into place. |
|
|
| ||
|
|
|
| |||
supplied battery with the label |
|
|
|
| ||
THIS SIDE UP facing up as |
|
|
|
| ||
indicated. |
|
|
|
| ||
CHARGE light Step 3 |
|
|
|
| ||
|
| Charge the handset by placing it |
|
|
| |
|
|
|
|
| ||
|
| SET DATE | ||||
|
| face up in the telephone base or | ||||
|
| charger. The CHARGE light is on |
|
| MM/DD/YY | |
|
| when charging. |
|
|
|
|
|
| After you install your telephone |
|
|
| |
|
|
|
|
| ||
|
| or power returns following a |
|
|
| |
|
|
|
|
| ||
|
| SET TIME | ||||
|
| power outage, the handset will | ||||
|
| |||||
|
| prompt you to set the date and |
|
|
| |
|
| time. To skip setting the date |
|
|
| |
|
| and time, press OFF/CLEAR. |
|
|
| |
|
|
|
|
| ||
