4
Preparation for Assembly
Remove grill and all packaging materials from the carton and place on a clean level surface. Some parts are packed inside the grill body. Remove, unpack and inspect these parts as well.
NOTE: Before using your grill, read the instructions and your manual.
For easier
If you have any questions or need help, go to www.aussiegrills.com or contact Customer Service at
Grill Assembly Instructions
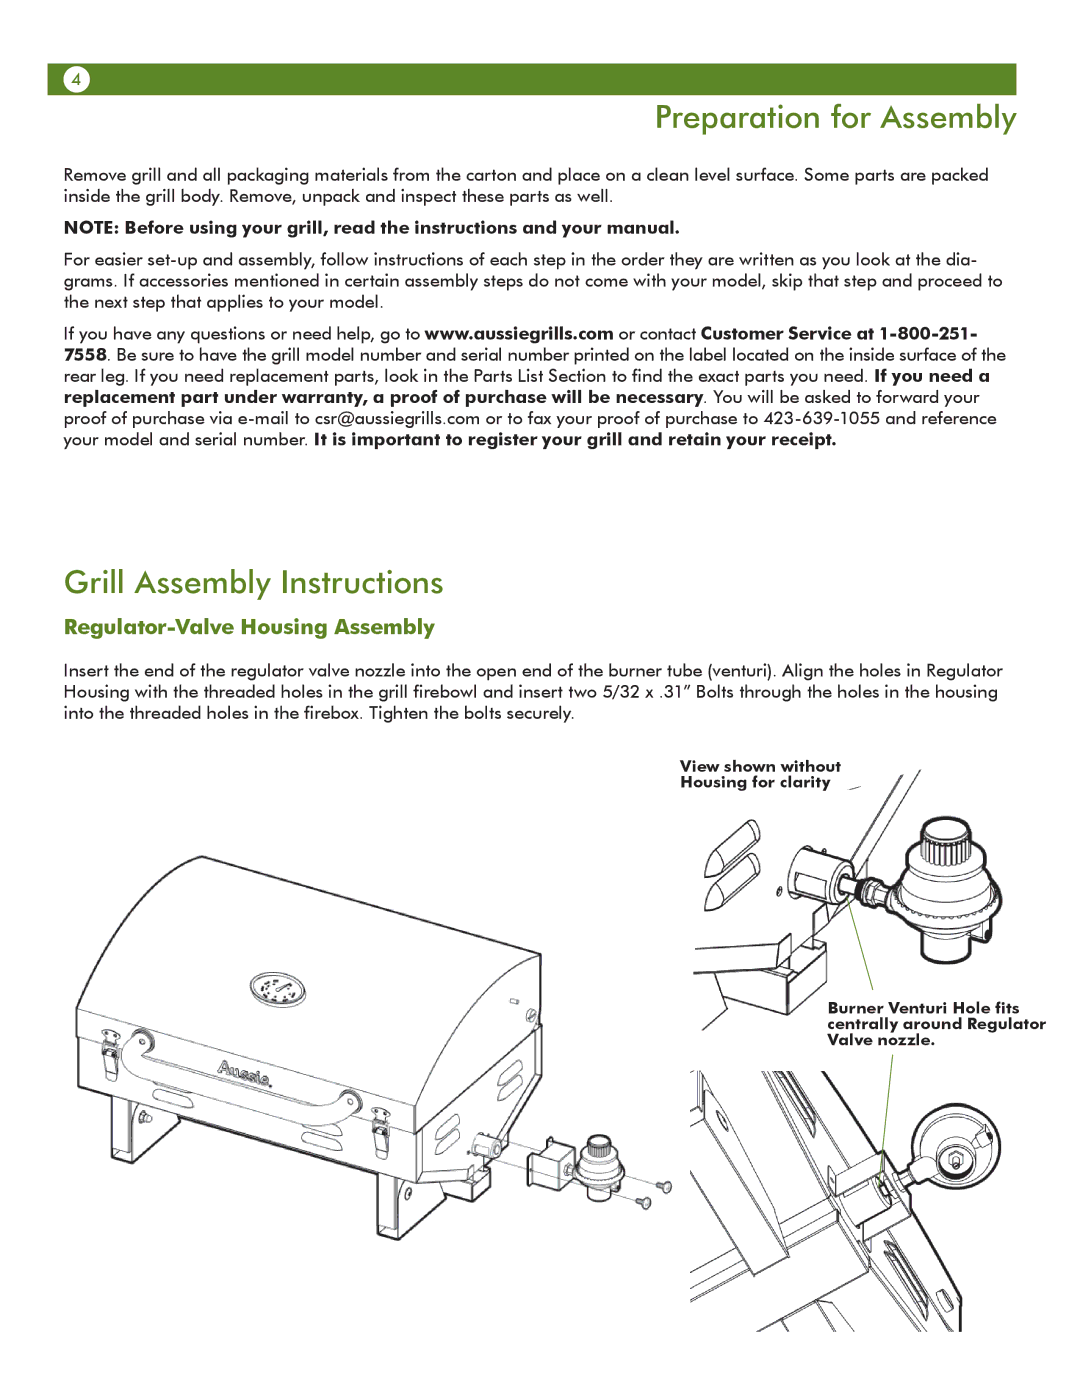
Regulator-Valve Housing Assembly
Insert the end of the regulator valve nozzle into the open end of the burner tube (venturi). Align the holes in Regulator Housing with the threaded holes in the grill firebowl and insert two 5/32 x .31” Bolts through the holes in the housing into the threaded holes in the firebox. Tighten the bolts securely.
View shown without
Housing for clarity
Burner Venturi Hole fits centrally around Regulator Valve nozzle.