Manually Lighting the Grill
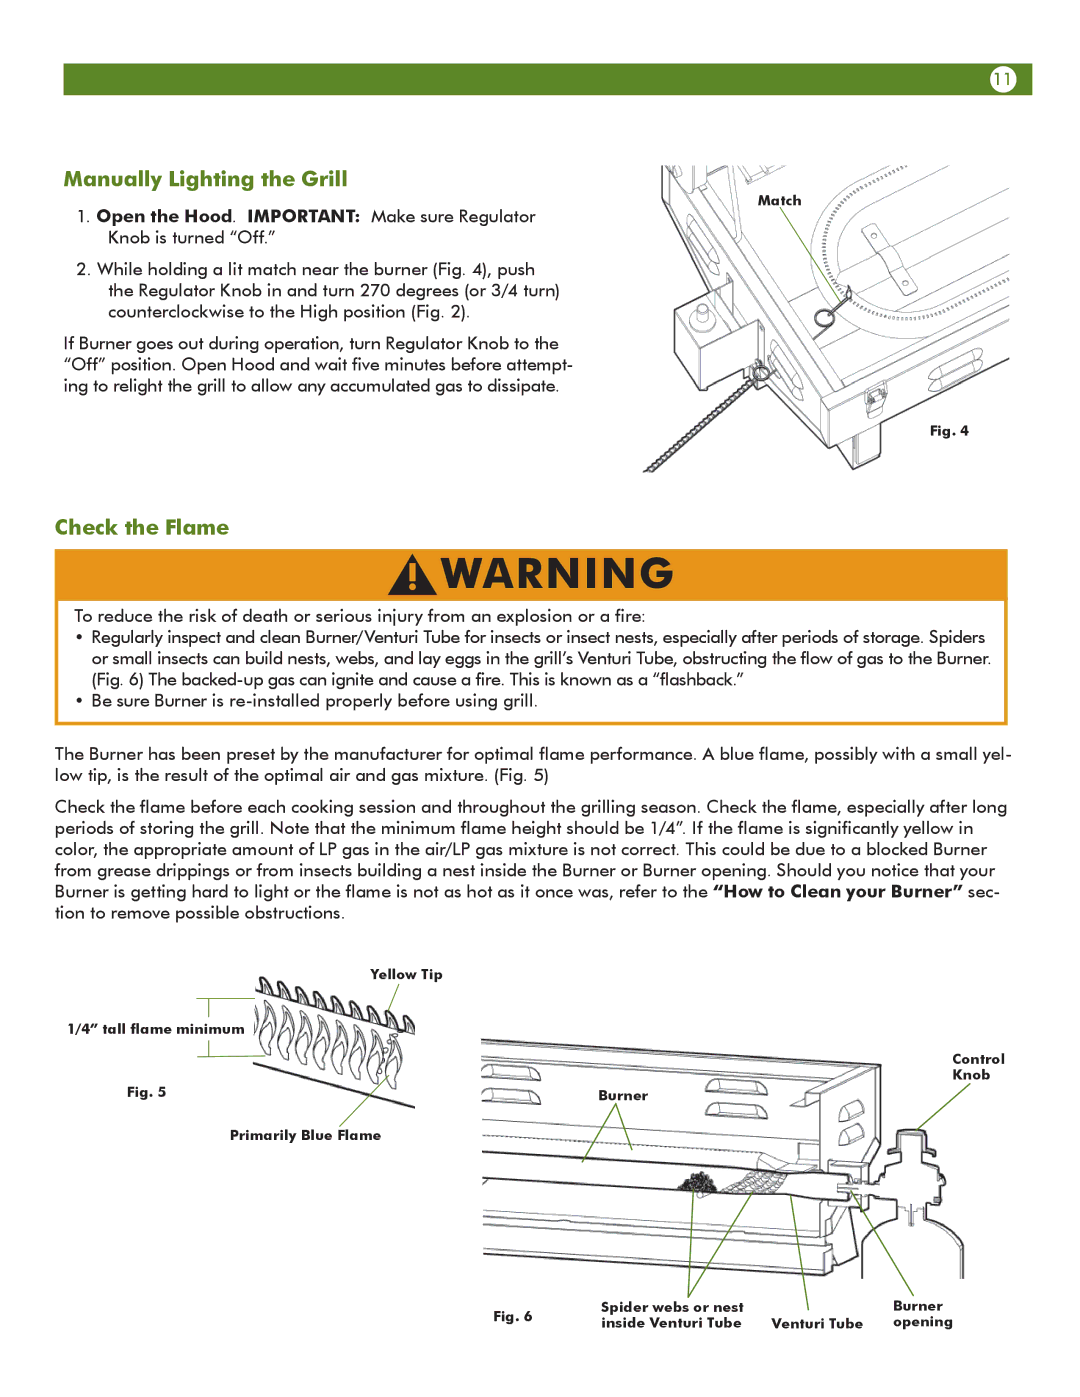
1. Open the Hood. IMPORTANT: Make sure Regulator Knob is turned “Off.”
11
Match
2. While holding a lit match near the burner (Fig. 4), push the Regulator Knob in and turn 270 degrees (or 3/4 turn) counterclockwise to the High position (Fig. 2).
If Burner goes out during operation, turn Regulator Knob to the “Off” position. Open Hood and wait five minutes before attempt- ing to relight the grill to allow any accumulated gas to dissipate.
Fig. 4
Check the Flame
!WARNING
To reduce the risk of death or serious injury from an explosion or a fire:
•Regularly inspect and clean Burner/Venturi Tube for insects or insect nests, especially after periods of storage. Spiders or small insects can build nests, webs, and lay eggs in the grill’s Venturi Tube, obstructing the flow of gas to the Burner. (Fig. 6) The
•Be sure Burner is
The Burner has been preset by the manufacturer for optimal flame performance. A blue flame, possibly with a small yel- low tip, is the result of the optimal air and gas mixture. (Fig. 5)
Check the flame before each cooking session and throughout the grilling season. Check the flame, especially after long periods of storing the grill. Note that the minimum flame height should be 1/4”. If the flame is significantly yellow in color, the appropriate amount of LP gas in the air/LP gas mixture is not correct. This could be due to a blocked Burner from grease drippings or from insects building a nest inside the Burner or Burner opening. Should you notice that your Burner is getting hard to light or the flame is not as hot as it once was, refer to the “How to Clean your Burner” sec- tion to remove possible obstructions.
Yellow Tip
1/4” tall flame minimum
Control
Knob
Fig. 5 | Burner |
Primarily Blue Flame
Fig. 6 | Spider webs or nest |
| Burner | |
inside Venturi Tube | Venturi Tube | opening | ||
|