14
Care and Maintenance
Cleaning the Grill
!CAUTION
To reduce risk of injury from laceration hazard, wear protective gloves when handling parts with sharp edges.
Drip Tray:
Remove the Drip Tray under the grill bowl after the grill has cooled completely. Scrape away food and fat residue from the Drip Tray. Empty and wash the Drip Tray with hot soapy water and a cloth.
Grill Body:
Remove excess grease and/or fat with a soft plastic or wooden scraper. Do not use steel wool or other abrasive cleaners that can scratch painted,
Cooking Grid/Warming Rack/Flavor Activator:
Clean the residue off with a baking soda and water solution. For stubborn stains, use a
All Other Cleaning:
For further cleaning, use hot soapy water and a cloth, or
Burner:
Burning off the residue after cooking will keep the Burner clean with normal usage, provided the Burner is operat- ing correctly. Clean the Burner annually, or whenever heavy
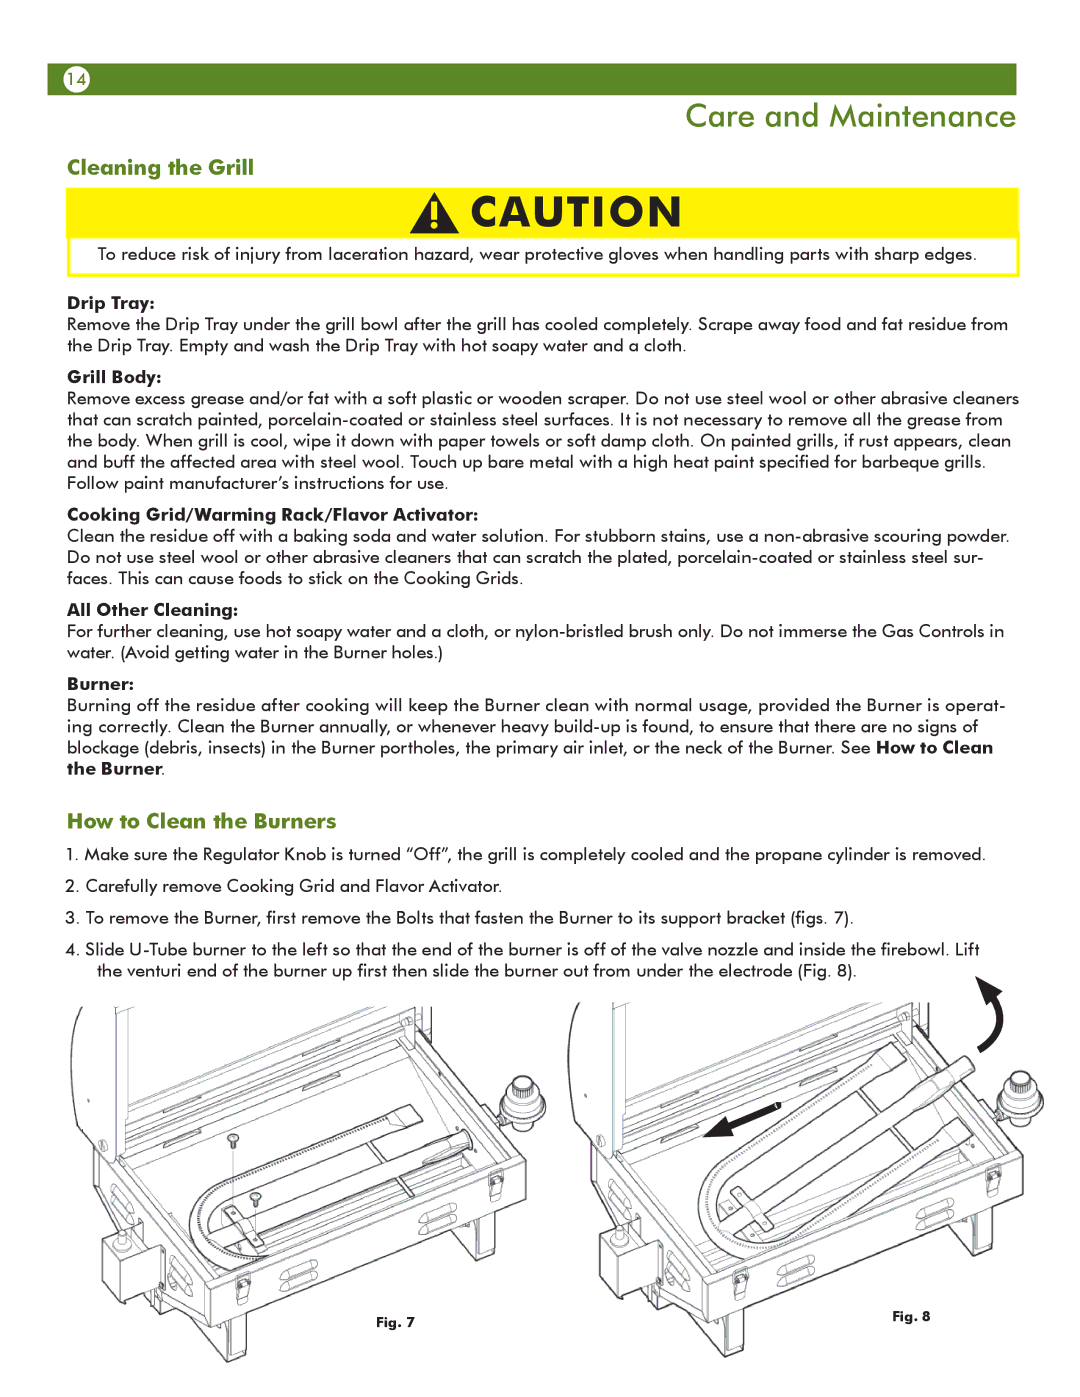
How to Clean the Burners
1.Make sure the Regulator Knob is turned “Off”, the grill is completely cooled and the propane cylinder is removed.
2.Carefully remove Cooking Grid and Flavor Activator.
3.To remove the Burner, first remove the Bolts that fasten the Burner to its support bracket (figs. 7).
4.Slide
Fig. 7 | Fig. 8 |
|