Install the Hard Drive in a Removable Case
1.Remove the removable hard drive drawer from the case.
2.Remove the upper cover of the drawer.
3.Connect the power connector to the hard drive as the right picture shows.
4.Connect the hard disk connector into the inner tray’s slot.
5.Close the upper cover. Slide the drawer into the removable hard drive case.
6.Power on the unit to see the LED indicators on the triple frame holders. If the LED indicators light up, you may use the hard disk.
7
Install a Removable Hard Drive Case in a PC (Optional)
For users who purchase an optional hard drive case, please follow the steps to install the case in a PC.
1.Power off your PC and remove the cover of your PC.
2.Remove a front cover and free a 5 1/4” drive bay. Insert the hard disk holder. Mount the hard disk holder, screw up the holder, and connect the IDE slot and power connector from PC’s motherboard.
3.Remove the drawer of the removable hard disk case. Please refer to
Install the Hard Drive in a Removable Case to install the hard drive.
4.Slide the drawer into the removable hard disk case, power on the PC and check the LED indicators. If the LED indicators light up, it is ok to use the hard drive in the removable case.
Connecting Devices
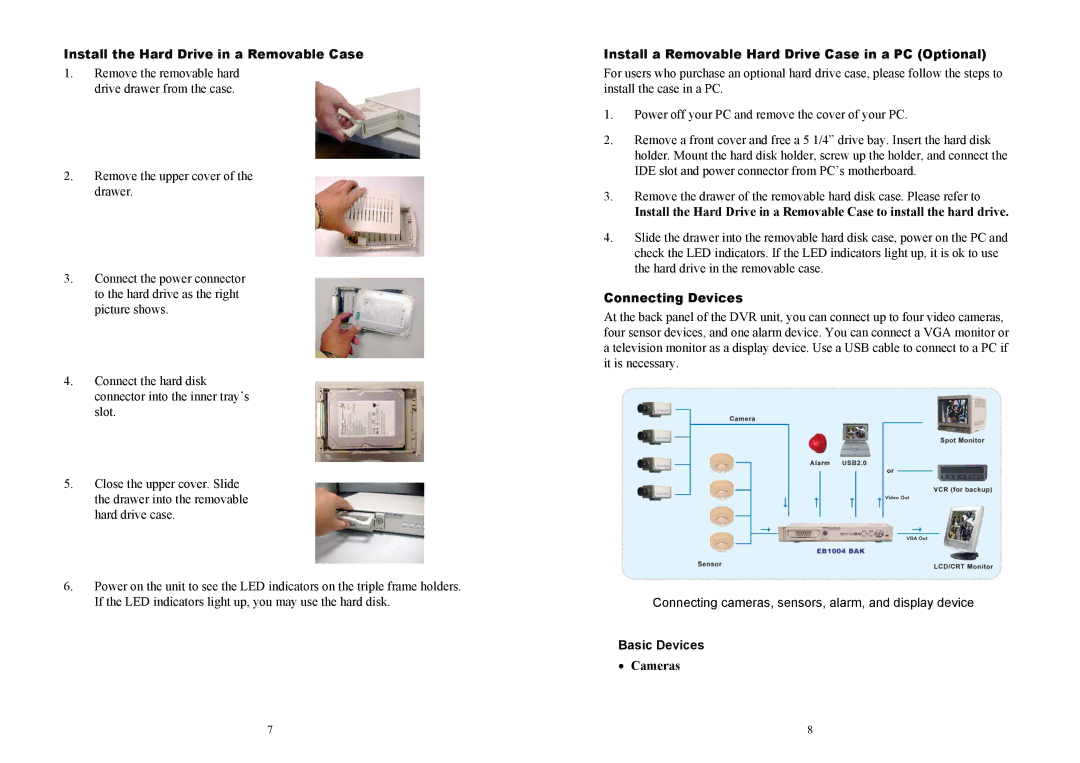
At the back panel of the DVR unit, you can connect up to four video cameras, four sensor devices, and one alarm device. You can connect a VGA monitor or a television monitor as a display device. Use a USB cable to connect to a PC if it is necessary.
Connecting cameras, sensors, alarm, and display device
Basic Devices
•Cameras
8
