Operating EB-DVR Playback Application
Click ![]() to run the application. Select the Hard Disk and click OK.
to run the application. Select the Hard Disk and click OK.
Note: The DVR’s HDD number will be next to your PC’s HDD number. If there is only one hard disk in PC, PC’s hard disk will be HDD1 and DVR’s hard disk will be HDD2 and so on. DVR’s HDD will not be shown under PC’s Operating System.
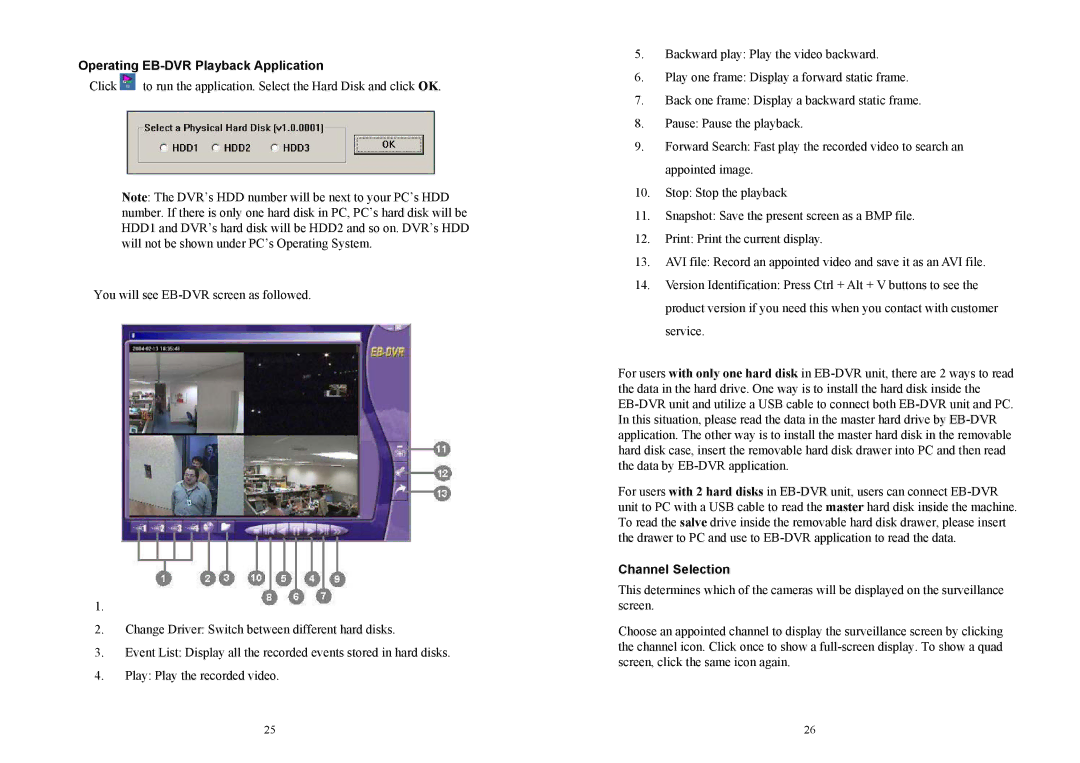
You will see
1.Channel 1- Channel 4: Switch between cameras.
2.Change Driver: Switch between different hard disks.
3.Event List: Display all the recorded events stored in hard disks.
4.Play: Play the recorded video.
25
5.Backward play: Play the video backward.
6.Play one frame: Display a forward static frame.
7.Back one frame: Display a backward static frame.
8.Pause: Pause the playback.
9.Forward Search: Fast play the recorded video to search an appointed image.
10.Stop: Stop the playback
11.Snapshot: Save the present screen as a BMP file.
12.Print: Print the current display.
13.AVI file: Record an appointed video and save it as an AVI file.
14.Version Identification: Press Ctrl + Alt + V buttons to see the product version if you need this when you contact with customer service.
For users with only one hard disk in
For users with 2 hard disks in
Channel Selection
This determines which of the cameras will be displayed on the surveillance screen.
Choose an appointed channel to display the surveillance screen by clicking the channel icon. Click once to show a
26