AXIS 209FD/AXIS | Page 5 |
 Install the hardware
!IMPORTANT! - The casing of the AXIS 209FD is not approved for outdoor use and may only be installed in indoor environments.
The AXIS
Mount the camera
The AXIS 209FD/AXIS
The AXIS 209FD is supplied with a standard
The AXIS
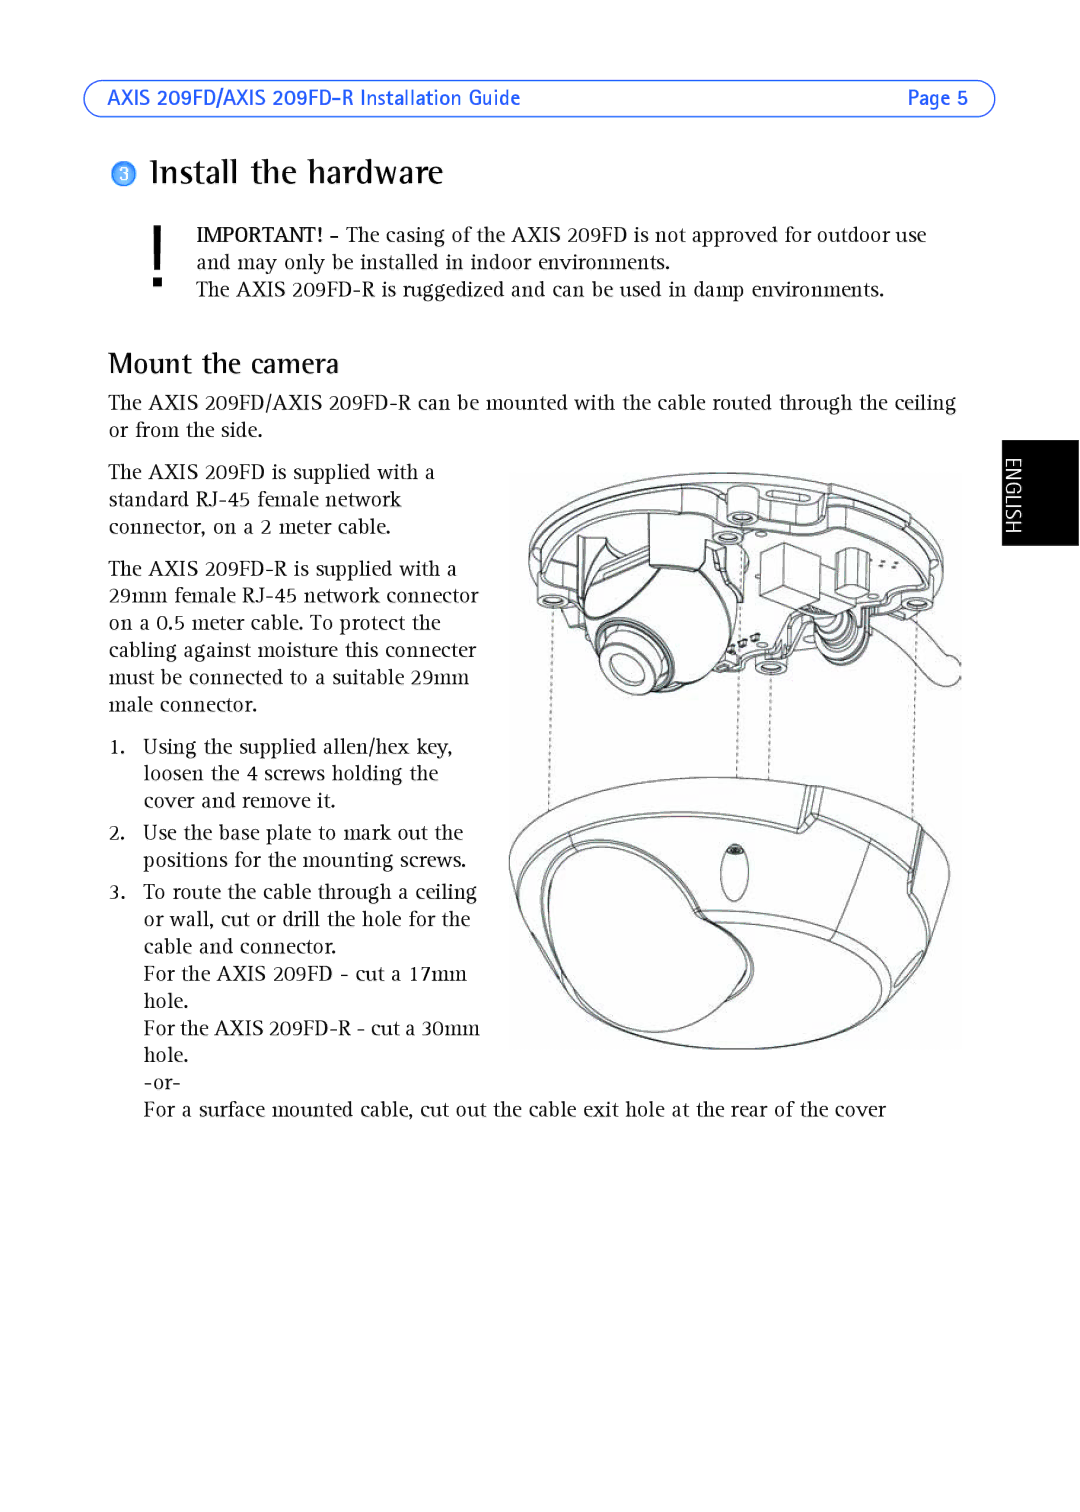
1.Using the supplied allen/hex key, loosen the 4 screws holding the cover and remove it.
2.Use the base plate to mark out the positions for the mounting screws.
3.To route the cable through a ceiling or wall, cut or drill the hole for the cable and connector.
For the AXIS 209FD - cut a 17mm hole.
For the AXIS
For a surface mounted cable, cut out the cable exit hole at the rear of the cover
ENGLISH