Page 6 | AXIS 215 PTZ Installation Guide |
The AXIS 215 PTZ can be mounted in 2 different ways:
•Surface mounted on a hard ceiling, in which case the unit is fastened directly to the ceiling material
•Recessed in a drop ceiling, which involves cutting a hole in the ceiling and using the supplied drop ceiling mount
Surface mounting
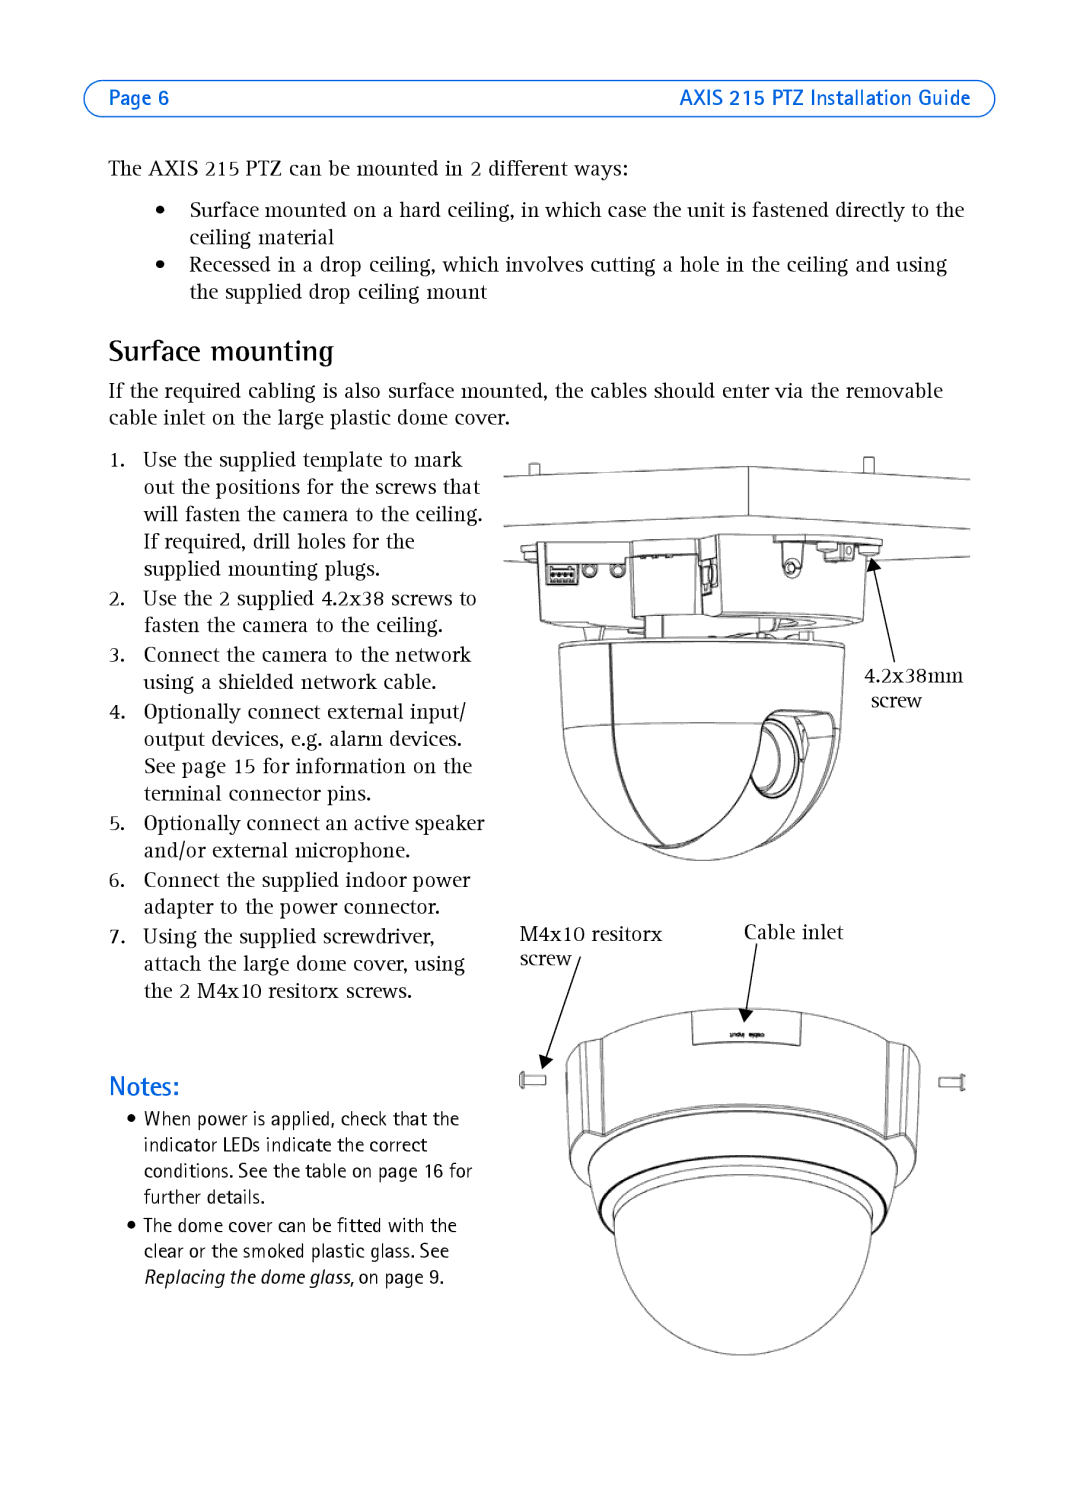
If the required cabling is also surface mounted, the cables should enter via the removable cable inlet on the large plastic dome cover.
1.Use the supplied template to mark out the positions for the screws that will fasten the camera to the ceiling. If required, drill holes for the supplied mounting plugs.
2.Use the 2 supplied 4.2x38 screws to fasten the camera to the ceiling.
3.Connect the camera to the network using a shielded network cable.
4.Optionally connect external input/ output devices, e.g. alarm devices. See page 15 for information on the terminal connector pins.
5.Optionally connect an active speaker and/or external microphone.
6.Connect the supplied indoor power adapter to the power connector.
7.Using the supplied screwdriver, attach the large dome cover, using the 2 M4x10 resitorx screws.
4.2x38mm screw
M4x10 resitorx | Cable inlet |
screw |
|
Notes:
•When power is applied, check that the indicator LEDs indicate the correct conditions. See the table on page 16 for further details.
•The dome cover can be fitted with the clear or the smoked plastic glass. See Replacing the dome glass, on page 9.