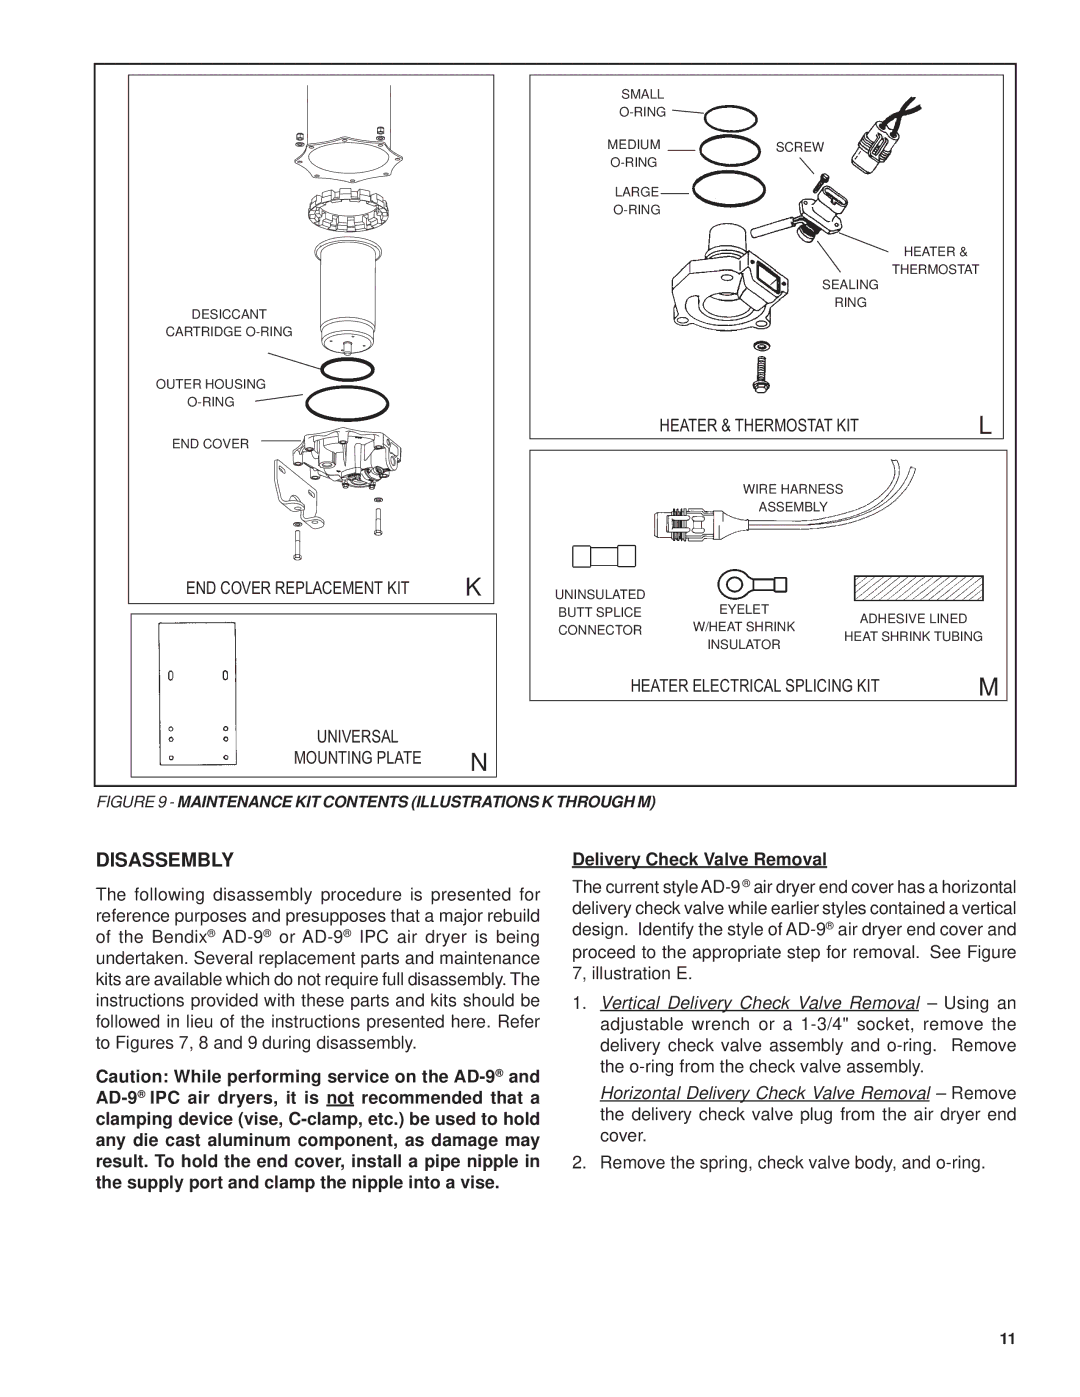
DESICCANT
CARTRIDGE O-RING
OUTER HOUSING
O-RING
END COVER
END COVER REPLACEMENT KIT | K |
UNIVERSAL | |
MOUNTING PLATE | N |
SMALL
O-RING 
LARGE
O-RING
HEATER &
THERMOSTAT
SEALING
RING
| | HEATER & THERMOSTAT KIT | L |
| | | | | |
| | WIRE HARNESS | | | |
| | ASSEMBLY | | | |
| UNINSULATED | EYELET | | | |
| BUTT SPLICE | ADHESIVE LINED | | |
| CONNECTOR | W/HEAT SHRINK | | |
| HEAT SHRINK TUBING |
| | INSULATOR |
| | | | |
| HEATER ELECTRICAL SPLICING KIT | M |
FIGURE 9 - MAINTENANCE KIT CONTENTS (ILLUSTRATIONS K THROUGH M)
DISASSEMBLY
The following disassembly procedure is presented for reference purposes and presupposes that a major rebuild of the Bendix® AD-9®or AD-9®IPC air dryer is being undertaken. Several replacement parts and maintenance kits are available which do not require full disassembly. The instructions provided with these parts and kits should be followed in lieu of the instructions presented here. Refer to Figures 7, 8 and 9 during disassembly.
Caution: While performing service on the AD-9®and AD-9®IPC air dryers, it is not recommended that a clamping device (vise, C-clamp, etc.) be used to hold any die cast aluminum component, as damage may result. To hold the end cover, install a pipe nipple in the supply port and clamp the nipple into a vise.
Delivery Check Valve Removal
The current style AD-9®air dryer end cover has a horizontal delivery check valve while earlier styles contained a vertical design. Identify the style of AD-9®air dryer end cover and proceed to the appropriate step for removal. See Figure 7, illustration E.
1.Vertical Delivery Check Valve Removal – Using an adjustable wrench or a 1-3/4" socket, remove the delivery check valve assembly and o-ring. Remove the o-ring from the check valve assembly.
Horizontal Delivery Check Valve Removal – Remove the delivery check valve plug from the air dryer end cover.
2.Remove the spring, check valve body, and o-ring.