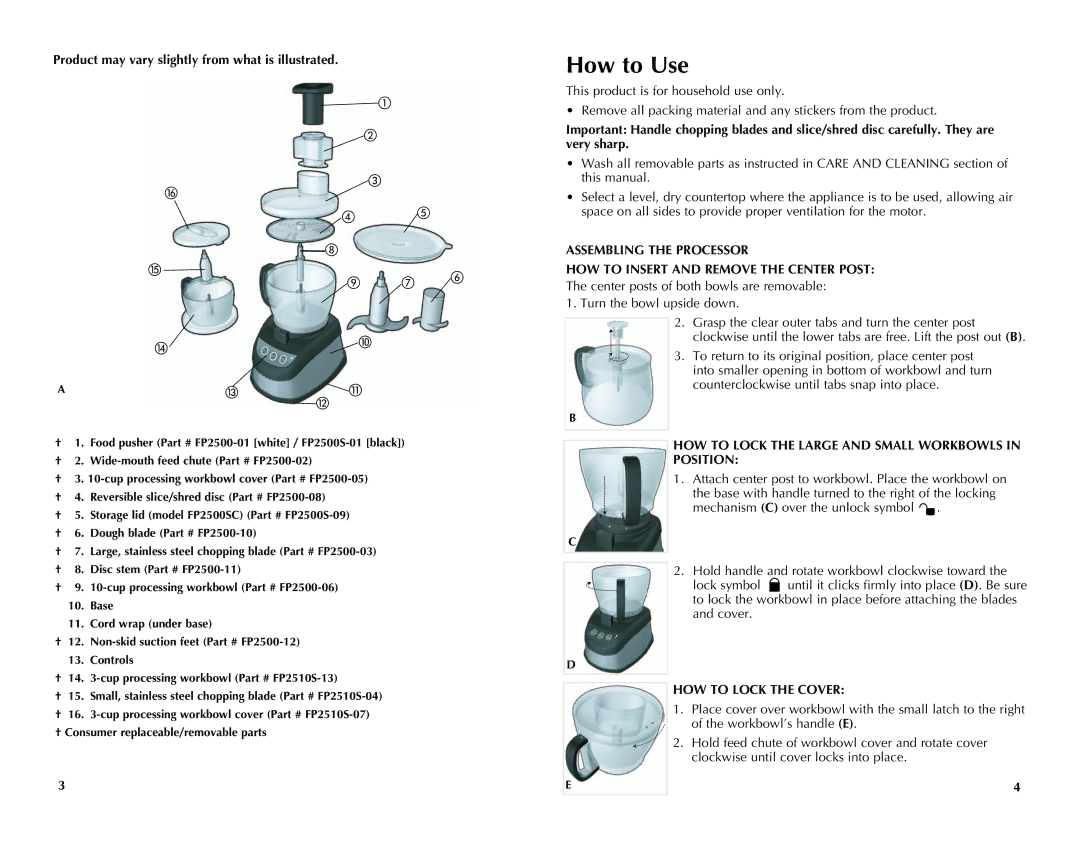
Product may vary slightly from what is illustrated.
How to Use
This product is for household use only.
• Remove all packing material and any stickers from the product.
Important: Handle chopping blades and slice/shred disc carefully. They are very sharp.
•Wash all removable parts as instructed in CARE AND CLEANING section of this manual.
•Select a level, dry countertop where the appliance is to be used, allowing air space on all sides to provide proper ventilation for the motor.
ASSEMBLING THE PROCESSOR
![]()
HOW TO INSERT AND REMOVE THE CENTER POST:
The center posts of both bowls are removable: 1. Turn the bowl upside down.
![]()
![]()
![]()
A | | |
2. Grasp the clear outer tabs and turn the center post clockwise until the lower tabs are free. Lift the post out (B).
3. To return to its original position, place center post into smaller opening in bottom of workbowl and turn counterclockwise until tabs snap into place.
B
†1. Food pusher (Part #
†2.
†3.
†4. Reversible slice/shred disc (Part #
†5. Storage lid (model FP2500SC) (Part #
†6. Dough blade (Part #
†7. Large, stainless steel chopping blade (Part #
†8. Disc stem (Part #
†9.
10.Base
11.Cord wrap (under base)
†12.
13.Controls
†14.
†15. Small, stainless steel chopping blade (Part #
†16.
†Consumer replaceable/removable parts
3
C |
D |
E
HOW TO LOCK THE LARGE AND SMALL WORKBOWLS IN POSITION:
1.Attach center post to workbowl. Place the workbowl on the base with handle turned to the right of the locking mechanism (C) over the unlock symbol ![]() .
.
2.Hold handle and rotate workbowl clockwise toward the lock symbol ![]() until it clicks firmly into place (D). Be sure to lock the workbowl in place before attaching the blades and cover.
until it clicks firmly into place (D). Be sure to lock the workbowl in place before attaching the blades and cover.
HOW TO LOCK THE COVER:
1.Place cover over workbowl with the small latch to the right of the workbowl’s handle (E).
2.Hold feed chute of workbowl cover and rotate cover clockwise until cover locks into place.
4