OPERATING INSTRUCTIONS
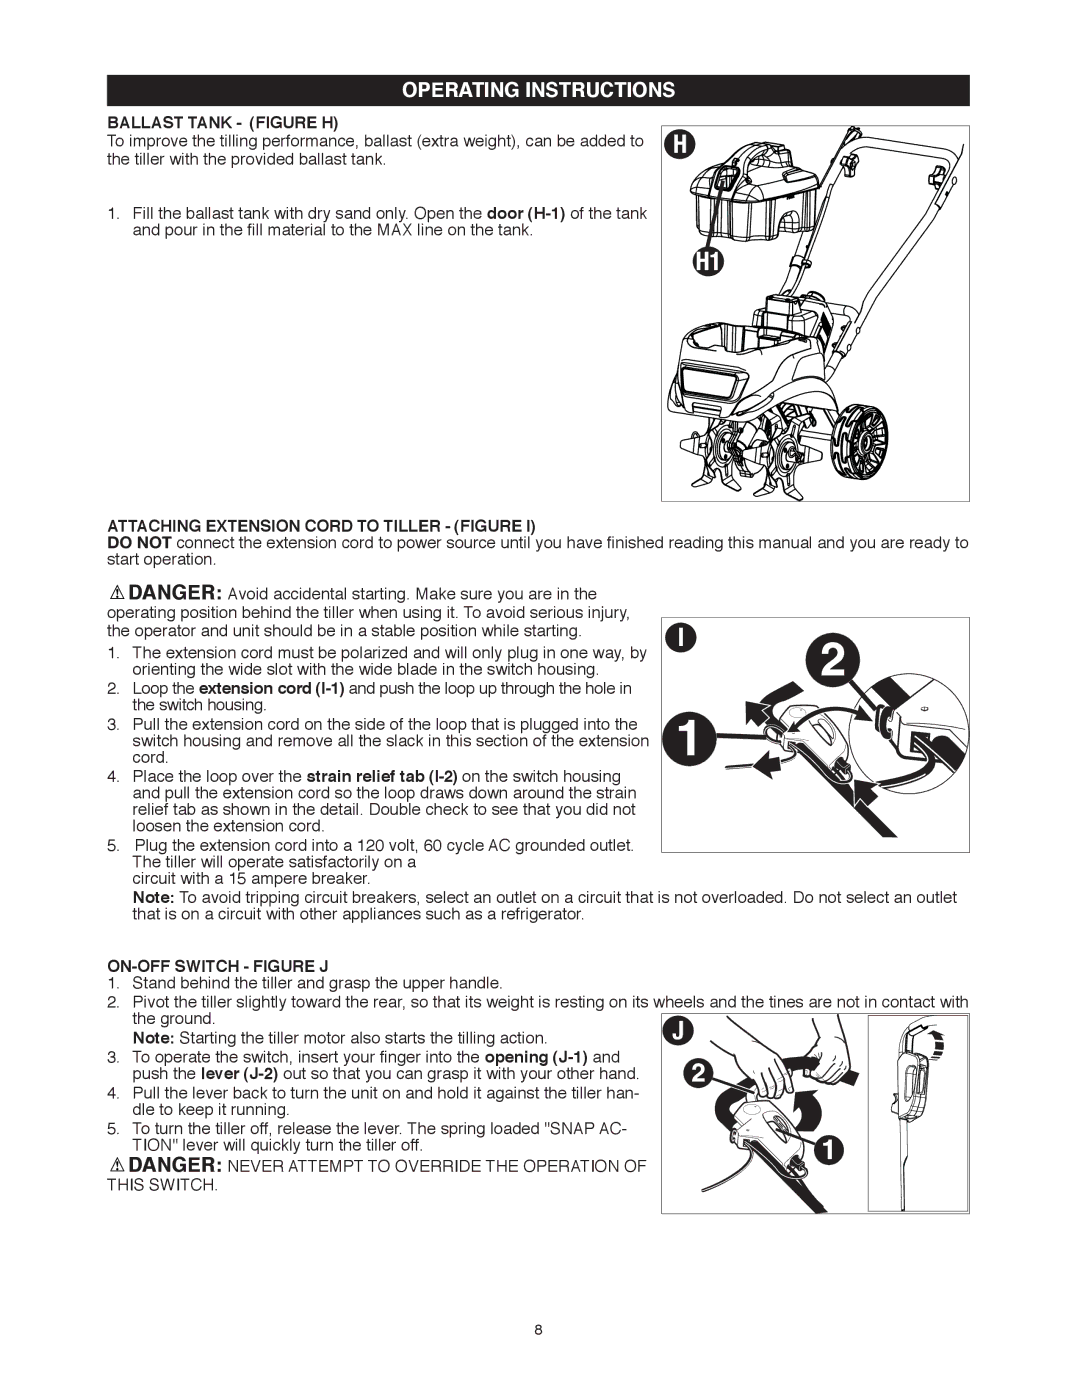
BALLAST TANK - (FIGURE H)
To improve the tilling performance, ballast (extra weight), can be added to the tiller with the provided ballast tank.
1.Fill the ballast tank with dry sand only. Open the door
H |
H1 |
ATTACHING EXTENSION CORD TO TILLER - (FIGURE I)
DO NOT connect the extension cord to power source until you have finished reading this manual and you are ready to start operation.
![]() DANGER: Avoid accidental starting. Make sure you are in the operating position behind the tiller when using it. To avoid serious injury, the operator and unit should be in a stable position while starting.
DANGER: Avoid accidental starting. Make sure you are in the operating position behind the tiller when using it. To avoid serious injury, the operator and unit should be in a stable position while starting.
1.The extension cord must be polarized and will only plug in one way, by orienting the wide slot with the wide blade in the switch housing.
2.Loop the extension cord
3.Pull the extension cord on the side of the loop that is plugged into the switch housing and remove all the slack in this section of the extension cord.
4.Place the loop over the strain relief tab
5.Plug the extension cord into a 120 volt, 60 cycle AC grounded outlet. The tiller will operate satisfactorily on a
circuit with a 15 ampere breaker.
I |
Note: To avoid tripping circuit breakers, select an outlet on a circuit that is not overloaded. Do not select an outlet that is on a circuit with other appliances such as a refrigerator.
ON-OFF SWITCH - FIGURE J
1.Stand behind the tiller and grasp the upper handle.
2.Pivot the tiller slightly toward the rear, so that its weight is resting on its wheels and the tines are not in contact with
the ground. | J |
Note: Starting the tiller motor also starts the tilling action. |
3. To operate the switch, insert your finger into the opening
4. Pull the lever back to turn the unit on and hold it against the tiller han- dle to keep it running.
5. To turn the tiller off, release the lever. The spring loaded "SNAP AC- TION" lever will quickly turn the tiller off.
![]() DANGER: NEVER ATTEMPT TO OVERRIDE THE OPERATION OF THIS SWITCH.
DANGER: NEVER ATTEMPT TO OVERRIDE THE OPERATION OF THIS SWITCH.
8