Contact
Do not return to place of purchase.
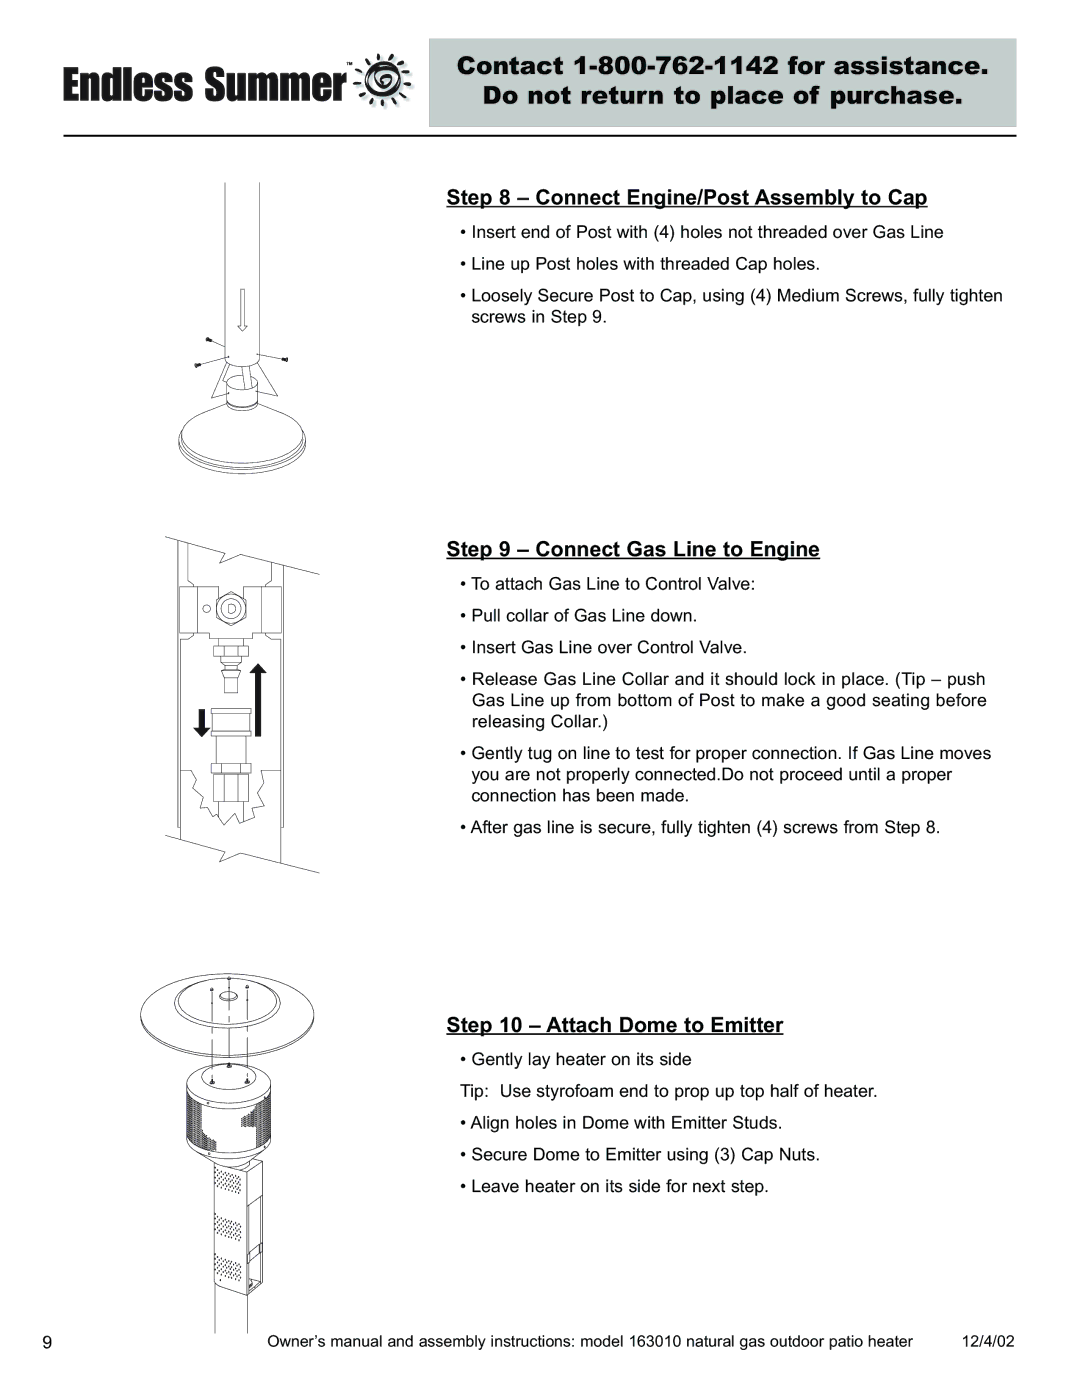
Step 8 – Connect Engine/Post Assembly to Cap
•Insert end of Post with (4) holes not threaded over Gas Line
•Line up Post holes with threaded Cap holes.
•Loosely Secure Post to Cap, using (4) Medium Screws, fully tighten screws in Step 9.
Step 9 – Connect Gas Line to Engine
•To attach Gas Line to Control Valve:
•Pull collar of Gas Line down.
•Insert Gas Line over Control Valve.
•Release Gas Line Collar and it should lock in place. (Tip – push Gas Line up from bottom of Post to make a good seating before
releasing Collar.)
•Gently tug on line to test for proper connection. If Gas Line moves you are not properly connected.Do not proceed until a proper connection has been made.
•After gas line is secure, fully tighten (4) screws from Step 8.
Step 10 – Attach Dome to Emitter
• Gently lay heater on its side
Tip: Use styrofoam end to prop up top half of heater.
• Align holes in Dome with Emitter Studs.
• Secure Dome to Emitter using (3) Cap Nuts.
• Leave heater on its side for next step.
9 | Owner’s manual and assembly instructions: model 163010 natural gas outdoor patio heater | 12/4/02 |
