Contact
Do not return to place of purchase.
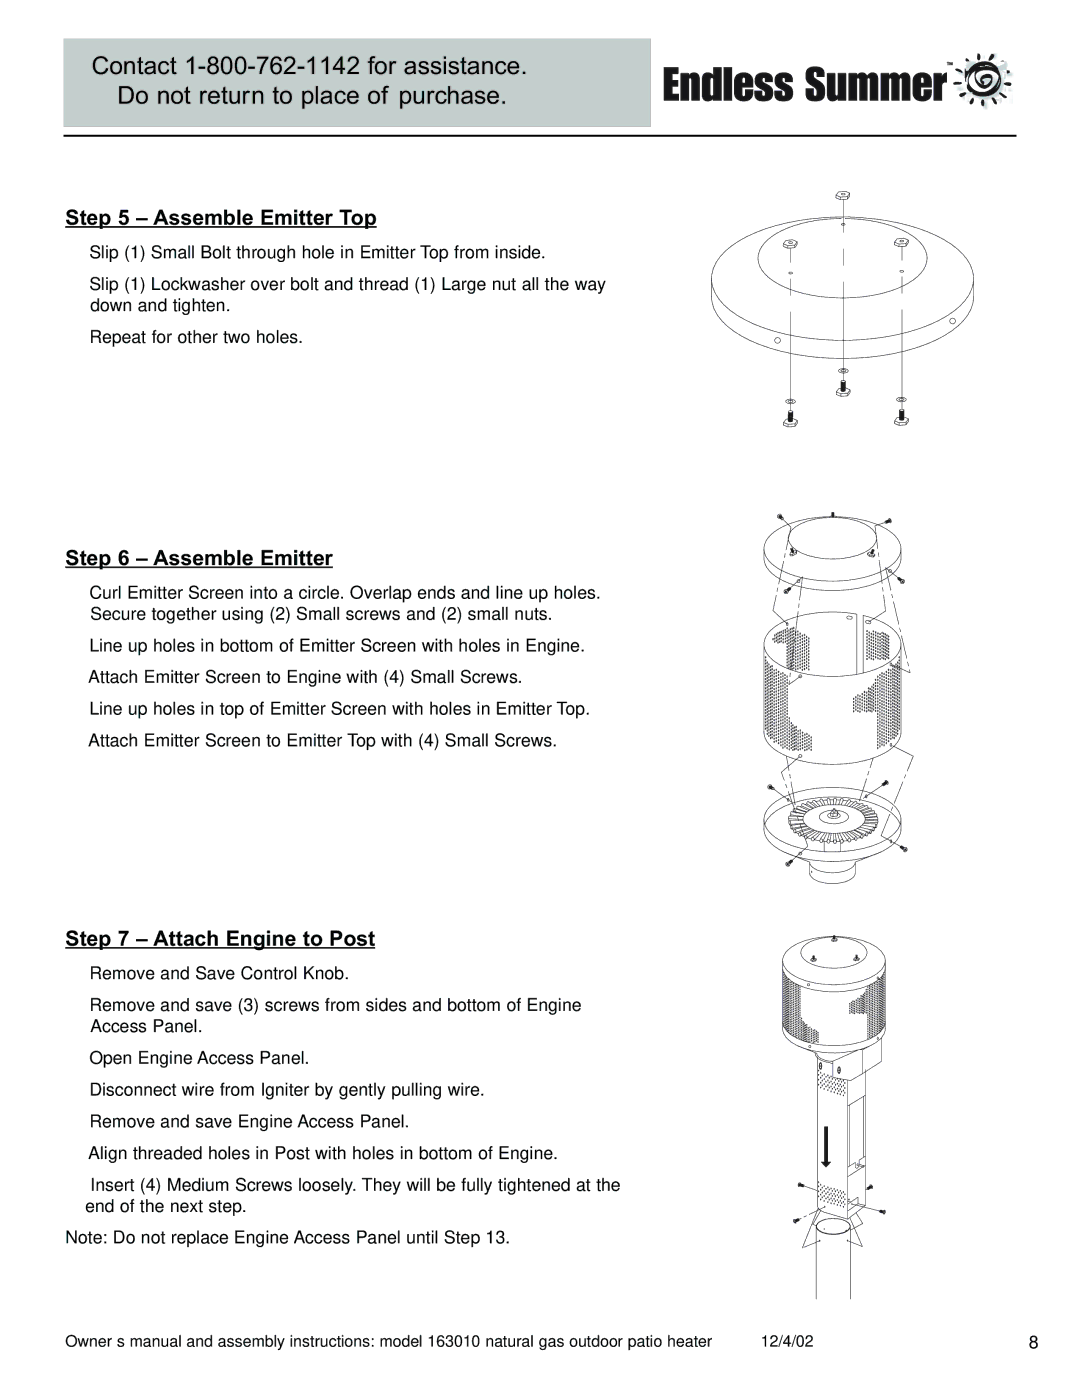
Step 5 – Assemble Emitter Top
•Slip (1) Small Bolt through hole in Emitter Top from inside.
•Slip (1) Lockwasher over bolt and thread (1) Large nut all the way down and tighten.
•Repeat for other two holes.
Step 6 – Assemble Emitter
•Curl Emitter Screen into a circle. Overlap ends and line up holes. Secure together using (2) Small screws and (2) small nuts.
• Line up holes in bottom of Emitter Screen with holes in Engine.
• Attach Emitter Screen to Engine with (4) Small Screws.
• Line up holes in top of Emitter Screen with holes in Emitter Top.
• Attach Emitter Screen to Emitter Top with (4) Small Screws.
Step 7 – Attach Engine to Post
• Remove and Save Control Knob.
• Remove and save (3) screws from sides and bottom of Engine Access Panel.
•Open Engine Access Panel.
•Disconnect wire from Igniter by gently pulling wire.
•Remove and save Engine Access Panel.
• Align threaded holes in Post with holes in bottom of Engine.
• Insert (4) Medium Screws loosely. They will be fully tightened at the end of the next step.
Note: Do not replace Engine Access Panel until Step 13.
Owner’s manual and assembly instructions: model 163010 natural gas outdoor patio heater | 12/4/02 | 8 |
