Contact
Do not return to place of purchase.
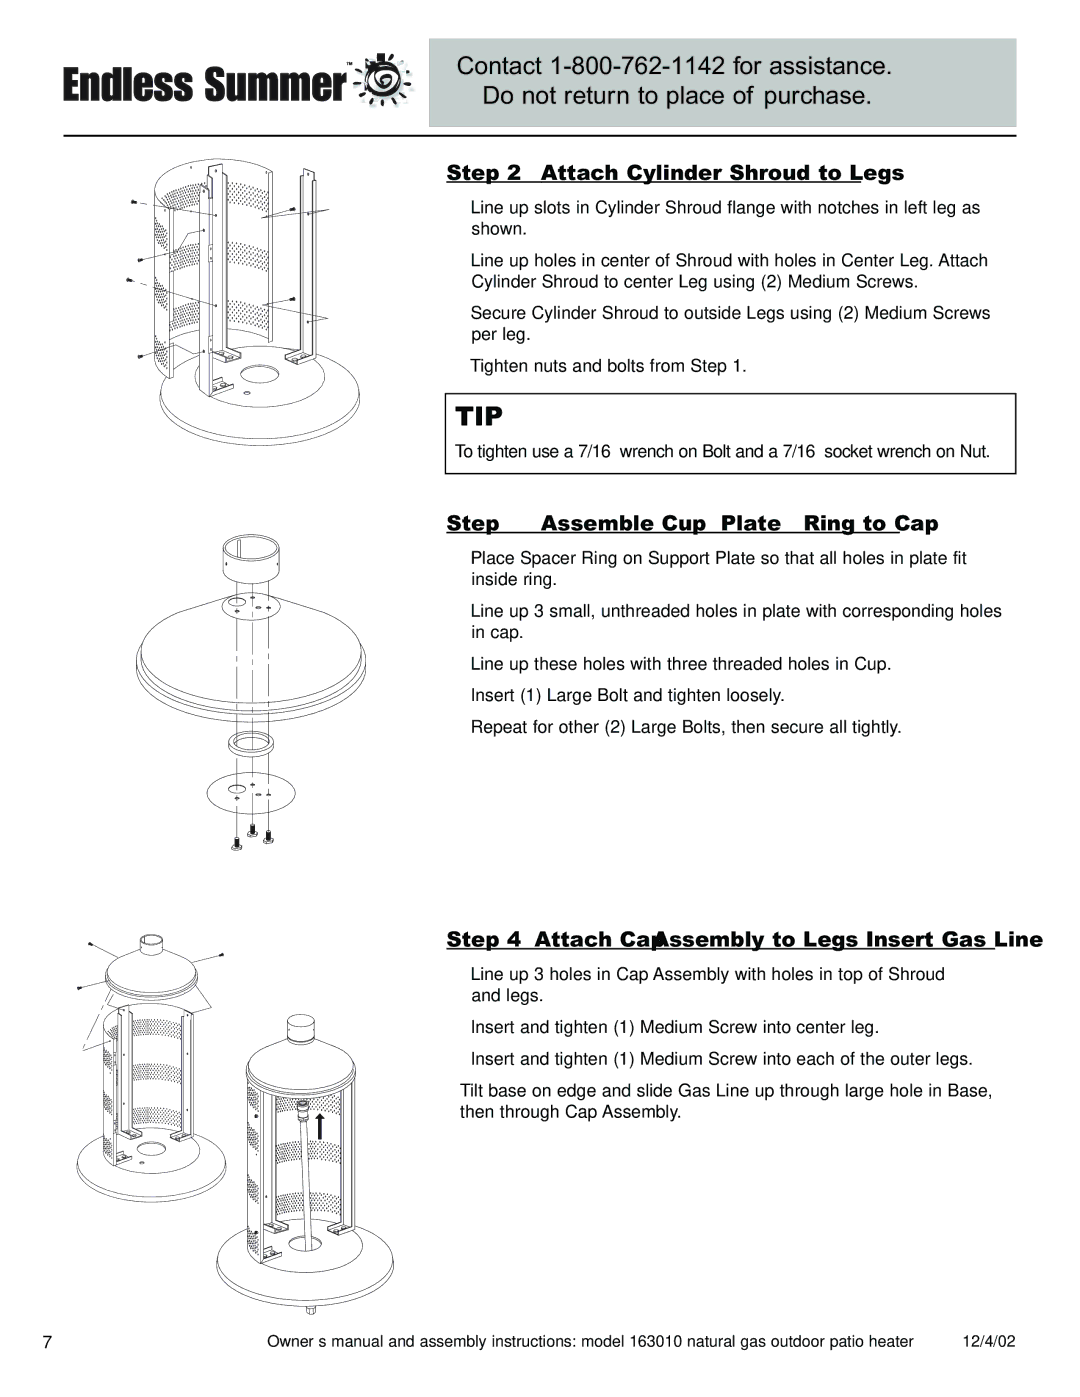
Step 2 – Attach Cylinder Shroud to Legs
• Line up slots in Cylinder Shroud flange with notches in left leg as shown.
• Line up holes in center of Shroud with holes in Center Leg. Attach Cylinder Shroud to center Leg using (2) Medium Screws.
• Secure Cylinder Shroud to outside Legs using (2) Medium Screws per leg.
• Tighten nuts and bolts from Step 1.
TIP:
To tighten use a 7/16” wrench on Bolt and a 7/16” socket wrench on Nut.
Step 3 – Assemble Cup, Plate & Ring to Cap
•Place Spacer Ring on Support Plate so that all holes in plate fit inside ring.
• Line up 3 small, unthreaded holes in plate with corresponding holes in cap.
•Line up these holes with three threaded holes in Cup.
•Insert (1) Large Bolt and tighten loosely.
•Repeat for other (2) Large Bolts, then secure all tightly.
Step 4 – Attach Cap Assembly to Legs/Insert Gas Line
• Line up 3 holes in Cap Assembly with holes in top of Shroud and legs.
• Insert and tighten (1) Medium Screw into center leg.
• Insert and tighten (1) Medium Screw into each of the outer legs.
Tilt base on edge and slide Gas Line up through large hole in Base, then through Cap Assembly.
7 | Owner’s manual and assembly instructions: model 163010 natural gas outdoor patio heater | 12/4/02 |