in a well ventilated area, and work with ap- proved safety equipment, such as those dust masks that are specially designed to filter out microscopic particles.
Double Insulated Tools
•Double Insulation ![]() is a design concept used in electric power tools which eliminates the need for the three wire grounded power cord and grounded power supply system. It is a recognized and approved system by Underwriter’s Laboratories, CSA and Federal OSHA authorities.
is a design concept used in electric power tools which eliminates the need for the three wire grounded power cord and grounded power supply system. It is a recognized and approved system by Underwriter’s Laboratories, CSA and Federal OSHA authorities.
IMPORTANT: Servicing of a tool with double insulation requires care and knowledge of the system and should be performed only by a qualified service technician. WHEN SERVICE IS REQUIRED USE ONLY IDENTICAL RE- PLACEMENT PARTS.
POLARIZED PLUGS: If your tool is equipped with a polarized plug (one blade is wider than the other), this plug will fit in a polarized outlet only one way. If the plug does not fit fully in the outlet, reverse the plug. If it still does not fit, contact a qualified electrician to install the proper outlet. To reduce the risk of electric shock do not change the plug in any way.
Extension Cords
•Replace damaged cords immediately. Use of damaged cords can shock, burn or electrocute.
•If an extension cord is necessary, a cord with adequate size conductors should be used to prevent excessive voltage drop, loss of power or overheating. The table below shows the correct size to use, depending on cord length and amperage rating on the tool’s nameplate. If in doubt, use the next heavier gauge. Always use U.L. and CSA listed extension cords.
Ampere Rating (shown on nameplate)
|
| 0- | 2.1- | 3.5- | 5.1- | 7.1- | 12.1- | |
|
| 2.0 | 3.4 | 5.0 | 7.0 |
| 12.0 | 16.0 |
Length |
|
|
|
|
|
|
|
|
25' | 18 | 18 | 18 | 18 |
| 16 | 14 | |
|
| |||||||
| 50' | 18 | 18 | 16 | 16 |
| 14 | 12 |
Cord | 75' | 18 | 18 | 16 | 14 |
| 12 | 10 |
100' | 18 | 16 | 14 | 12 |
| 10 |
| |
|
|
| ||||||
| 150' | 16 | 14 | 12 | 12 | Wire Gauge | ||
|
|
|
|
|
|
|
|
|
Note: The smaller the gauge number, the larger the wire is in the cord.
"SAVE THESE INSTRUCTIONS"
Operating the Tool
Slide "ON/OFF" Switch
This tool is switched "ON" by the slide switch located on the front of the motor housing. TO TURN THE TOOL "ON" slide the switch button to the right or "I" position.
TO TURN THE TOOL "OFF" slide the switch button to the left or "0" position. WARNING! Hold the tool with both hands while starting the tool, since torque from the motor can cause the tool to twist.
All Models Except Model 1609A
Inserting and Removing Bits
WARNING! Always disconnect tool from the power source before installing bits, accesso- ries, or making any adjustments.
If the base is installed, you may remove it to completely expose the collet assembly. The motor may be placed on its side or flat top surface when changing bits.
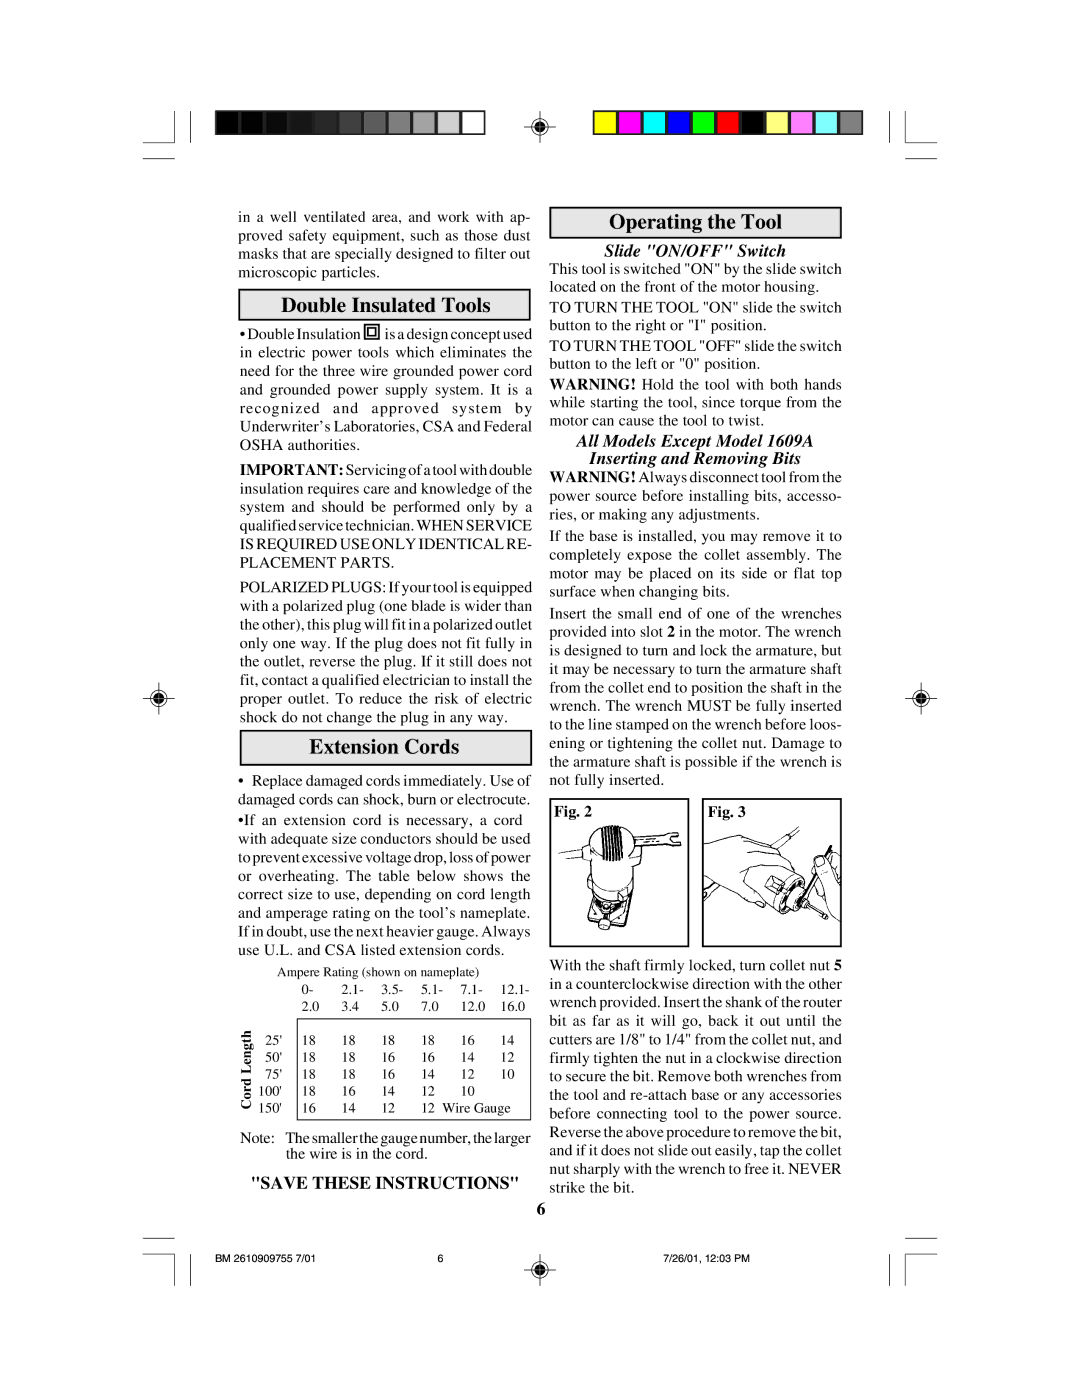
Insert the small end of one of the wrenches provided into slot 2 in the motor. The wrench is designed to turn and lock the armature, but it may be necessary to turn the armature shaft from the collet end to position the shaft in the wrench. The wrench MUST be fully inserted to the line stamped on the wrench before loos- ening or tightening the collet nut. Damage to the armature shaft is possible if the wrench is not fully inserted.
Fig. 2 |
| Fig. 3 |
|
|
|
With the shaft firmly locked, turn collet nut 5 in a counterclockwise direction with the other wrench provided. Insert the shank of the router bit as far as it will go, back it out until the cutters are 1/8" to 1/4" from the collet nut, and firmly tighten the nut in a clockwise direction to secure the bit. Remove both wrenches from the tool and
6
BM 2610909755 7/01 | 6 | 7/26/01, 12:03 PM |
