Saw Operations
Crown Molding Angled to Table
and Fence
FIG. 31
•The advantage to cutting in this position is that no bevel setting is required. Cutting is done with 45° miter angle.
•Crown molding of up to
Follow these instructions for cutting crown molding angled to table and fence.
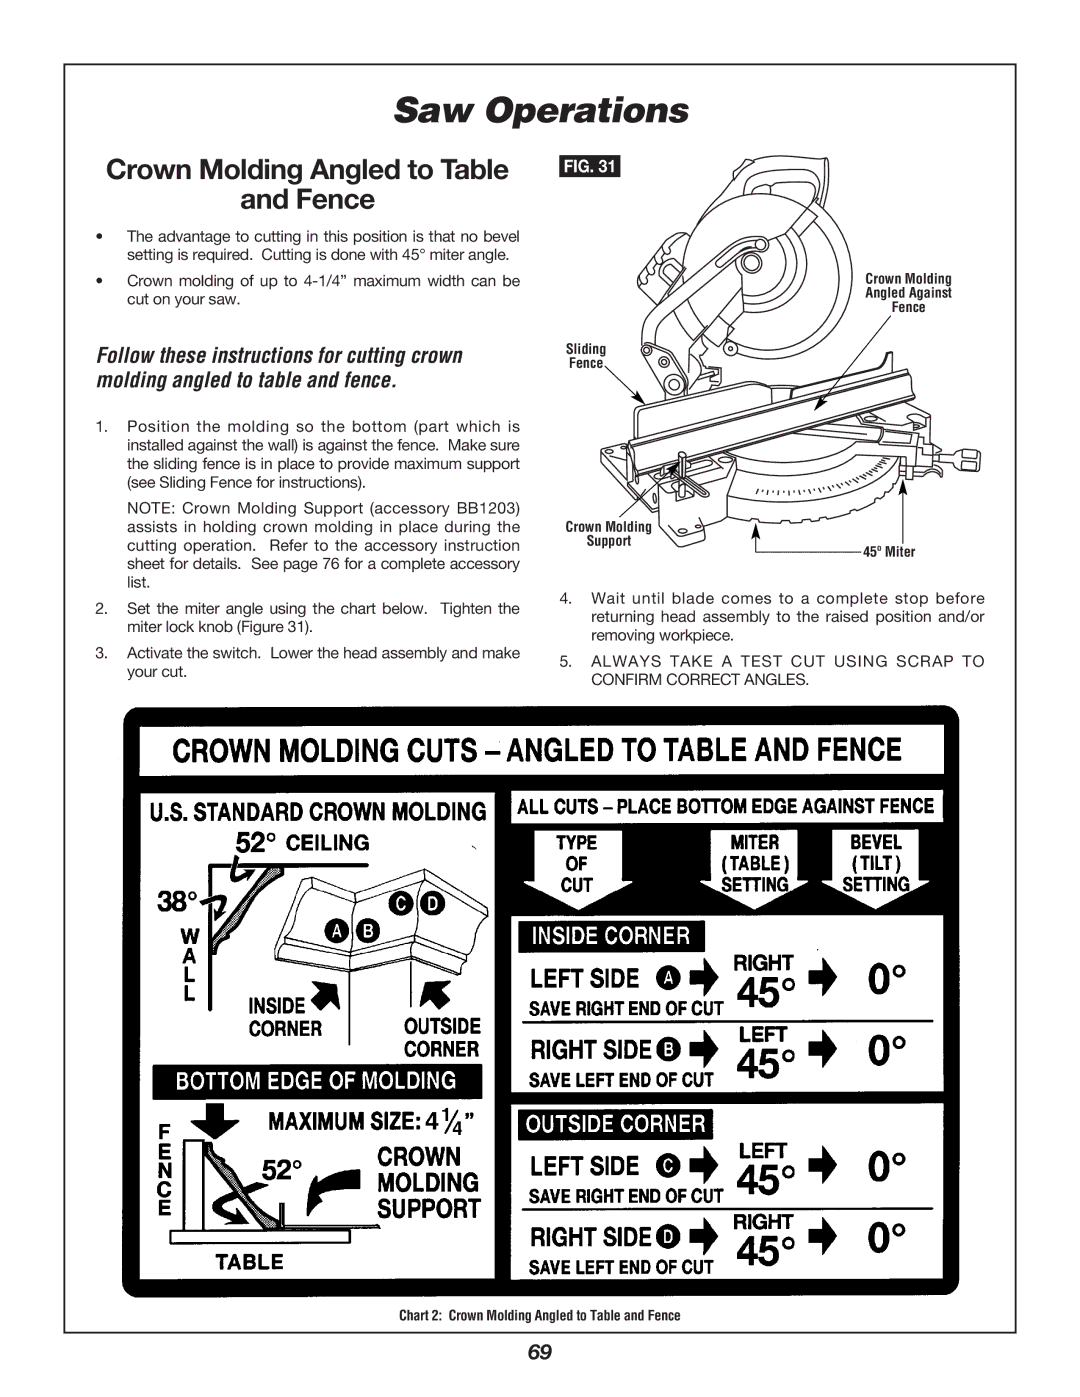
1. Position the molding so the bottom (part which is |
installed against the wall) is against the fence. Make sure |
the sliding fence is in place to provide maximum support |
(see Sliding Fence for instructions). |
NOTE: Crown Molding Support (accessory BB1203) |
assists in holding crown molding in place during the |
cutting operation. Refer to the accessory instruction |
sheet for details. See page 76 for a complete accessory |
list. |
Sliding
Fence
Crown Molding
Support
Crown Molding
Angled Against
Fence
45º Miter
2. | Set the miter angle using the chart below. Tighten the |
| miter lock knob (Figure 31). |
3. | Activate the switch. Lower the head assembly and make |
| your cut. |
4.Wait until blade comes to a complete stop before returning head assembly to the raised position and/or removing workpiece.
5.ALWAYS TAKE A TEST CUT USING SCRAP TO CONFIRM CORRECT ANGLES.
Chart 2: Crown Molding Angled to Table and Fence
69