Carbide Blades
Carbide planer blades (HM/TC) have two blade edges and are reversible.
When both cutting edges are dull the planer blades must be replaced. HM/TC planer blades may not be resharpened.
Disassembling the planer blades
To reverse or replace the planer blades, bring the blade head 23 into the respective position. Lightly unscrew the three clamping screws 24 in clock- wise direction using the
After pressing down the lateral
Push the planer blade 27 out of the clamping el- ement 26 with a piece of wood. (see figure D )
Turn the blade head 23 another half turn and re- peat the procedure to disassemble the second clamping element.
Assembling the planer blades
The height adjustment of the HM/TC blades is factory set.
Clean the blade seat (clamping element) and the planer blade respectively, if required.
When assembling the planer blade, ensure that it is seated properly in the blade holder of the clamping element 26 and aligned flush at the side edge of the rear planer shoe 13. (see figure E )
Afterwards tighten the clamping screws 24 evenly and alternating.
Turn the blade head 23 another half turn and re- peat the procedure to disassemble the second clamping element.
HSS Blades
Blade replacement is identical with the method described under a), with the difference that an additional height adjustment of the blade is re- quired (see appendix, picture page G).
Rustic Blade
Blade replacement is identical with the method described under a), with the difference that an additional height adjustment of the blade is re- quired (see appendix, picture page H).
Note: The lowest spot of the rustic blade must not exceed the planer shoe (see appendix, pic- ture page H, Fig. 6).
■Before restarting check if the clamping screws 24 are tightened well.
■Rotate the blade head 23 by hand and en- sure that the planer blades do not graze.
Replacing the Drive Belt (see figure F )
■Before any work on the machine itself, pull the mains plug.
Loosen screw 12 and take off the belt cover 11. Remove worn drive belt 29.
Before assembling a new drive belt, clean both belt pulleys 28 and 30.
Place the new drive belt on the small belt pul- ley 30 first and then work it on the large belt pul- ley 28 by hand while rotating.
Reattach the belt cover 11 and tighten with the screw 12.
Maintenance and Cleaning
■Before any work on the machine itself, pull the mains plug.
■For safe and proper working, always keep the machine and the ventilation slots clean.
If the machine should fail despite the care taken in manufacturing and testing procedures, repair should be carried out by an
In all correspondence and spare parts orders, please always include the
WARNING! Important instructions for con- necting a new
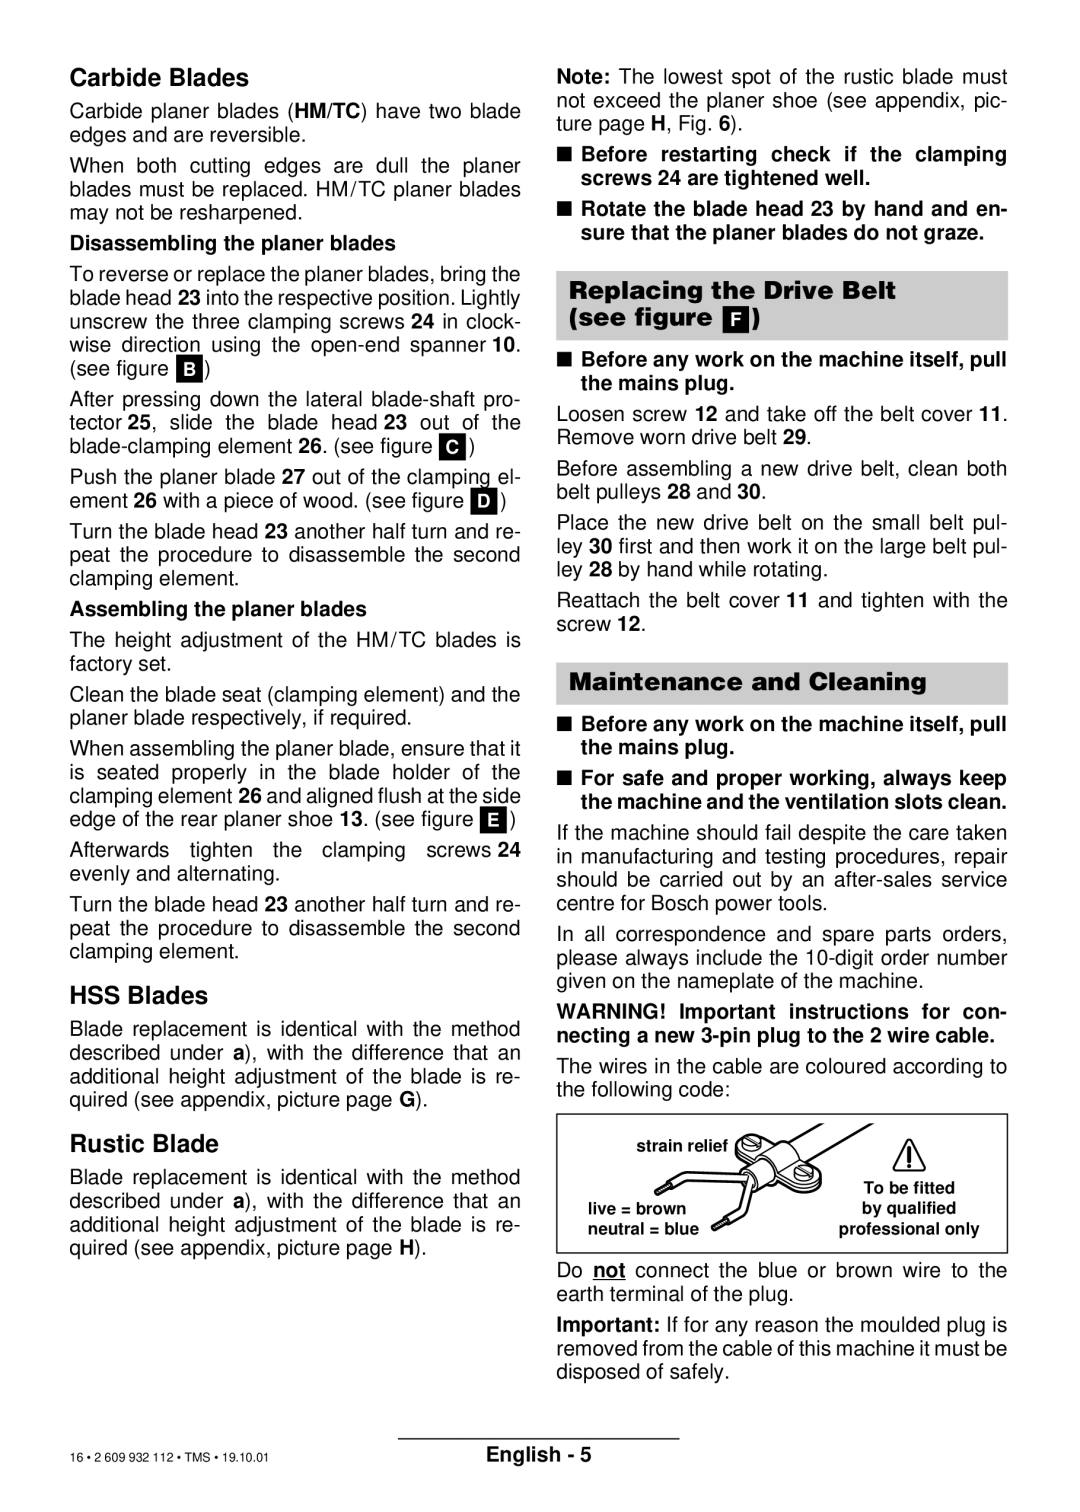
The wires in the cable are coloured according to the following code:
strain relief |
|
| To be fitted |
live = brown | by qualified |
neutral = blue | professional only |
Do not connect the blue or brown wire to the earth terminal of the plug.
Important: If for any reason the moulded plug is removed from the cable of this machine it must be disposed of safely.
16 • 2 609 932 112 • TMS • 19.10.01 | English - 5 |