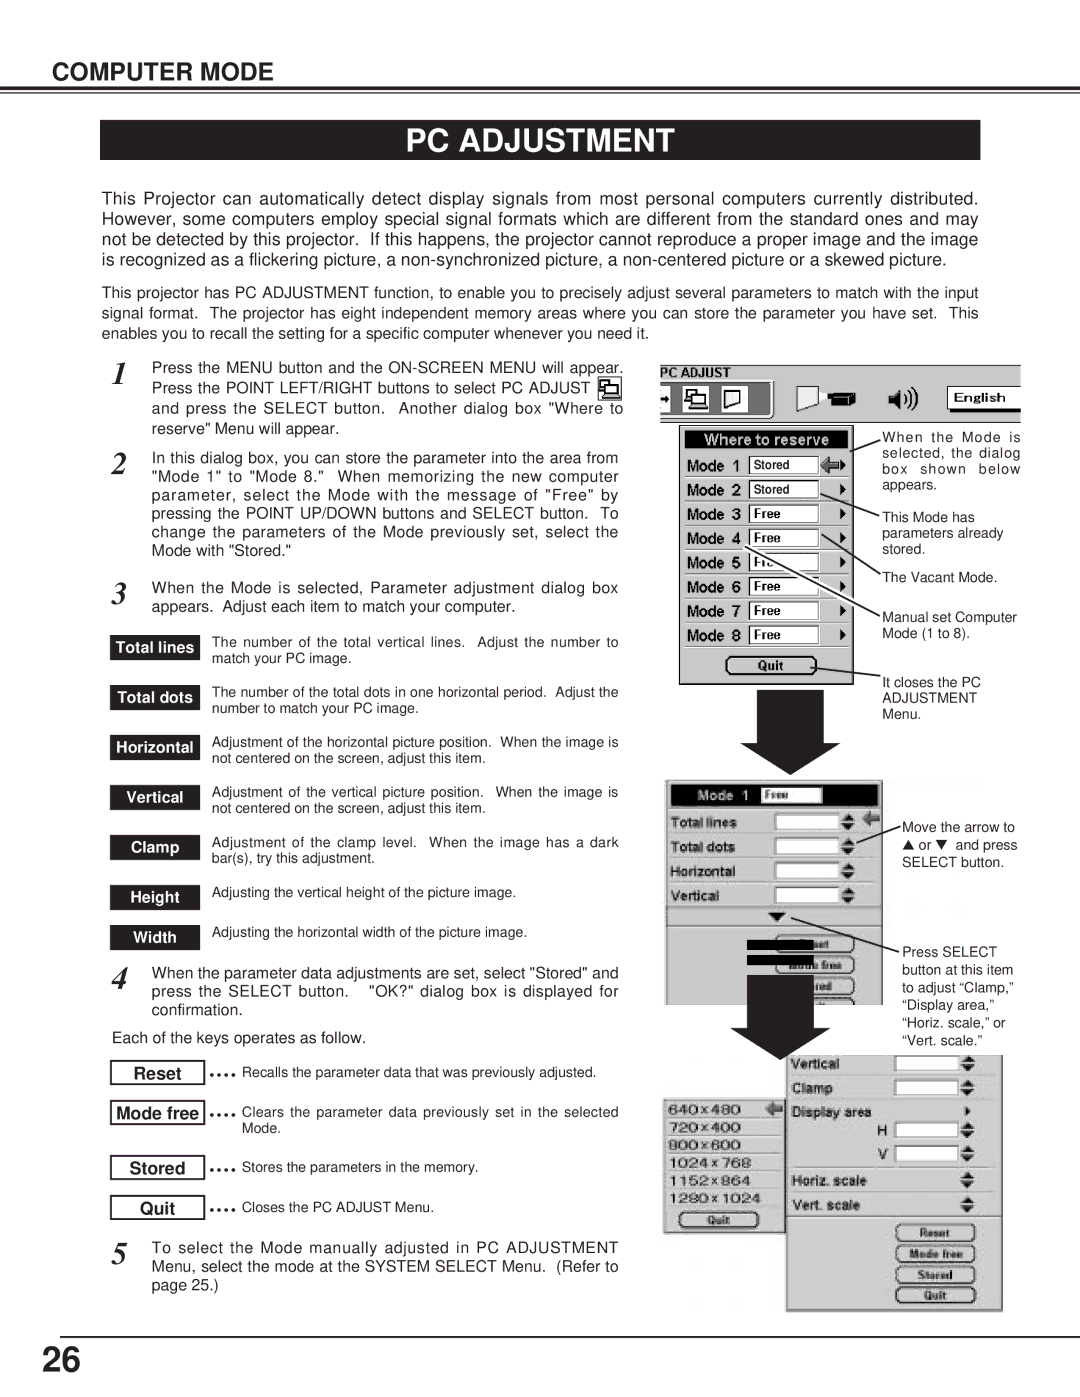
CP-15t specifications
The BOXLIGHT CP-15t is a state-of-the-art educational tool designed to enhance the teaching and learning experience in classrooms and training environments. This interactive projector incorporates advanced technologies to provide educators with a versatile and user-friendly solution for presenting lessons, videos, and other educational materials.One of the key features of the BOXLIGHT CP-15t is its impressive brightness level, which reaches up to 3,500 lumens. This high brightness ensures that the projected images remain vivid and clear, even in well-lit classrooms. With a native resolution of 1280 x 800 pixels, the projector delivers sharp and detailed visuals, making it ideal for displaying presentations, graphs, and educational content with precision.
The BOXLIGHT CP-15t utilizes DLP (Digital Light Processing) technology, which not only enhances image quality but also promotes longevity and reliability. DLP projectors are known for their high contrast ratios, ensuring that colors appear rich and vibrant, while black levels are deep. This results in a more engaging visual experience for both teachers and students.
Additionally, the CP-15t is equipped with a variety of connectivity options, including HDMI, VGA, USB, and audio inputs. This extensive range allows users to easily connect laptops, document cameras, tablets, and other devices, making it a highly adaptable tool for modern classrooms. The projector also supports wireless capabilities, enabling seamless streaming and sharing of content without the need for cumbersome cables.
Another standout feature of the BOXLIGHT CP-15t is its interactive capabilities. When paired with the right software, this projector can transform any flat surface into an interactive touchscreen. Teachers can write, draw, and annotate directly on the projected image, facilitating dynamic discussions and enhancing student engagement.
Furthermore, the CP-15t's compact and portable design makes it easy to transport between classrooms or training locations. Its long lamp life, which can extend up to 20,000 hours, ensures that the projector remains operational for an extended period, reducing maintenance costs and downtime.
In summary, the BOXLIGHT CP-15t is a remarkable interactive projector that combines high brightness, advanced DLP technology, versatile connectivity, and interactive features to create an innovative teaching tool. Its ability to deliver exceptional image quality and interactive engagement makes it a valuable asset for educators aiming to inspire and educate their students effectively.