EFR160T120*(EN, EF100T250(E)*(N, EF100T399(E)*(N, EF100T300(E)*(N, EF60T125(E)*(N specifications
Bradford-White Corporation is a leading manufacturer of water heating solutions, known for its high-quality and durable products. Among its extensive product lineup, the EF60T150(E)*(N), EF100T150(E)*(N), EF60T199(E)*(N,X)(A)(2), and EF100T199(E)*(N) models stand out for their impressive features and technologies that cater to both residential and commercial water heating needs.The EF60T150(E)*(N) model is designed for medium to large households, providing a reliable hot water supply. It features a 60-gallon tank with a first-hour delivery rate that ensures ample hot water, making it ideal for simultaneous usage in multiple applications. This water heater operates on natural gas, boasting high energy efficiency ratings due to its advanced burner technology. The environmentally friendly design reduces greenhouse gas emissions while delivering consistent performance.
Similarly, the EF100T150(E)*(N) model provides an even larger capacity of 100 gallons, addressing the hot water demands of larger families or commercial establishments. It employs Bradford-White's Hydrojet Total Performance System, which minimizes sediment buildup and optimizes hot water output. This model also features a patented Vitraglas lining that protects the tank from corrosion, extending its lifespan and enhancing reliability.
On the other hand, the EF60T199(E)*(N,X)(A)(2) and EF100T199(E)*(N) models offer advanced technology with their unique "N" designation, indicating that they are equipped to handle more extensive heating requirements efficiently. The EF60T199 model, with its 60-gallon capacity, and the EF100T199, with 100 gallons, incorporate enhanced insulation to reduce heat loss and improve energy efficiency. Both models are designed for easy installation and maintenance, making them user-friendly for both homeowners and technicians.
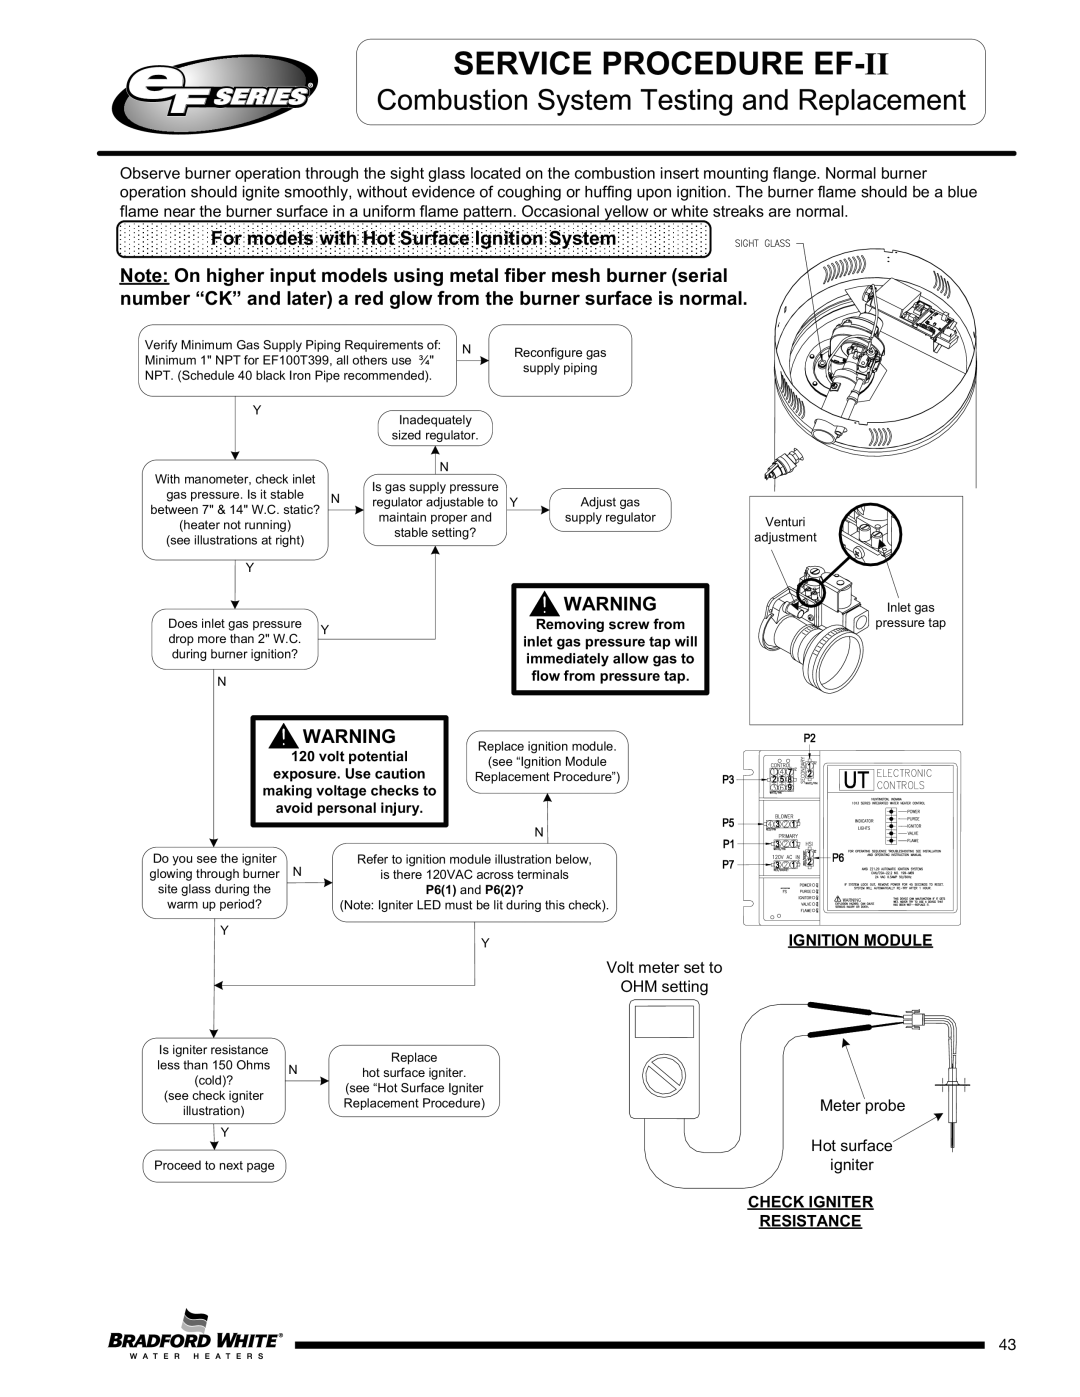
Additionally, these water heaters feature advanced electronic ignition and controls that allow for precise temperature regulation and easy monitoring. The intuitive user interface simplifies operation, while built-in safety features ensure reliable and secure hot water delivery.
Overall, Bradford-White's EF series of water heaters, including the EF60T150(E)*(N), EF100T150(E)*(N), EF60T199(E)*(N,X)(A)(2), and EF100T199(E)*(N), exemplify the company's commitment to quality and innovation. With their robust performance, energy efficiency, and advanced technologies, these models offer dependable hot water solutions tailored to meet the diverse needs of today's consumers. Whether for residential or commercial use, Bradford-White continues to set the standard for excellence in water heating technology.

