| Express® Lavatory System |
Installation Instructions - For Service Only | |
|
|
Installation Instructions continued . . .
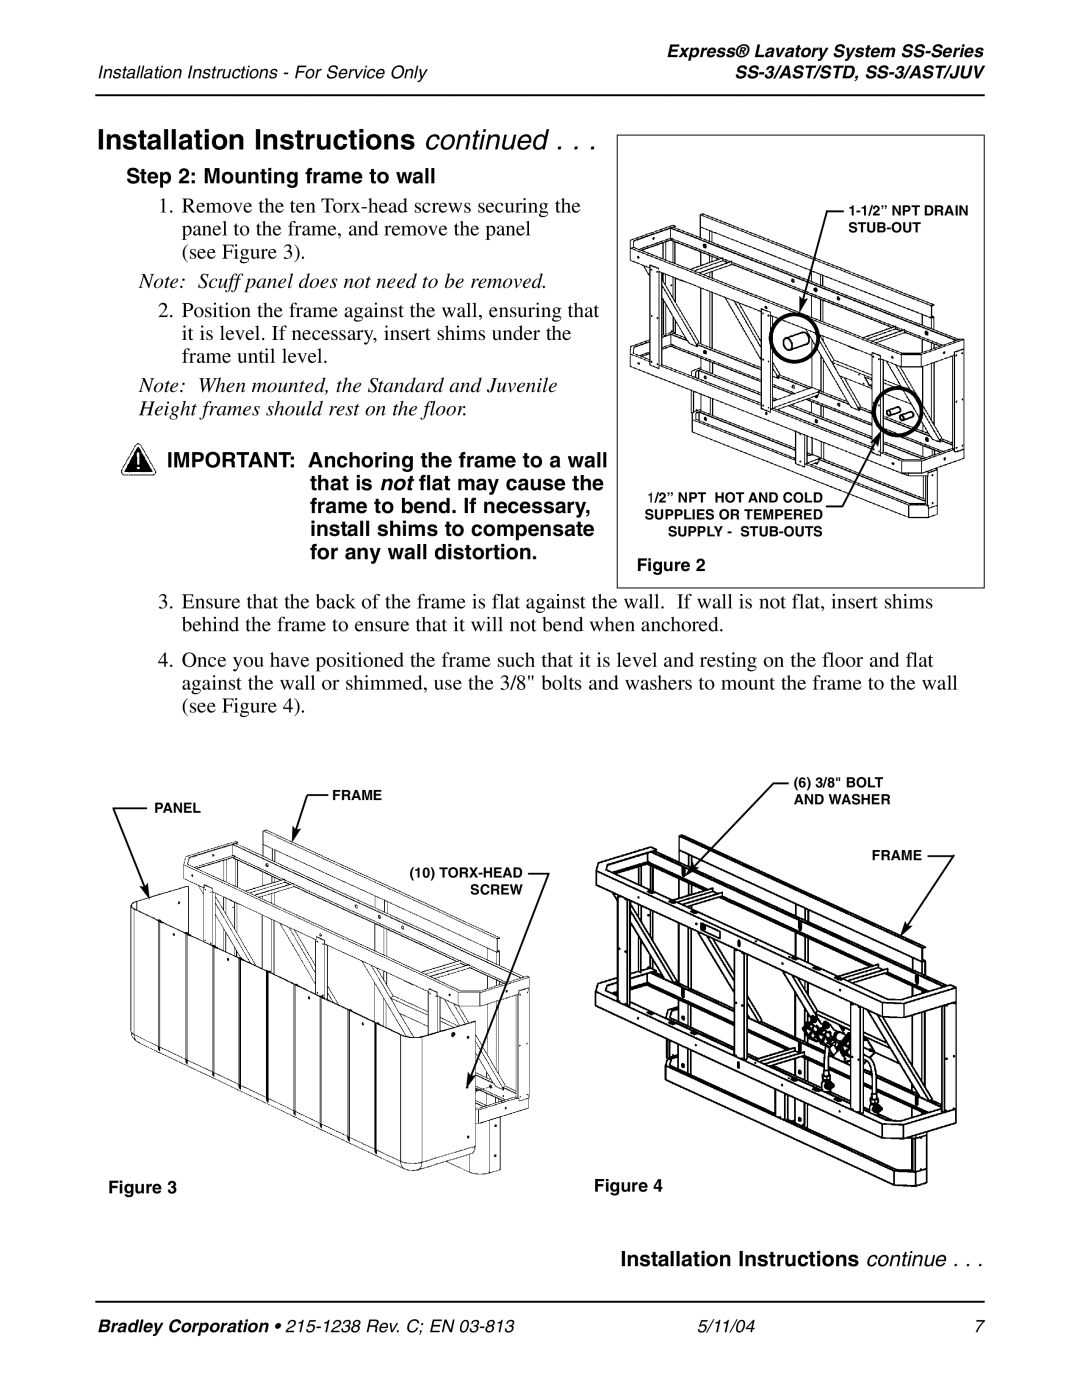
Step 2: Mounting frame to wall
1.Remove the ten
Note: Scuff panel does not need to be removed.
2.Position the frame against the wall, ensuring that it is level. If necessary, insert shims under the frame until level.
Note: When mounted, the Standard and Juvenile Height frames should rest on the floor.
IMPORTANT: Anchoring the frame to a wall that is not flat may cause the frame to bend. If necessary, install shims to compensate for any wall distortion.
1/2” NPT HOT AND COLD
SUPPLIES OR TEMPERED SUPPLY -
Figure 2
3.Ensure that the back of the frame is flat against the wall. If wall is not flat, insert shims behind the frame to ensure that it will not bend when anchored.
4.Once you have positioned the frame such that it is level and resting on the floor and flat against the wall or shimmed, use the 3/8" bolts and washers to mount the frame to the wall (see Figure 4).
|
|
|
|
| (6) 3/8" BOLT |
|
|
|
| FRAME | AND WASHER |
|
|
|
| ||
PANEL |
|
|
|
| |
|
|
|
|
|
FRAME
(10)
Figure 3 | Figure 4 |
|
|
Installation Instructions continue . . .
Bradley Corporation • | 5/11/04 | 7 |