Express® Lavatory System |
|
Installation Instructions - For Service Only |
Installation Instructions continued . . .
Step 3: Installing bowl assembly
IMPORTANT: Moving and positioning the bowl will require more than one person.
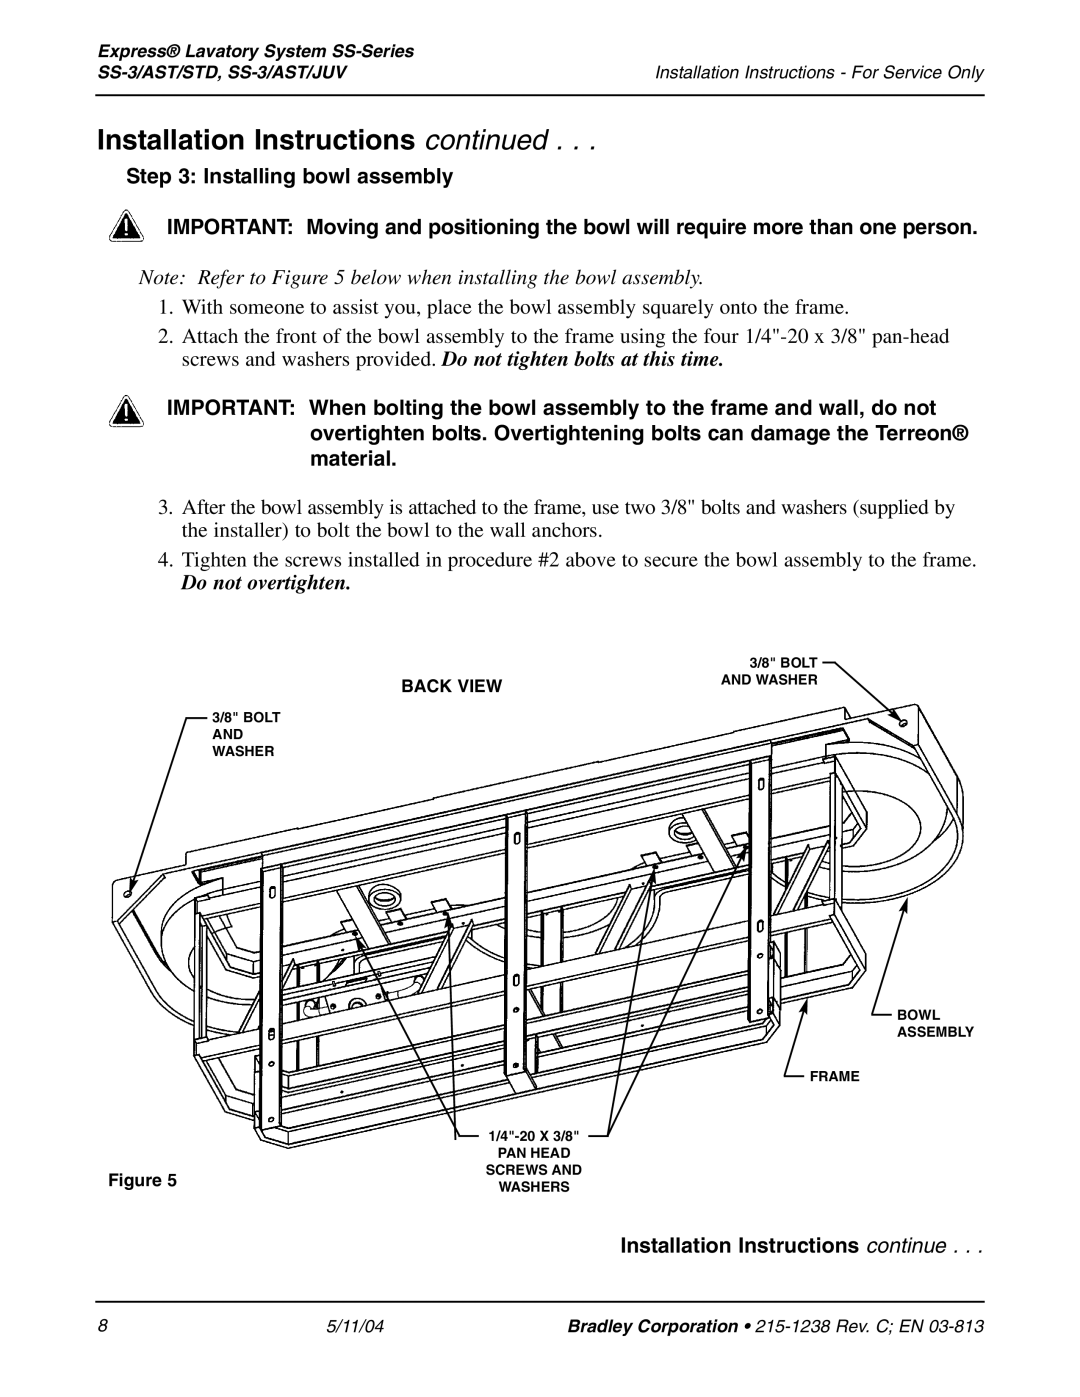
Note: Refer to Figure 5 below when installing the bowl assembly.
1.With someone to assist you, place the bowl assembly squarely onto the frame.
2.Attach the front of the bowl assembly to the frame using the four
IMPORTANT: When bolting the bowl assembly to the frame and wall, do not overtighten bolts. Overtightening bolts can damage the Terreon® material.
3.After the bowl assembly is attached to the frame, use two 3/8" bolts and washers (supplied by the installer) to bolt the bowl to the wall anchors.
4.Tighten the screws installed in procedure #2 above to secure the bowl assembly to the frame.
Do not overtighten.
BACK VIEW
3/8" BOLT AND WASHER
3/8" BOLT AND WASHER
BOWL
ASSEMBLY
FRAME
|
| ||
|
| PAN HEAD | |
|
| SCREWS AND | |
Figure 5 | |||
| WASHERS | ||
|
| ||
|
|
|
Installation Instructions continue . . .
8 | 5/11/04 | Bradley Corporation • |