Installation
3.3Connecting the transfer printer
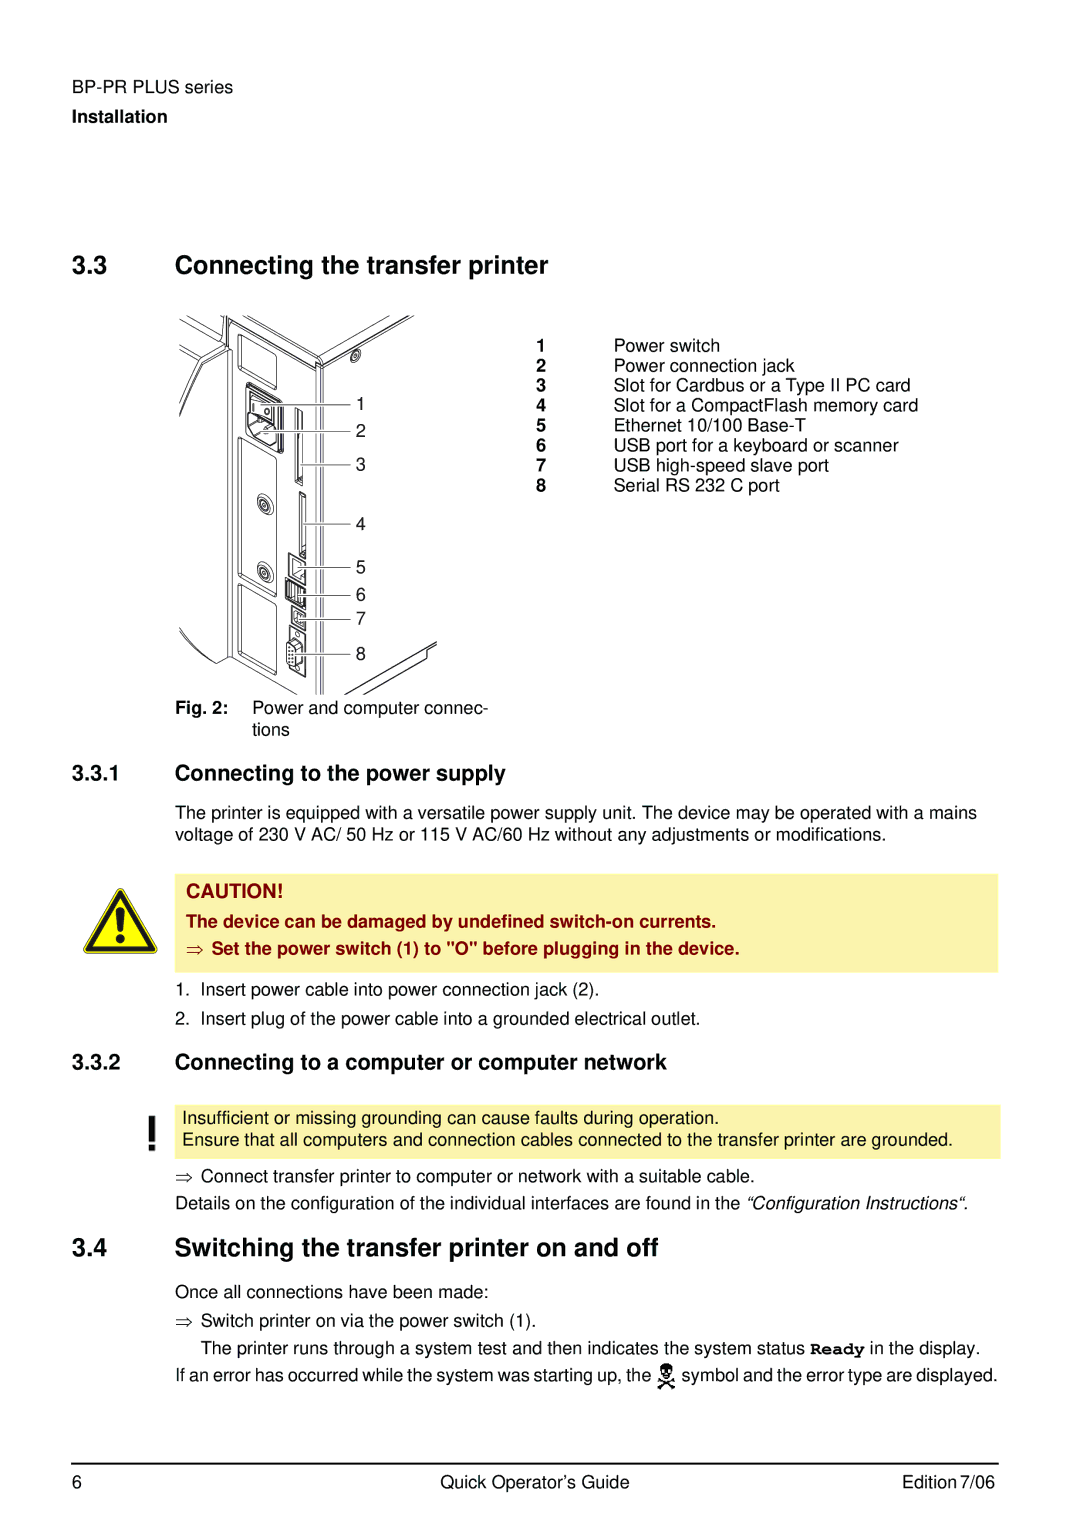
| 1 | Power switch |
| 2 | Power connection jack |
1 | 3 | Slot for Cardbus or a Type II PC card |
4 | Slot for a CompactFlash memory card | |
2 | 5 | Ethernet 10/100 |
3 | 6 | USB port for a keyboard or scanner |
7 | USB | |
| 8 | Serial RS 232 C port |
4 |
|
|
5
6
7
8
Fig. 2: Power and computer connec- tions
3.3.1Connecting to the power supply
The printer is equipped with a versatile power supply unit. The device may be operated with a mains voltage of 230 V AC/ 50 Hz or 115 V AC/60 Hz without any adjustments or modifications.
CAUTION!
The device can be damaged by undefined
⇒Set the power switch (1) to "O" before plugging in the device.
1.Insert power cable into power connection jack (2).
2.Insert plug of the power cable into a grounded electrical outlet.
3.3.2Connecting to a computer or computer network
Insufficient or missing grounding can cause faults during operation.
Ensure that all computers and connection cables connected to the transfer printer are grounded.
⇒Connect transfer printer to computer or network with a suitable cable.
Details on the configuration of the individual interfaces are found in the “Configuration Instructions“.
3.4Switching the transfer printer on and off
Once all connections have been made:
⇒Switch printer on via the power switch (1).
The printer runs through a system test and then indicates the system status Ready in the display. If an error has occurred while the system was starting up, the ![]() symbol and the error type are displayed.
symbol and the error type are displayed.
6 | Quick Operator’s Guide | Edition 7/06 |