Removing the Engine Oil and Filter
WHEN PERFORMING ANY ADJUSTMENT OR MAINTENANCE, YOU MUST FIRST SHUT OFF THE ENGINE, WAIT FIVE (5) MINUTES TO ALLOW PARTS TO COOL AND DISCONNECT THE SPARK PLUG WIRE(S), KEEPING IT AWAY FROM THE SPARK PLUG(S).
NOTE: Drain the oil when the Engine is warm. Warm oil drains quickly and completely.
Tools and Supplies Needed:
•Oil Filter Wrench (obtainable from a local auto parts or hardware store)
•Rags and a suitable container for used oil
•SAE 30 High Detergent Oil
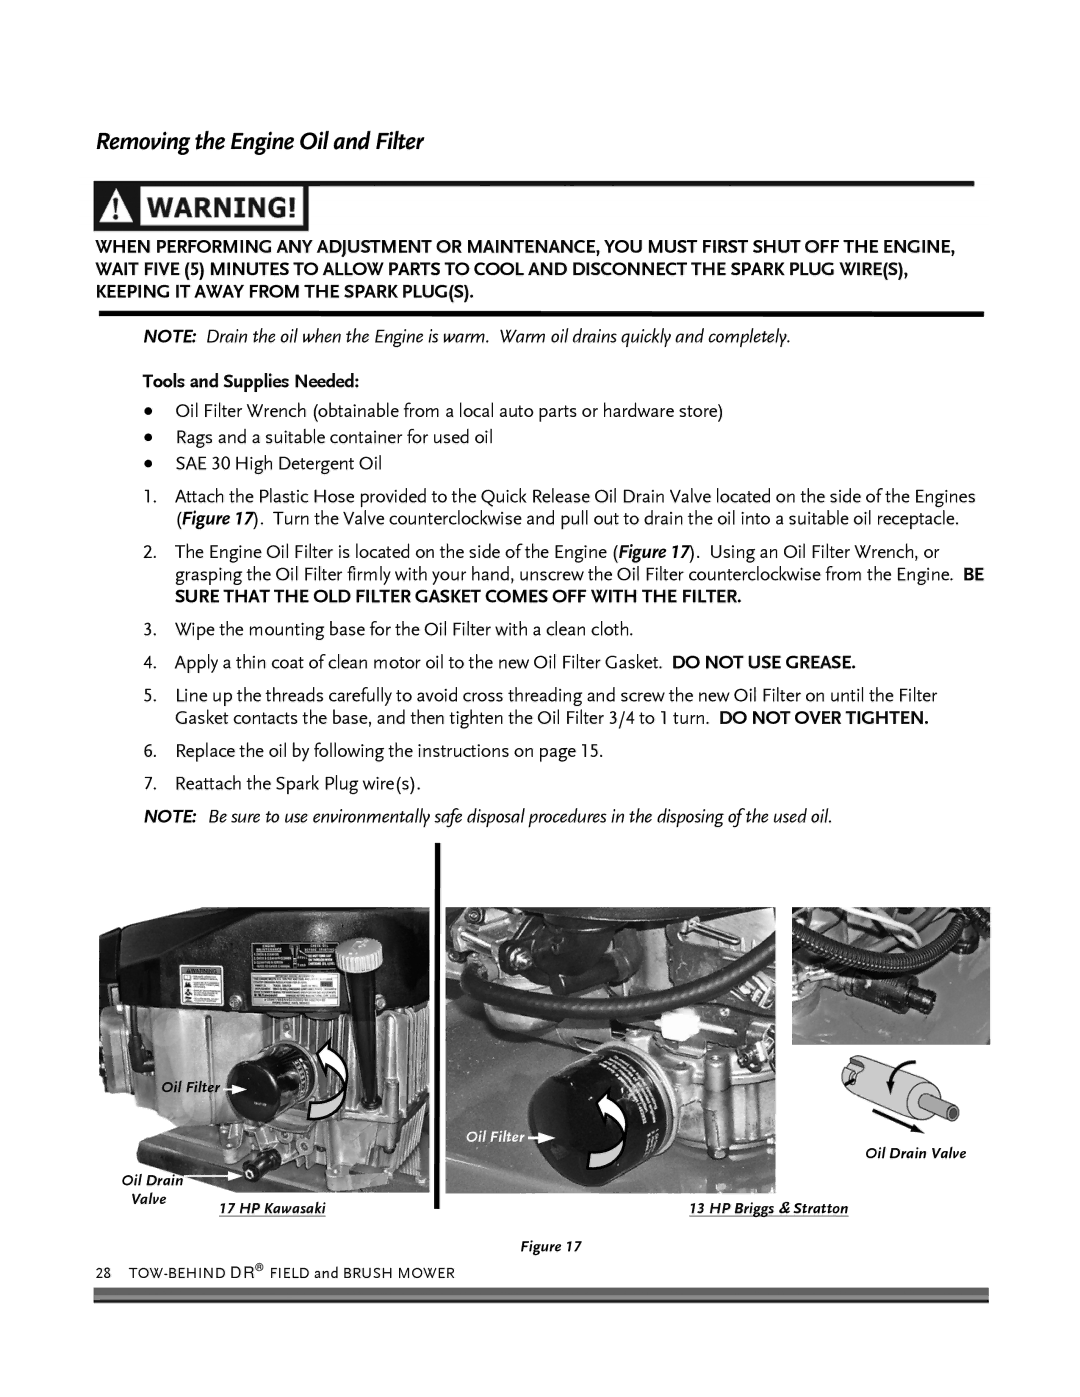
1.Attach the Plastic Hose provided to the Quick Release Oil Drain Valve located on the side of the Engines (Figure 17). Turn the Valve counterclockwise and pull out to drain the oil into a suitable oil receptacle.
2.The Engine Oil Filter is located on the side of the Engine (Figure 17). Using an Oil Filter Wrench, or grasping the Oil Filter firmly with your hand, unscrew the Oil Filter counterclockwise from the Engine. BE
SURE THAT THE OLD FILTER GASKET COMES OFF WITH THE FILTER.
3.Wipe the mounting base for the Oil Filter with a clean cloth.
4.Apply a thin coat of clean motor oil to the new Oil Filter Gasket. DO NOT USE GREASE.
5.Line up the threads carefully to avoid cross threading and screw the new Oil Filter on until the Filter Gasket contacts the base, and then tighten the Oil Filter 3/4 to 1 turn. DO NOT OVER TIGHTEN.
6.Replace the oil by following the instructions on page 15.
7.Reattach the Spark Plug wire(s).
NOTE: Be sure to use environmentally safe disposal procedures in the disposing of the used oil.
Oil Filter |
| |
|
| Oil Filter |
|
| Oil Drain Valve |
Oil Drain |
|
|
Valve | 17 HP Kawasaki | 13 HP Briggs & Stratton |
| ||
Figure 17
