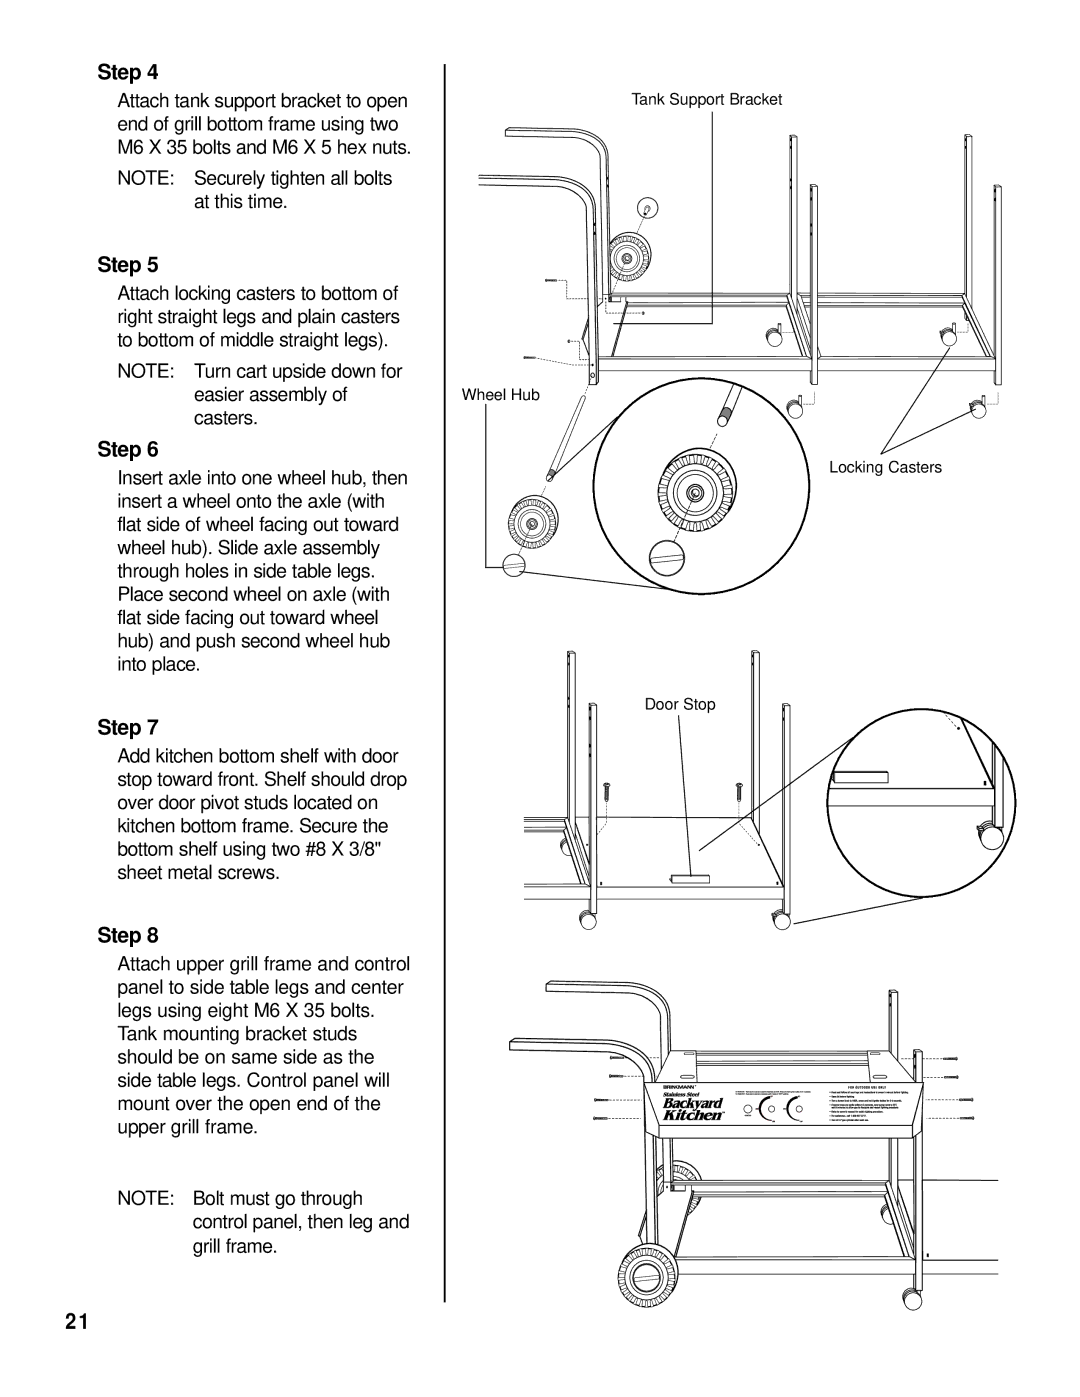
Step 4 |
|
Attach tank support bracket to open |
|
end of grill bottom frame using two |
|
M6 X 35 bolts and M6 X 5 hex nuts. |
|
NOTE: Securely tighten all bolts |
|
at this time. |
|
Step 5 |
|
Attach locking casters to bottom of |
|
right straight legs and plain casters |
|
to bottom of middle straight legs). |
|
NOTE: Turn cart upside down for |
|
easier assembly of | Wheel Hub |
casters. |
|
Step 6 |
|
Insert axle into one wheel hub, then |
|
insert a wheel onto the axle (with |
|
flat side of wheel facing out toward |
|
wheel hub). Slide axle assembly |
|
through holes in side table legs. |
|
Place second wheel on axle (with |
|
flat side facing out toward wheel |
|
hub) and push second wheel hub |
|
into place. |
|
Step 7 |
|
Add kitchen bottom shelf with door |
|
stop toward front. Shelf should drop |
|
over door pivot studs located on |
|
kitchen bottom frame. Secure the |
|
bottom shelf using two #8 X 3/8" |
|
sheet metal screws. |
|
Step 8 |
|
Attach upper grill frame and control |
|
panel to side table legs and center |
|
legs using eight M6 X 35 bolts. |
|
Tank mounting bracket studs |
|
should be on same side as the |
|
side table legs. Control panel will |
|
mount over the open end of the |
|
upper grill frame. |
|
NOTE: Bolt must go through |
|
control panel, then leg and |
|
grill frame. |
|
Tank Support Bracket
Door Stop
Locking Casters
21