Installation: Forward Facing
Lap-Belt Installation
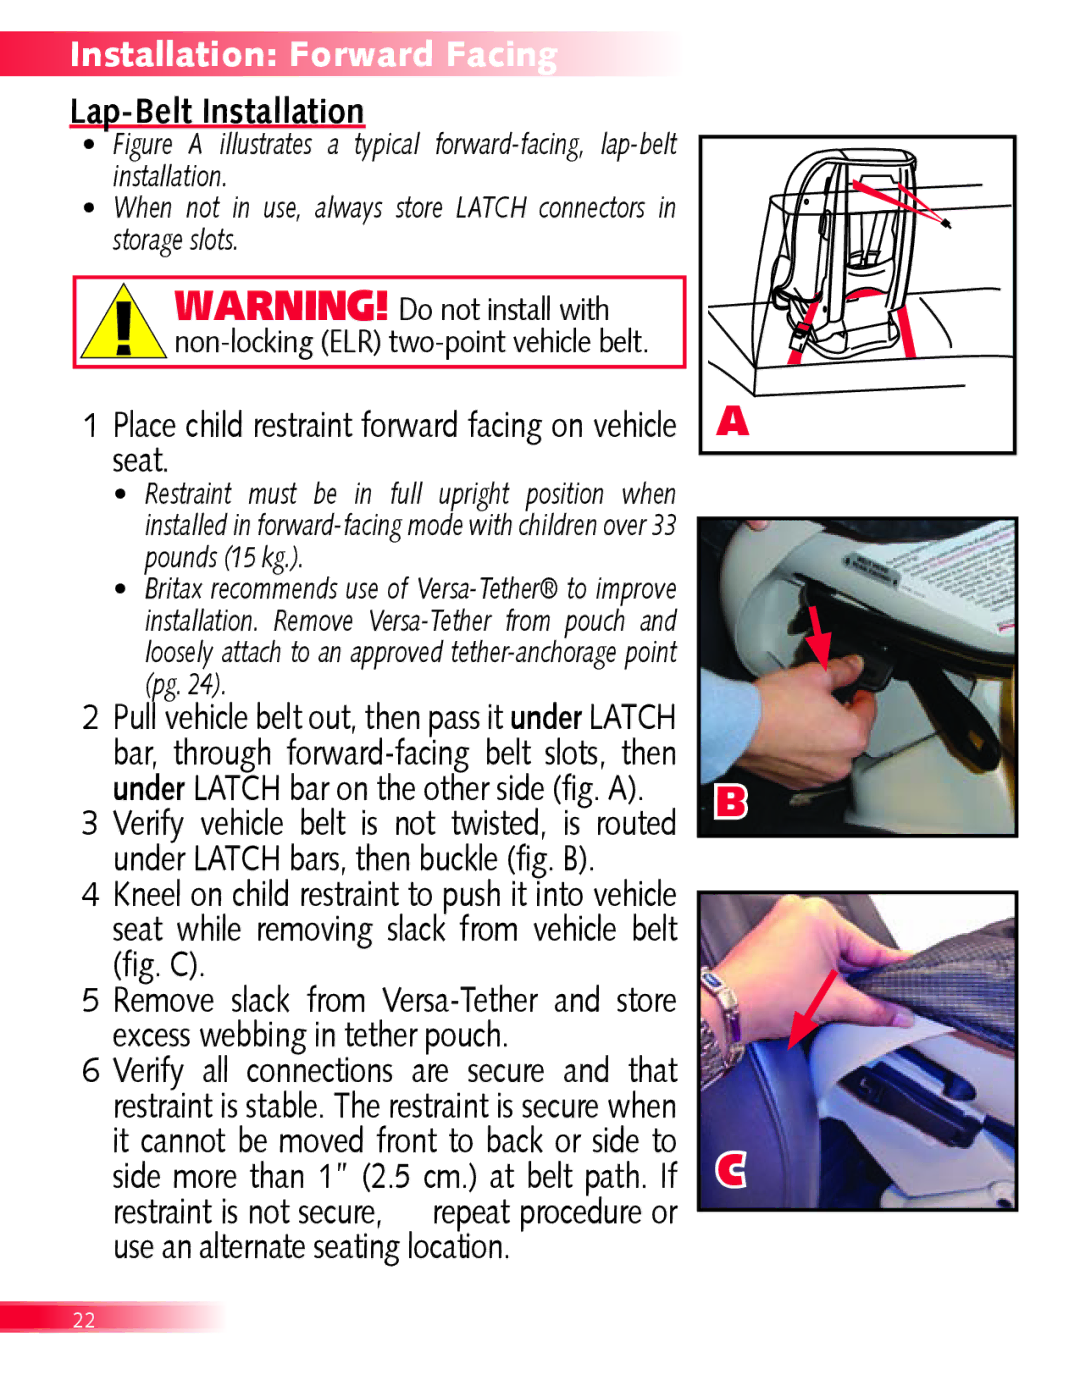
•Figure A illustrates a typical forward-facing, lap-belt installation.
•When not in use, always store LATCH connectors in storage slots.
WARNING! Do not install with
1�Place child restraint forward facing on vehicle seat.
•Restraint must be in full upright position when installed in
•Britax recommends use of
2�Pull vehicle belt out, then pass it under LATCH bar, through
3�Verify vehicle belt is not twisted, is routed under LATCH bars, then buckle (fig. B).
4�Kneel on child restraint to push it into vehicle seat while removing slack from vehicle belt (fig. C).
5�Remove slack from
6�Verify all connections are secure and that restraint is stable. The restraint is secure when it cannot be moved front to back or side to side more than 1” (2.5 cm.) at belt path. If restraint is not secure, repeat procedure or use an alternate seating location.
A |
B
C
22