Installation: Rear Facing
LATCH Installation
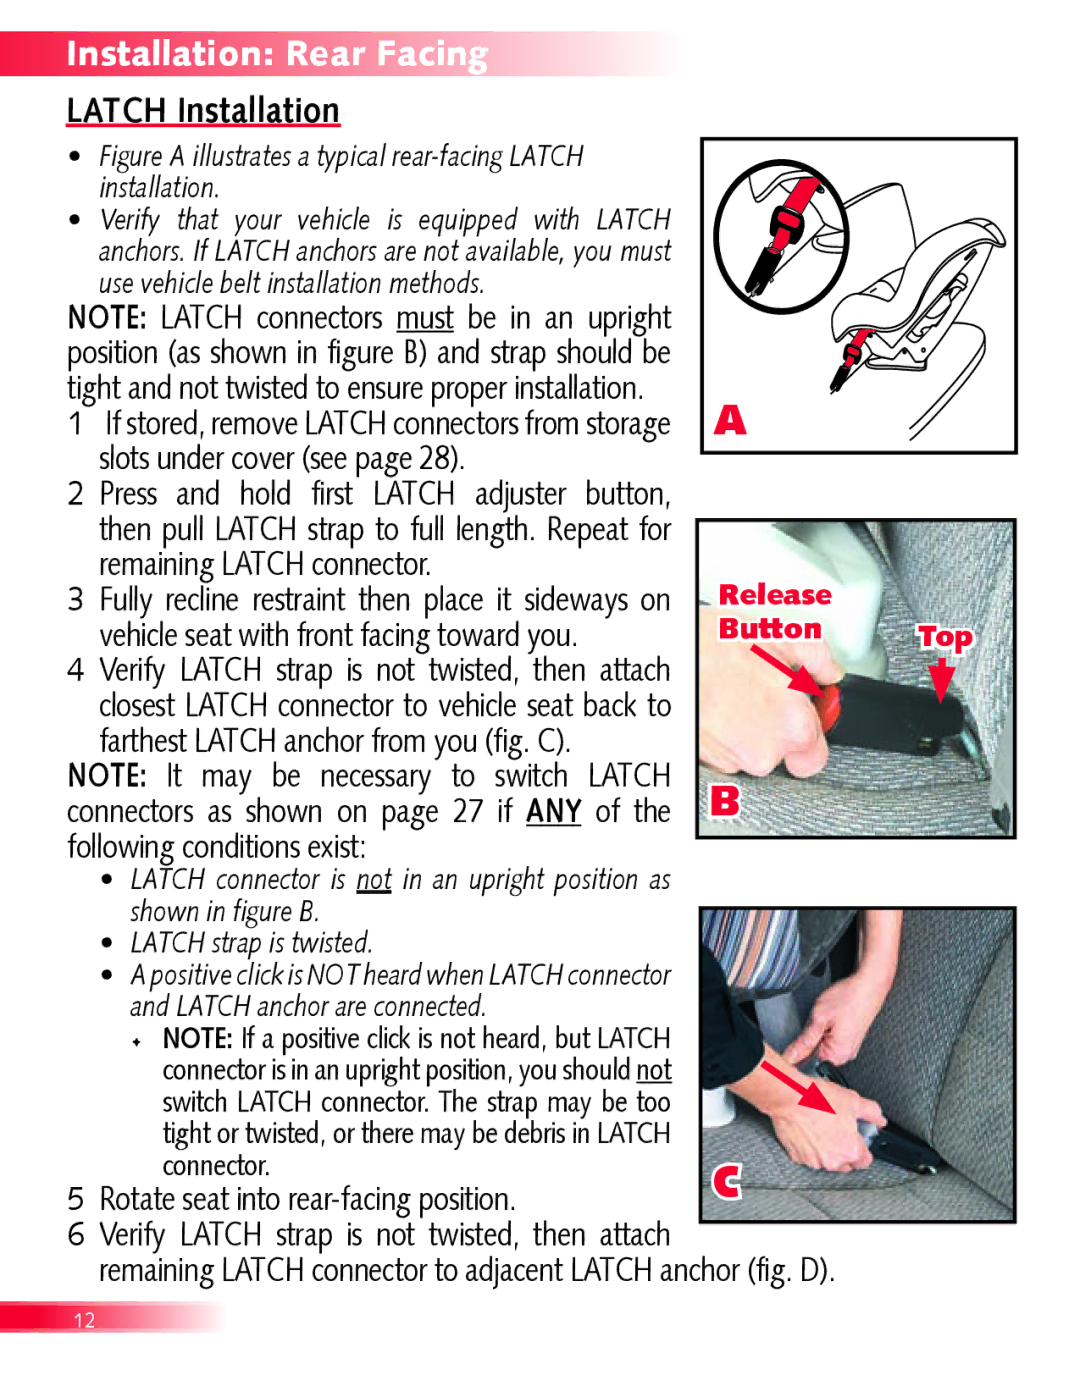
• Figure A illustrates a typical rear-facing LATCH installation.
• Verify that your vehicle is equipped with LATCH anchors. If LATCH anchors are not available, you must use vehicle belt installation methods.
NOTE: LATCH connectors must be in an upright |
|
|
position (as shown in figure B) and strap should be |
|
|
tight and not twisted to ensure proper installation. | A |
|
1�If stored, remove LATCH connectors from storage |
| |
slots under cover (see page 28). |
|
|
2�Press and hold first LATCH adjuster button, |
|
|
then pull LATCH strap to full length. Repeat for |
|
|
remaining LATCH connector. | Release |
|
3�Fully recline restraint then place it sideways on |
| |
vehicle seat with front facing toward you. | Button | Top |
4�Verify LATCH strap is not twisted, then attach |
|
|
closest LATCH connector to vehicle seat back to |
|
|
farthest LATCH anchor from you (fig. C). |
|
|
NOTE: It may be necessary to switch LATCH | B |
|
connectors as shown on page 27 if ANY of the |
| |
following conditions exist: |
|
|
• LATCH connector is not in an upright position as shown in figure B.
• LATCH strap is twisted.
• A positive click is NOT heard when LATCH connector and LATCH anchor are connected.
• NOTE: If a positive click is not heard, but LATCH connector is in an upright position, you should not switch LATCH connector. The strap may be too tight or twisted, or there may be debris in LATCH
connector.C 5�Rotate seat into rear-facing position.
6�Verify LATCH strap is not twisted, then attach remaining LATCH connector to adjacent LATCH anchor (fig. D).
12