Installation: Rear Facing
Lap-Belt Installation
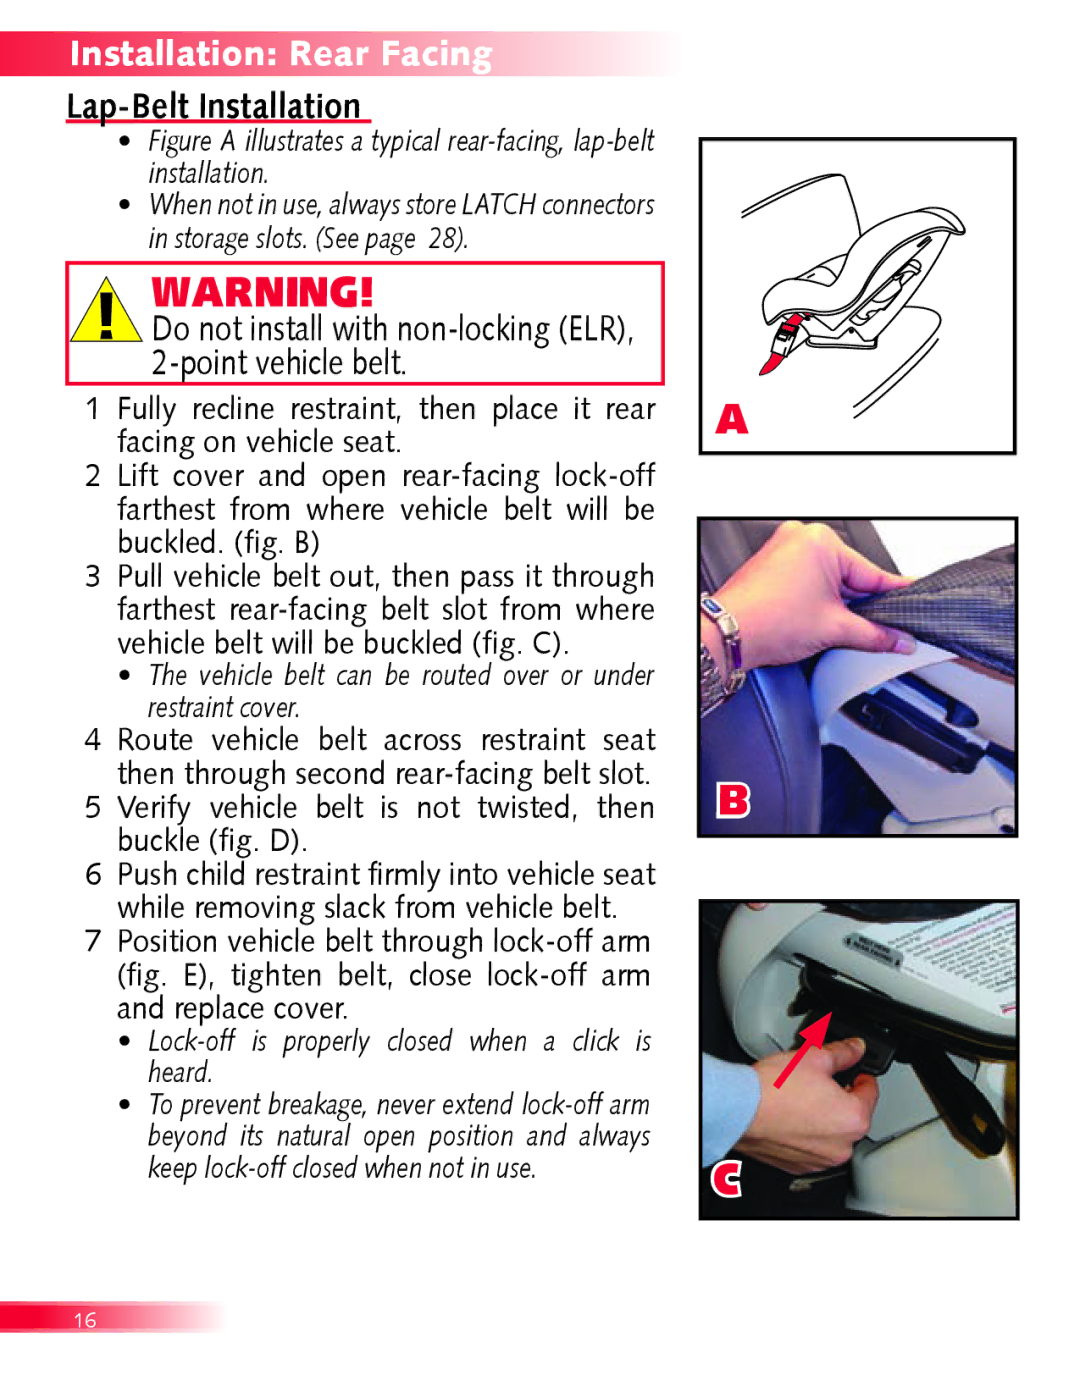
•Figure A illustrates a typical rear-facing, lap-belt installation.
•When not in use, always store LATCH connectors in storage slots. (See page 28).
WARNING!
Do not install with non-locking (ELR), 2-point vehicle belt.
1�Fully recline restraint, then place it rear facing on vehicle seat.
2�Lift cover and open
3�Pull vehicle belt out, then pass it through farthest
•The vehicle belt can be routed over or under restraint cover.
4�Route vehicle belt across restraint seat then through second
5�Verify vehicle belt is not twisted, then buckle (fig. D).
6�Push child restraint firmly into vehicle seat while removing slack from vehicle belt.
7�Position vehicle belt through
•Lock-off is properly closed when a click is heard.
•To prevent breakage, never extend
A
B
C
16