Child Seat Functions
Switching the Lower Connector System (LCS)
Child Seat Functions
Recline Adjustment
The LCS strap may need to be switched to the proper belt path in
1 | Lift the front of the child seat cover to access the |
| LCS connectors. |
2 | Pass the LCS connector strap through the belt |
| path on the child’s right side (Fig. C). |
3 | Pass one LCS connector through the appropriate |
| belt path ensuring that the larger part of the |
| connector is on top for the installation procedure |
| you wish to use (Fig D). |
• | Verify that the harness is not twisted. |
IMPORTANT: When installing this child seat in rear- | |
A Rear-facing
A
Pull the recline handle then slide the child seat shell into the desired position. (Fig. F) Release the recline handle and verify the child seat has locked into position.
![]() WARNING!
WARNING!
• This child seat must be in the recline position when | e |
installed |
•Child seat must be in. full upright position when installed
NOTE : It will be necessary to loosen the tether, vehicle seat belt, and/or LCS strap before adjusting the recline position. The tether, vehicle seat belt, and/or LCS strap must be properly
facing mode, the LCS strap must rest behind the |
child seat buckle strap. |
NOTE: To ensure LCS connector is properly aligned |
with vehicle’s LUAS anchor, the connector’s red |
release button should face away from vehicle seat |
back, and the larger of the two connector sections is |
on top (Fig. D). |
4 Replace the cover and continue with the installation |
procedure. |
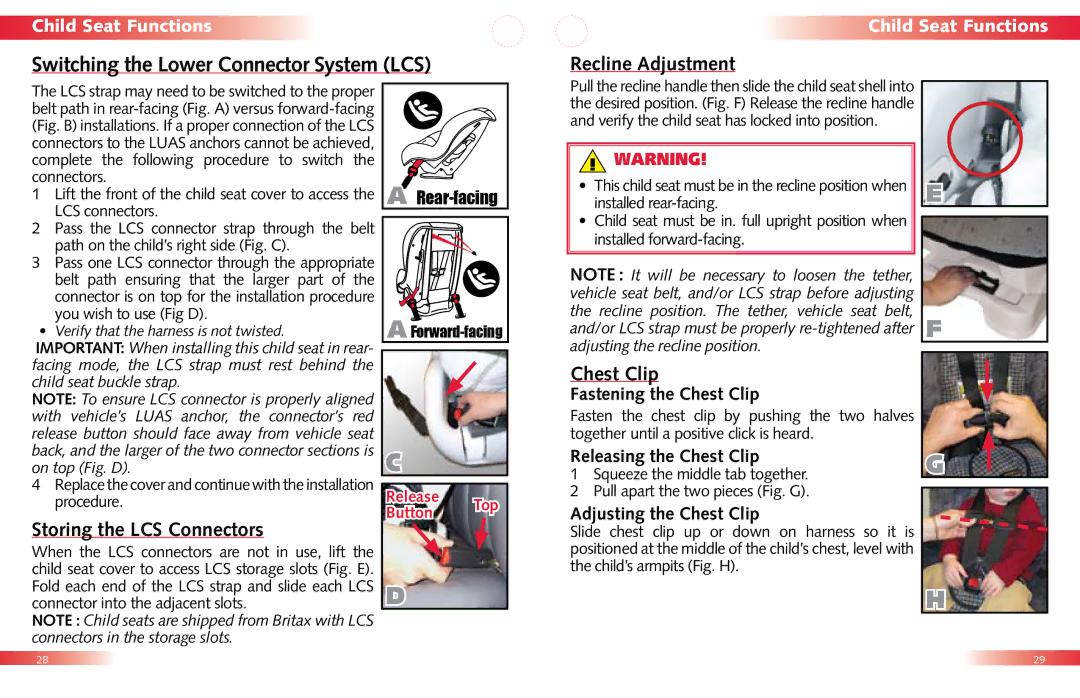
Storing the LCS Connectors
When the LCS connectors are not in use, lift the child seat cover to access LCS storage slots (Fig. E). Fold each end of the LCS strap and slide each LCS connector into the adjacent slots.
NOTE : Child seats are shipped from Britax with LCS connectors in the storage slots.
c
Release Top Button
d
Chest Clip
Fastening the Chest Clip
Fasten the chest clip by pushing the two halves together until a positive click is heard.
Releasing the Chest Clip
1Squeeze the middle tab together.
2Pull apart the two pieces (Fig. G).
Adjusting the Chest Clip
Slide chest clip up or down on harness so it is positioned at the middle of the child’s chest, level with the child’s armpits (Fig. H).
g |
h |
28
29 |