Installation :
Lower Universal Anchorage System (LUAS) Installation
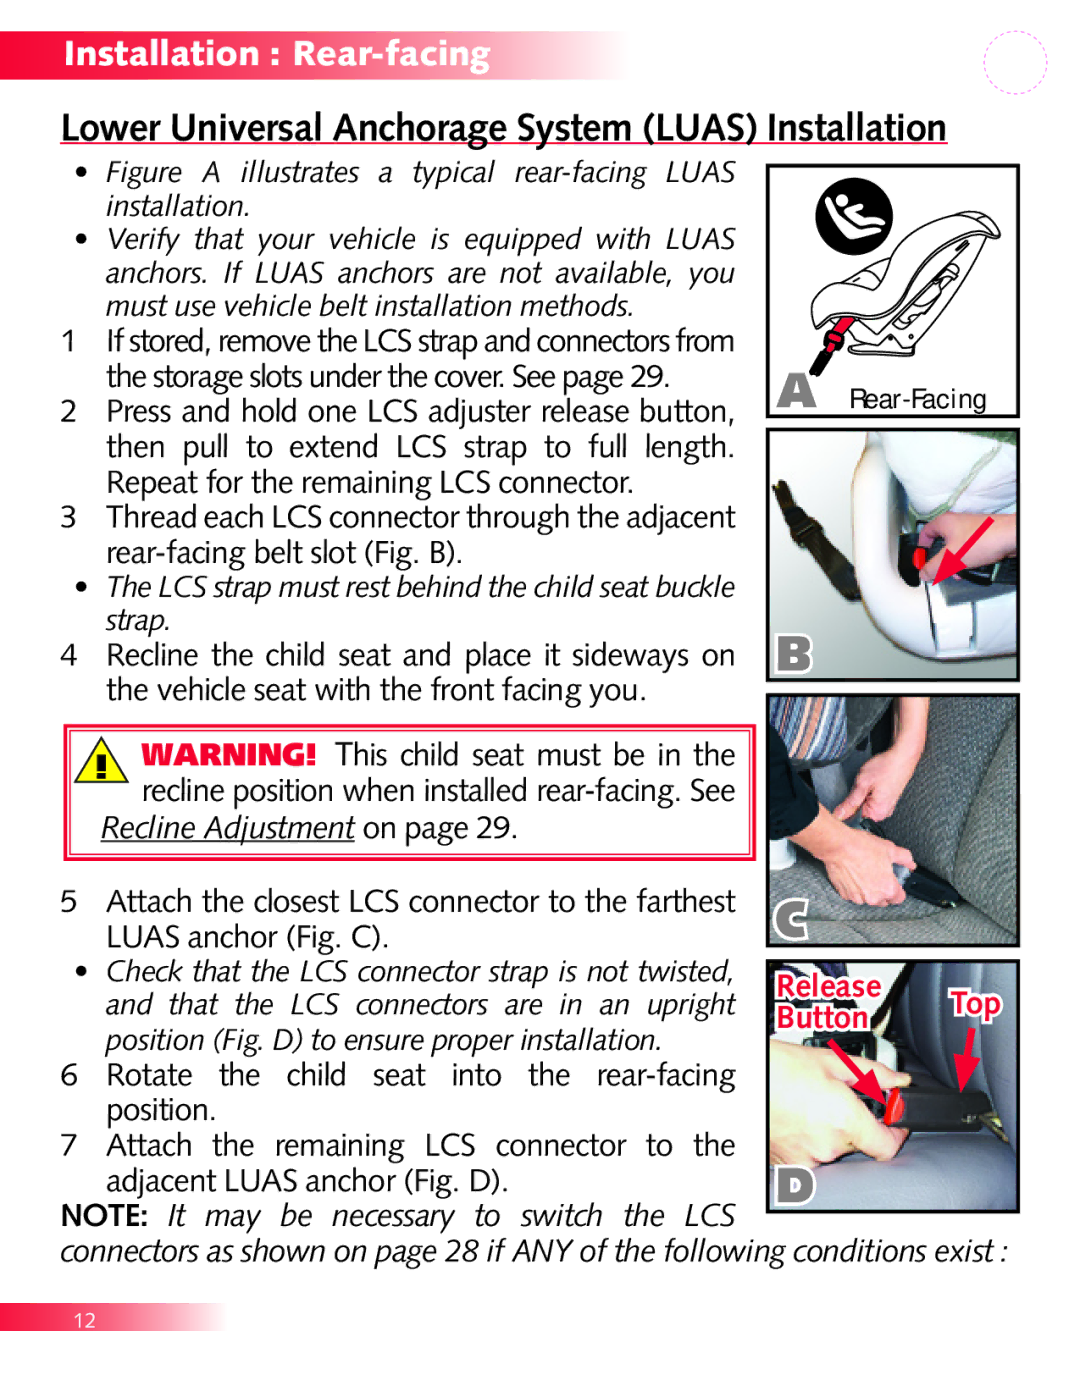
• | Figure A illustrates a typical |
|
| installation. |
|
• | Verify that your vehicle is equipped with LUAS |
|
| anchors. If LUAS anchors are not available, you |
|
| must use vehicle belt installation methods. |
|
1 | If stored, remove the LCS strap and connectors from |
|
| the storage slots under the cover. See page 29. | A |
2 | Press and hold one LCS adjuster release button, | |
| then pull to extend LCS strap to full length. |
|
| Repeat for the remaining LCS connector. |
|
3 | Thread each LCS connector through the adjacent |
|
| |
|
|
|
| |
• | The LCS strap must rest behind the child seat buckle |
|
| |
| strap. | b |
| |
4 | Recline the child seat and place it sideways on |
| ||
| the vehicle seat with the front facing you. |
|
| |
|
|
| ||
|
|
| ||
| WARNING! This child seat must be in the |
|
| |
| recline position when installed |
|
| |
| Recline Adjustment on page 29. |
|
| |
5 | Attach the closest LCS connector to the farthest | C |
| |
| LUAS anchor (Fig. C). |
| ||
|
|
| ||
• | Check that the LCS connector strap is not twisted, |
|
| |
Release | Top | |||
| and that the LCS connectors are in an upright | |||
| Button | |||
| position (Fig. D) to ensure proper installation. |
| ||
|
|
| ||
6 | Rotate the child seat into the |
|
| |
| position. |
|
| |
7 | Attach the remaining LCS connector to the | D |
| |
| adjacent LUAS anchor (Fig. D). |
| ||
NOTE: It may be necessary to switch the LCS |
| |||
|
| |||
connectors as shown on page 28 if ANY of the following conditions exist :
12