Installation :
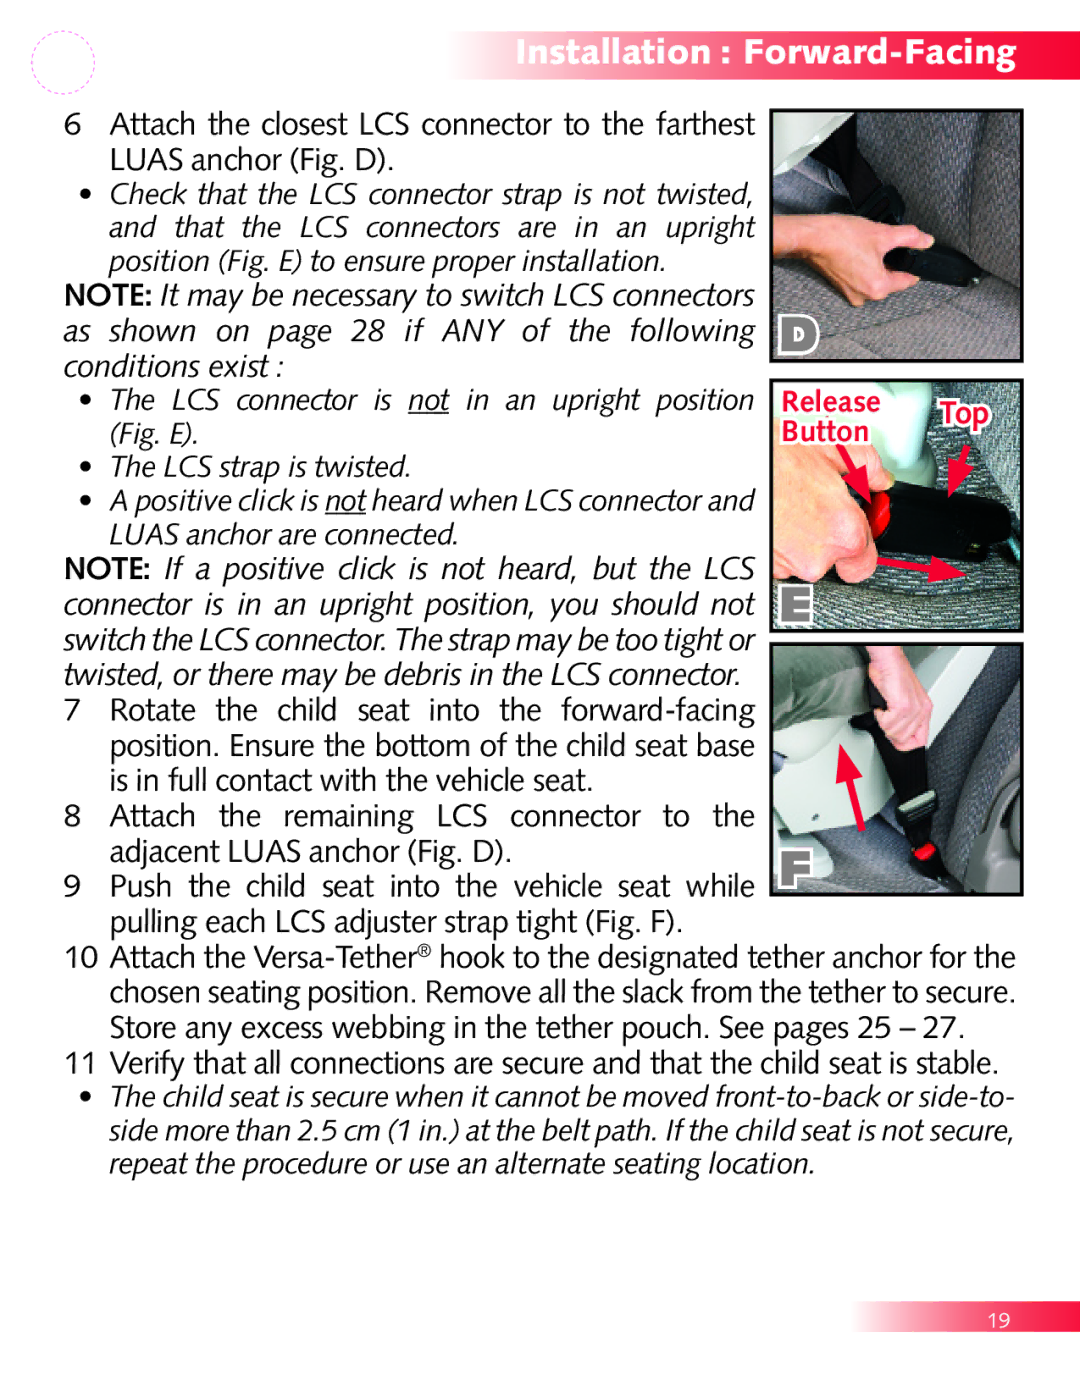
6Attach the closest LCS connector to the farthest LUAS anchor (Fig. D).
•Check that the LCS connector strap is not twisted, and that the LCS connectors are in an upright position (Fig. E) to ensure proper installation.
NOTE: It may be necessary to switch LCS connectors
as shown on page 28 if ANY of the following D conditions exist :
• | The LCS connector is not in an upright position | Release | Top |
| (Fig. E). | Button | |
|
| ||
• | The LCS strap is twisted. |
|
|
•A positive click is not heard when LCS connector and LUAS anchor are connected.
NOTE: If a positive click is not heard, but the LCS connector is in an upright position, you should not e switch the LCS connector. The strap may be too tight or twisted, or there may be debris in the LCS connector.
7Rotate the child seat into the
8Attach the remaining LCS connector to the
| adjacent LUAS anchor (Fig. D). | |
9 | Push the child seat into the vehicle seat while | f |
| ||
| pulling each LCS adjuster strap tight (Fig. F). | |
10 | Attach the | |
| chosen seating position. Remove all the slack from the tether to secure. | |
| Store any excess webbing in the tether pouch. See pages 25 – 27. | |
11 | Verify that all connections are secure and that the child seat is stable. | |
• | The child seat is secure when it cannot be moved | |
| side more than 2.5 cm (1 in.) at the belt path. If the child seat is not secure, | |
| repeat the procedure or use an alternate seating location. | |
19
