Installation :
Lap-Shoulder Belt Installation
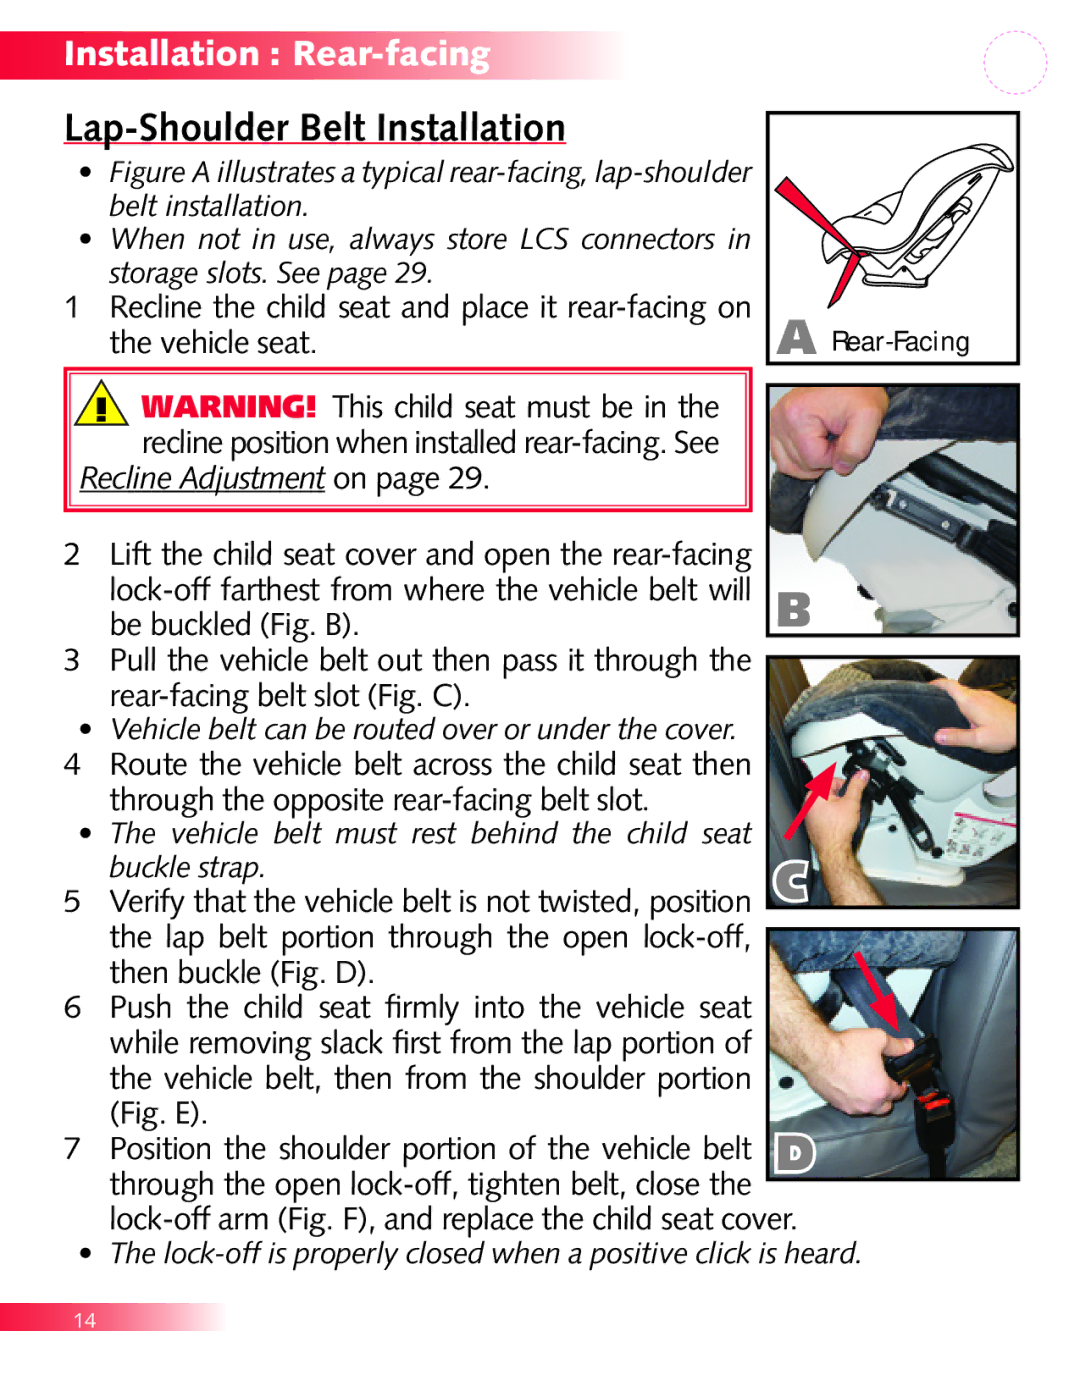
•Figure A illustrates a typical rear-facing, lap-shoulder belt installation.
•When not in use, always store LCS connectors in storage slots. See page 29.
1Recline the child seat and place it
A |
![]() WARNING! This child seat must be in the recline position when installed
WARNING! This child seat must be in the recline position when installed
Recline Adjustment on page 29.
2Lift the child seat cover and open the
3Pull the vehicle belt out then pass it through the
•Vehicle belt can be routed over or under the cover.
4Route the vehicle belt across the child seat then through the opposite
•The vehicle belt must rest behind the child seat
| buckle strap. | C | |
5 | Verify that the vehicle belt is not twisted, position | ||
| |||
| the lap belt portion through the open |
| |
|
| ||
| then buckle (Fig. D). |
| |
6 | Push the child seat firmly into the vehicle seat |
| |
| while removing slack first from the lap portion of |
| |
| the vehicle belt, then from the shoulder portion |
| |
| (Fig. E). | D | |
7 | Position the shoulder portion of the vehicle belt | ||
| through the open |
| |
|
| ||
| |||
• The
14