INSTALL THE |
|
|
|
| |
|
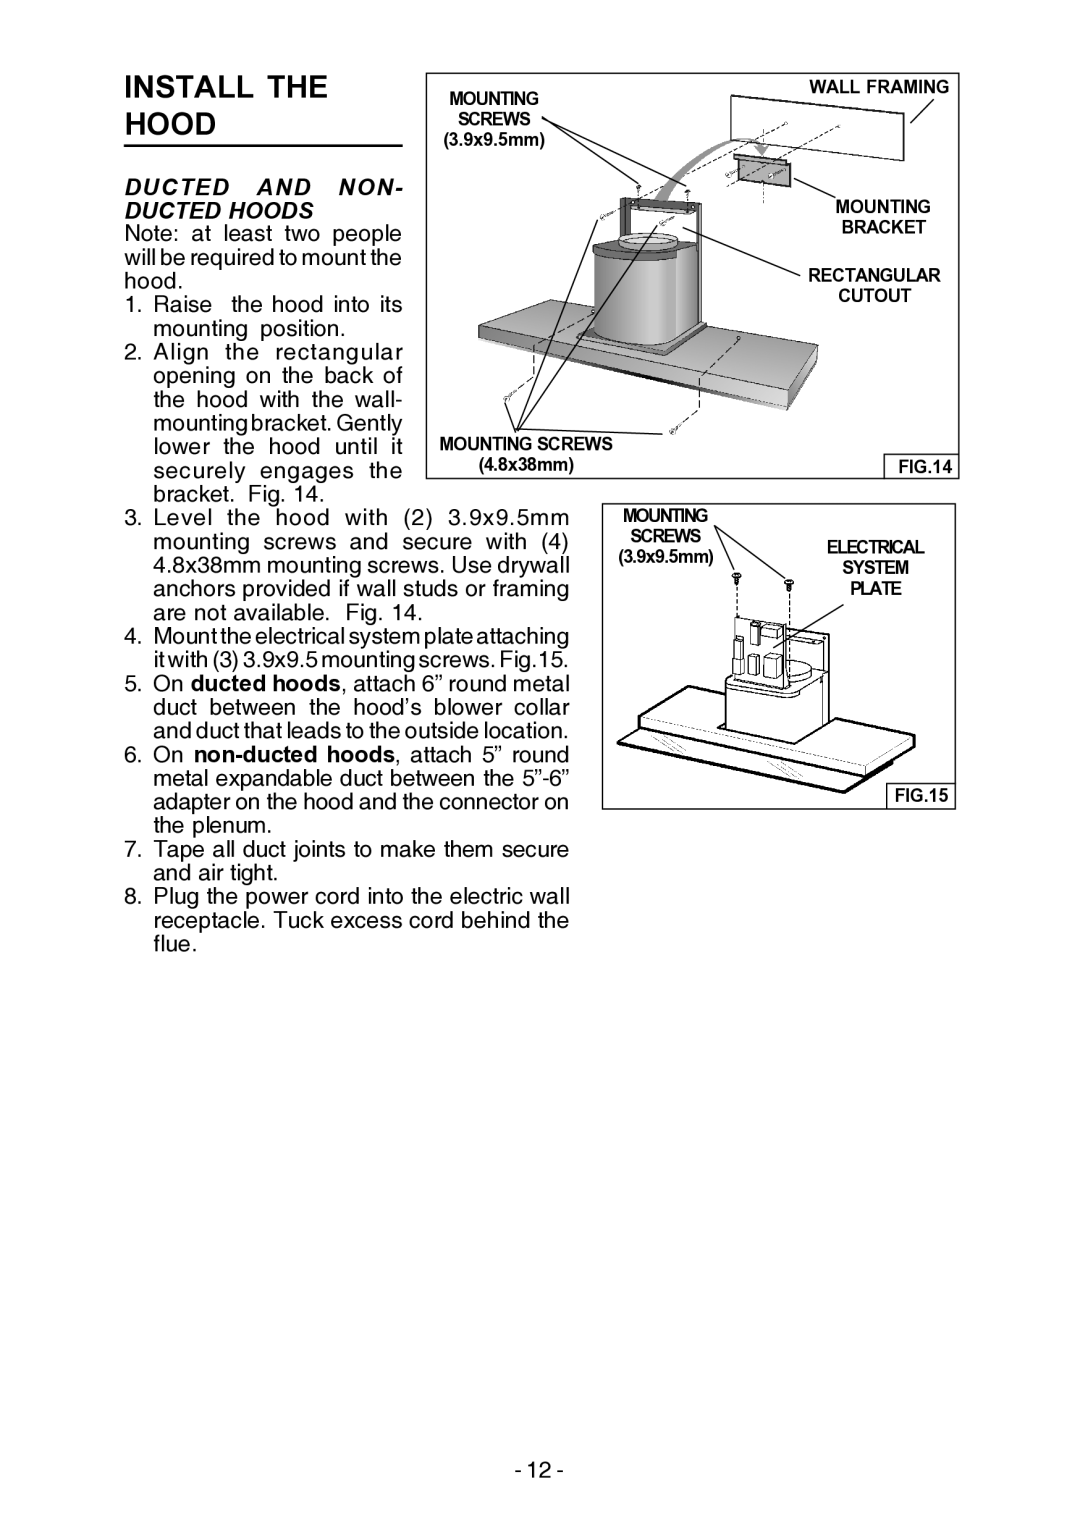
| MOUNTING | WALL FRAMING | ||
HOOD |
|
|
| SCREWS |
|
|
|
| (3.9x9.5mm) |
| |
DUCTED | AND | NON- | MOUNTING | ||
DUCTED HOODS | people | ||||
Note: at least two | BRACKET | ||||
will be required to mount the | RECTANGULAR | ||||
hood. |
|
|
|
| |
1. Raise | the hood into its | CUTOUT | |||
mounting position. |
| ||||
2.Align the rectangular opening on the back of
the hood with the wall- |
|
|
|
|
|
| |
mounting bracket. Gently | MOUNTING SCREWS |
|
|
|
| ||
lower the | hood until it |
|
|
|
| ||
securely | engages the | (4.8x38mm) |
|
| FIG.14 | ||
bracket. Fig. 14. |
|
|
|
|
|
| |
3. Level the hood with (2) 3.9x9.5mm |
| MOUNTING |
|
|
| ||
mounting | screws and secure with (4) | SCREWS | ELECTRICAL | ||||
4.8x38mm mounting screws. Use drywall | (3.9x9.5mm) | SYSTEM | |||||
anchors provided if wall studs or framing |
| PLATE | |||||
are not available. Fig. 14. |
|
|
|
|
|
| |
4.Mount the electrical system plate attaching it with (3) 3.9x9.5 mounting screws. Fig.15.
5.On ducted hoods, attach 6” round metal duct between the hood’s blower collar and duct that leads to the outside location.
6.On
adapter on the hood and the connector on | FIG.15 |
the plenum. |
|
7.Tape all duct joints to make them secure and air tight.
8.Plug the power cord into the electric wall receptacle. Tuck excess cord behind the flue.
- 12 -