CAUTION
1.Apply only non- combustible facing material to the fire- place surround.
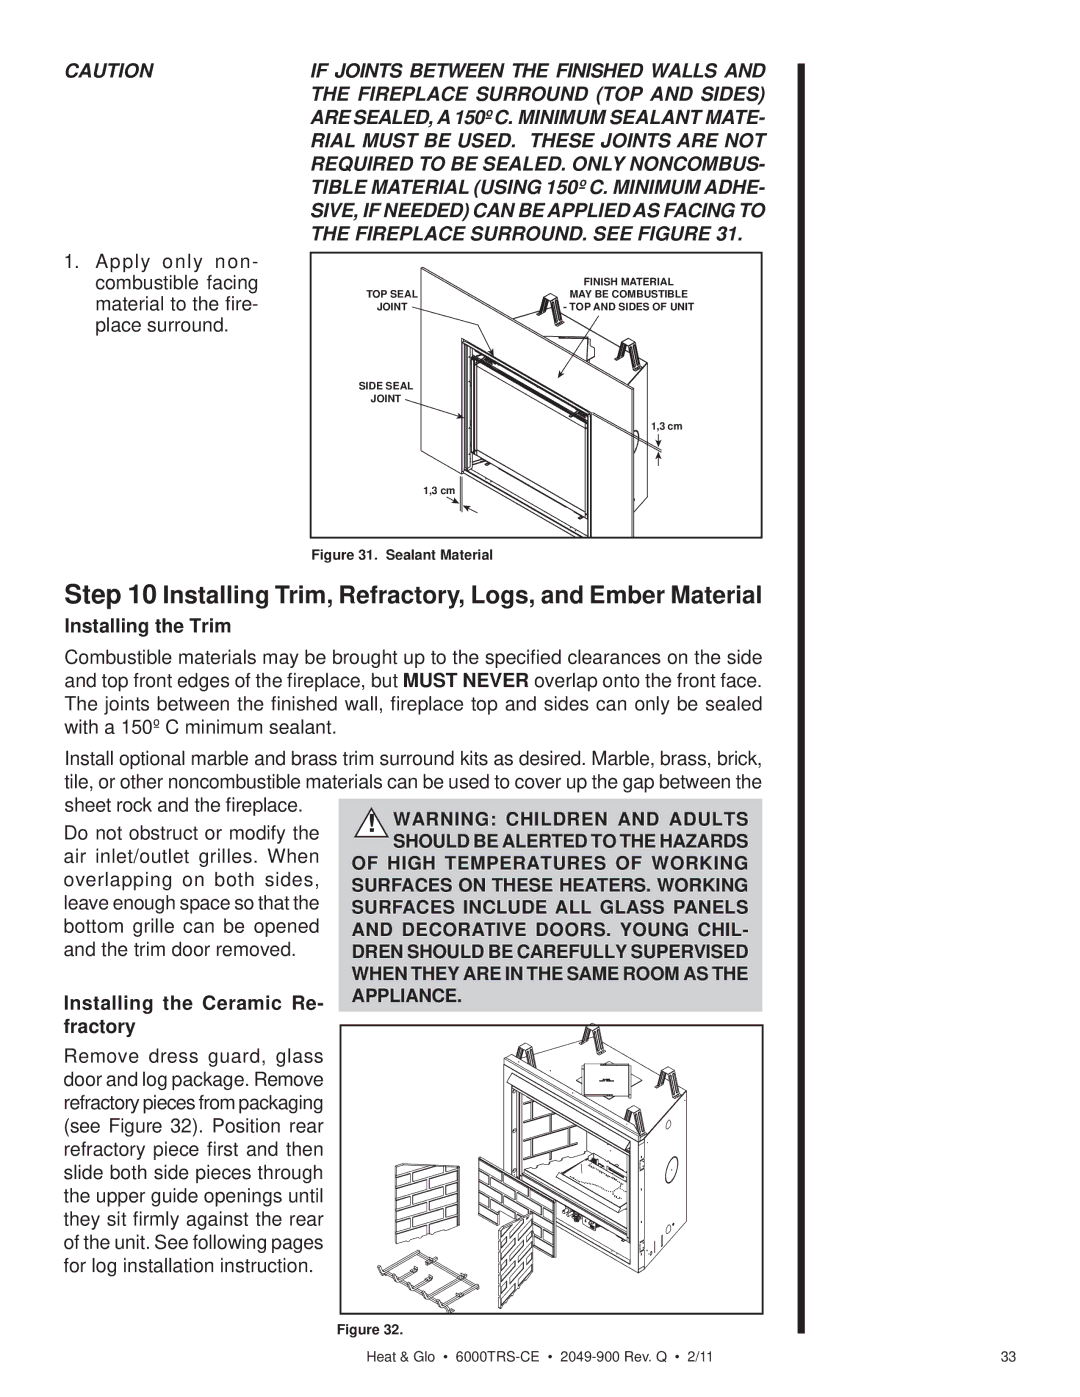
IF JOINTS BETWEEN THE FINISHED WALLS AND THE FIREPLACE SURROUND (TOP AND SIDES) ARE SEALED, A 150º C. MINIMUM SEALANT MATE-
RIAL MUST BE USED. THESE JOINTS ARE NOT REQUIRED TO BE SEALED. ONLY NONCOMBUS- TIBLE MATERIAL (USING 150º C. MINIMUM ADHE-
SIVE, IF NEEDED) CAN BE APPLIED AS FACING TO THE FIREPLACE SURROUND. SEE FIGURE 31.
TOP SEAL | FINISH MATERIAL |
MAY BE COMBUSTIBLE | |
JOINT | - TOP AND SIDES OF UNIT |
SIDE SEAL |
|
JOINT |
|
| 1,3 cm |
| 1,3 cm |
Figure 31. Sealant Material
Step 10 Installing Trim, Refractory, Logs, and Ember Material
Installing the Trim
Combustible materials may be brought up to the specified clearances on the side and top front edges of the fireplace, but MUST NEVER overlap onto the front face. The joints between the finished wall, fireplace top and sides can only be sealed with a 150º C minimum sealant.
Install optional marble and brass trim surround kits as desired. Marble, brass, brick, tile, or other noncombustible materials can be used to cover up the gap between the sheet rock and the fireplace.
Do not obstruct or modify the | ! WARNING: CHILDREN AND ADULTS | |
air inlet/outlet grilles. When | SHOULD BE ALERTED TO THE HAZARDS | |
OF HIGH TEMPERATURES OF WORKING | ||
overlapping on both sides, | ||
SURFACES ON THESE HEATERS. WORKING | ||
leave enough space so that the | SURFACES INCLUDE ALL GLASS PANELS | |
bottom grille can be opened | AND DECORATIVE DOORS. YOUNG CHIL- | |
and the trim door removed. | DREN SHOULD BE CAREFULLY SUPERVISED | |
| WHEN THEY ARE IN THE SAME ROOM AS THE | |
Installing the Ceramic Re- | APPLIANCE. | |
fractory |
| |
Remove dress guard, glass |
| |
door and log package. Remove |
| |
refractory pieces from packaging |
| |
(see Figure 32). Position rear |
| |
refractory piece first and then |
| |
slide both side pieces through |
| |
the upper guide openings until |
| |
they sit firmly against the rear |
| |
of the unit. See following pages |
| |
for log installation instruction. |
|
Figure 32.
Heat & Glo • | 33 |