
EW5830SS, EW5836SS specifications
The Broan EW5836SS and EW5830SS range hoods are premium kitchen ventilation solutions designed to enhance both functionality and aesthetic in modern kitchens. With their striking design and powerful performance, they cater to the needs of home chefs and those who prioritize air quality in their cooking environment.One of the standout features of both models is their sleek, stainless steel construction. This not only ensures durability and easy maintenance, but also adds a touch of elegance to any kitchen decor. The modern aesthetic is complemented by a straightforward design, making them suitable for various kitchen styles.
Both the EW5836SS and EW5830SS are equipped with a powerful internal blower that efficiently removes smoke, steam, and odors from the kitchen. With multiple airflow settings, users can adjust the ventilation power according to the cooking task at hand. This flexibility allows for effective air management, ensuring the kitchen remains fresh and inviting during meal preparation.
Another notable aspect of these range hoods is their quiet operation. The advanced sound-dampening technology minimizes noise levels, allowing for a more pleasant cooking experience. Even at higher speed settings, the sound produced remains unobtrusive, making it easier to converse with family or enjoy music while cooking.
The Broan EW5836SS and EW5830SS also feature integrated LED lighting, which provides bright illumination over the cooking surface. This not only enhances visibility during meal preparation but also contributes to energy efficiency, as LED lights consume less power compared to traditional bulbs.
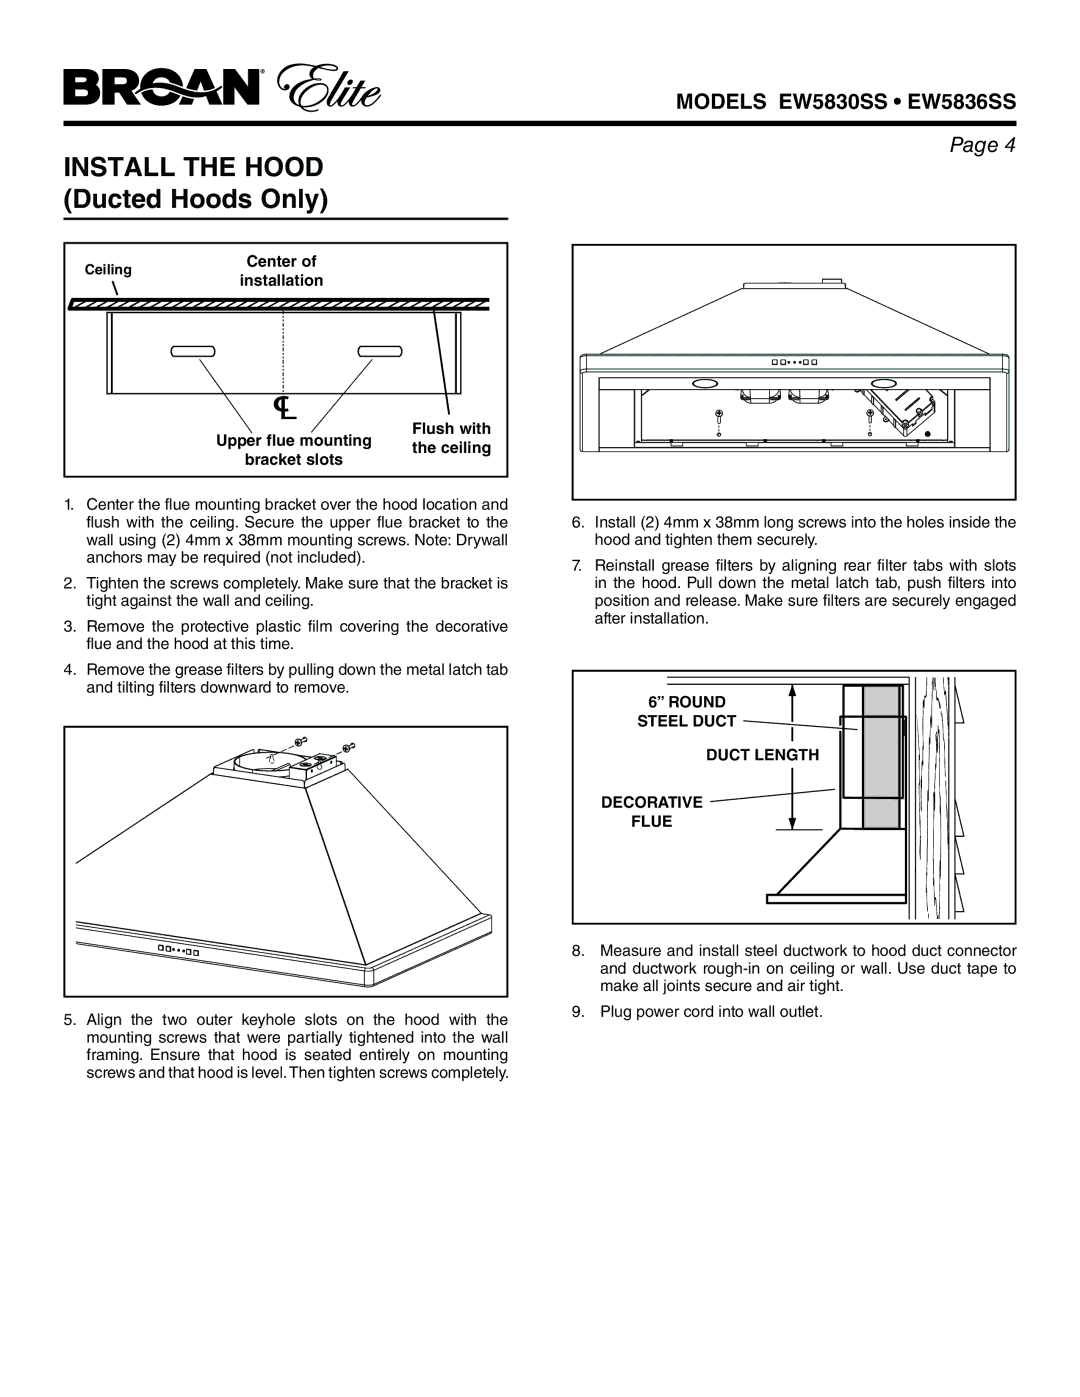
Installation flexibility is another benefit of these range hoods. Both models can be easily installed as either ducted or non-ducted options, depending on the kitchen layout and ventilation requirements. This versatility makes them suitable for a variety of home configurations, accommodating different needs and preferences.
Additionally, the Broan EW5836SS and EW5830SS come with dishwasher-safe aluminum filters that capture grease and other airborne particles. This feature ensures that the range hood operates effectively while making maintenance hassle-free for users.
In summary, the Broan EW5836SS and EW5830SS range hoods combine style, power, and efficiency into one robust solution for modern kitchens. With their durable construction, quiet operation, integrated lighting, and flexible installation options, they stand out as exceptional choices for enhancing kitchen ventilation and overall cooking experience.