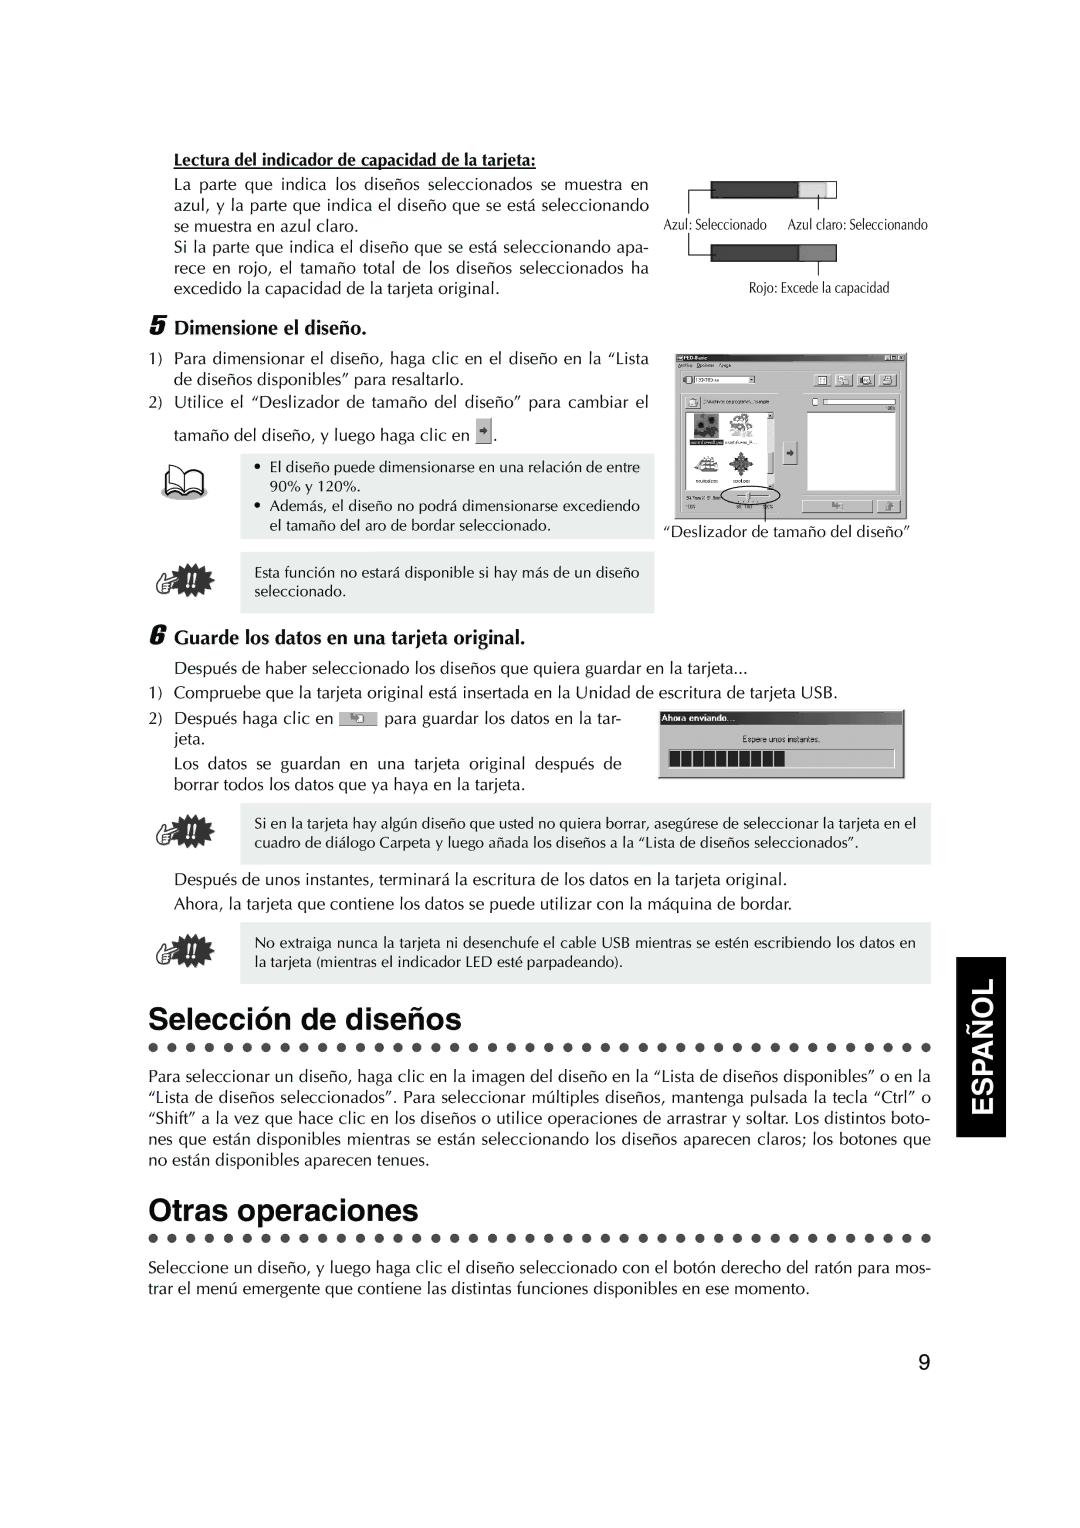
Lectura del indicador de capacidad de la tarjeta:

La parte que indica los diseños seleccionados se muestra en azul, y la parte que indica el diseño que se está seleccionando

se muestra en azul claro.

Azul: Seleccionado

Azul claro: Seleccionando

Si la parte que indica el diseño que se está seleccionando apa-


rece en rojo, el tamaño total de los diseños seleccionados ha


excedido la capacidad de la tarjeta original.


Rojo: Excede la capacidad

5 Dimensione el diseño.

1)Para dimensionar el diseño, haga clic en el diseño en la “Lista de diseños disponibles” para resaltarlo.

2)Utilice el “Deslizador de tamaño del diseño” para cambiar el tamaño del diseño, y luego haga clic en .

El diseño puede dimensionarse en una relación de entre

90% y 120%.

Además, el diseño no podrá dimensionarse excediendo

el tamaño del aro de bordar seleccionado.

“Deslizador de tamaño del diseño”


Esta función no estará disponible si hay más de un diseño seleccionado.

6 Guarde los datos en una tarjeta original.

Después de haber seleccionado los diseños que quiera guardar en la tarjeta...

1)Compruebe que la tarjeta original está insertada en la Unidad de escritura de tarjeta USB.

2)Después haga clic en para guardar los datos en la tar- jeta.

Los datos se guardan en una tarjeta original después de borrar todos los datos que ya haya en la tarjeta.

Si en la tarjeta hay algún diseño que usted no quiera borrar, asegúrese de seleccionar la tarjeta en el cuadro de diálogo Carpeta y luego añada los diseños a la “Lista de diseños seleccionados”.

Después de unos instantes, terminará la escritura de los datos en la tarjeta original. Ahora, la tarjeta que contiene los datos se puede utilizar con la máquina de bordar.

No extraiga nunca la tarjeta ni desenchufe el cable USB mientras se estén escribiendo los datos en la tarjeta (mientras el indicador LED esté parpadeando).

Selección de diseños

● ● ● ● ● ● ● ● ● ● ● ● ● ● ● ● ● ● ● ● ● ● ● ● ● ● ● ● ● ● ● ● ● ● ● ● ● ● ● ● ● ●

Para seleccionar un diseño, haga clic en la imagen del diseño en la “Lista de diseños disponibles” o en la “Lista de diseños seleccionados”. Para seleccionar múltiples diseños, mantenga pulsada la tecla “Ctrl” o “Shift” a la vez que hace clic en los diseños o utilice operaciones de arrastrar y soltar. Los distintos boto- nes que están disponibles mientras se están seleccionando los diseños aparecen claros; los botones que no están disponibles aparecen tenues.

Otras operaciones

● ● ● ● ● ● ● ● ● ● ● ● ● ● ● ● ● ● ● ● ● ● ● ● ● ● ● ● ● ● ● ● ● ● ● ● ● ● ● ● ● ●

Seleccione un diseño, y luego haga clic el diseño seleccionado con el botón derecho del ratón para mos- trar el menú emergente que contiene las distintas funciones disponibles en ese momento.

ESPAÑOL

9

Page 77
Image 77
Brother PED Basic Selección de diseños, Otras operaciones, Dimensione el diseño, Guarde los datos en una tarjeta original

1, PED Basic specifications

Brother PED Basic is an innovative software solution designed for embroiderers who want to personalize and manage their embroidery designs efficiently. This powerful tool is a must-have for both beginners and experienced users tending to create stunning embroidery projects.

One of the key features of Brother PED Basic is its ability to convert a wide range of image file formats into embroidery designs. Users can simply import their favorite graphics and transform them into professional-quality stitch files that are compatible with various Brother embroidery machines. The software supports formats such as BMP, JPEG, and GIF, making it versatile for creative exploration.

Another standout characteristic of Brother PED Basic is the user-friendly interface. The layout is intuitive, allowing users to navigate through the program with ease. New users particularly benefit from the step-by-step instructions and tutorials included within the software. This support makes it accessible for individuals with little to no background in embroidery or design, enabling them to get started on their projects quickly.

In terms of design capabilities, Brother PED Basic offers a robust set of editing tools. Users can resize, rotate, and mirror their designs, providing flexibility in customization. Additionally, the software allows users to select individual colors and adjust thread density to achieve the desired effect, ensuring the final product meets their specific requirements.

The software also integrates seamlessly with Brother's embroidery machines, allowing users to transfer designs effortlessly. By connecting through a USB cable or using a memory card, users can quickly upload their new embroidery creations to their machine and begin stitching without any hassles.

One of the technological advancements of Brother PED Basic is its built-in stitch simulator, which gives users a preview of how the design will look once stitched. This feature not only saves time but also helps in making adjustments before committing to the fabric.

Overall, Brother PED Basic stands out for its combination of user accessibility, functionality, and compatibility with a wide range of Brother embroidery machines. Whether you are looking to dip your toes into the world of embroidery or you are an experienced stitcher, Brother PED Basic provides the tools necessary to bring your creative visions to life. Its features and technologies are geared towards enhancing the embroidery experience, making it a valuable asset for anyone passionate about this artisanal craft.