
PQ1500S specifications
The Brother PQ1500S is a high-performance sewing machine designed specifically for quilters and sewing enthusiasts. Known for its speed, precision, and versatility, this model caters to a wide range of sewing projects, from quilts to home decor and garment making.One of the standout features of the PQ1500S is its remarkable sewing speed. It can reach up to 1,500 stitches per minute, allowing for efficient stitching without compromising on quality. This rapid pace is particularly beneficial for quilters who need to cover large areas quickly. Additionally, the machine includes a precision pin-feed system that ensures the fabric is fed evenly, preventing any misalignment that could disrupt the sewing process.
The PQ1500S is equipped with an adjustable presser foot pressure, giving users the ability to tailor the machine’s pressure to the thickness of the fabric. This feature is vital when working with various materials, ensuring that delicate fabrics are not damaged while heavier materials are securely held in place.
Another characteristic that sets the PQ1500S apart is its extensive throat space. With a sizable work area of 11.25 inches, the machine provides ample room for maneuvering larger projects, making it particularly suitable for quilting. The built-in extension table further enhances the workspace, allowing for smooth movement of bulky quilts.
The adjustable stitch length, which ranges from 1 to 7 millimeters, is another critical feature, enabling users to customize their stitch for different projects. Additionally, the machine offers a wide selection of presser feet, including the walking foot and free-motion quilting foot, further increasing its versatility.
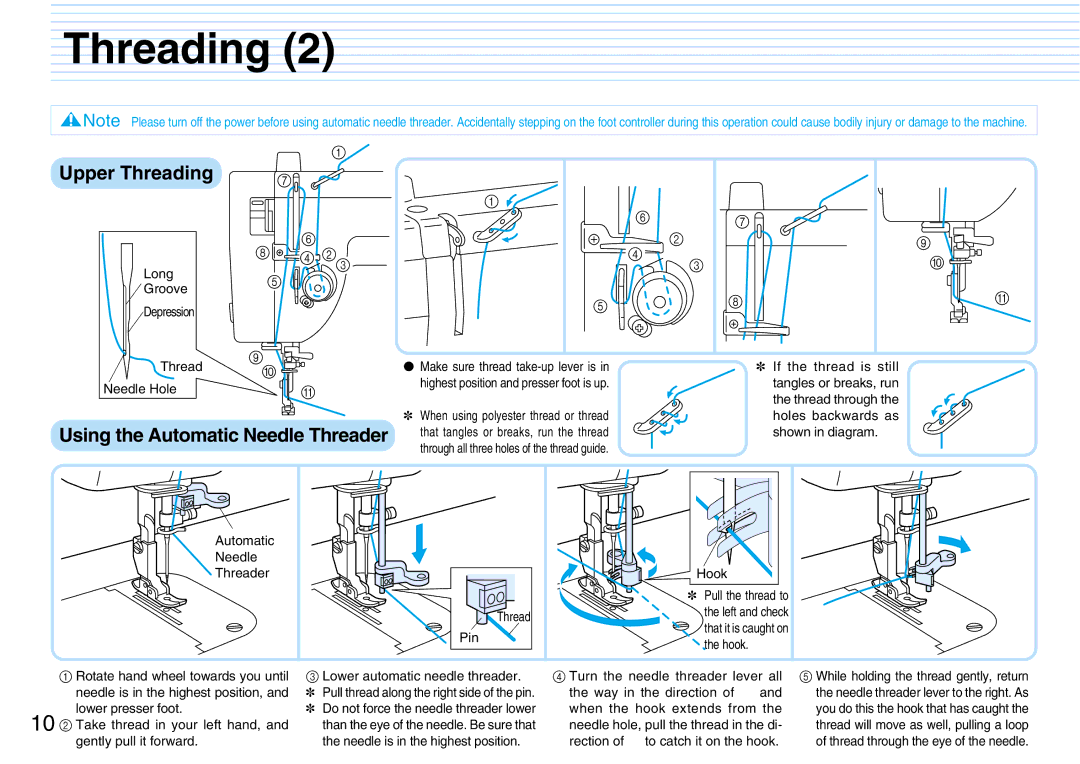
Technologically, the Brother PQ1500S incorporates an automatic needle threader, simplifying the threading process and minimizing eye strain. An easy-to-access bobbin compartment also supports quick changes and allows for a clear view of the remaining thread.
Overall, the Brother PQ1500S combines speed, precision, and ease of use, making it an excellent choice for both seasoned quilters and novice sewers. Its range of features and technologies makes it a standout option in the realm of sewing machines, promising quality results for a variety of sewing endeavors. Whether crafting quilts or tackling home decor projects, the PQ1500S is built to meet the needs of modern sewing enthusiasts.