•Repeat this procedure on all four sides.
•Trim extra material prior to sealing.
•Cut, fold, and glue roof membrane using contact cement (not provided)
•Position flashing to corner and form to fit by applying hand pressure to outside edges. Secure the corner flashing to the sidewalls.
Install to existing wall
•Allow membrane to extend up the existing wall approximately 6".
•Position 2 1/2" cove and fasten.
Apply contact cement or caulk (not provided by W. A. Brown) along the top joint where the cove joins the wall, down the edge at each end of the cove and down the edge of flashing at the wall.
Duro-Last® Roof Cap Installation (for outside installation)
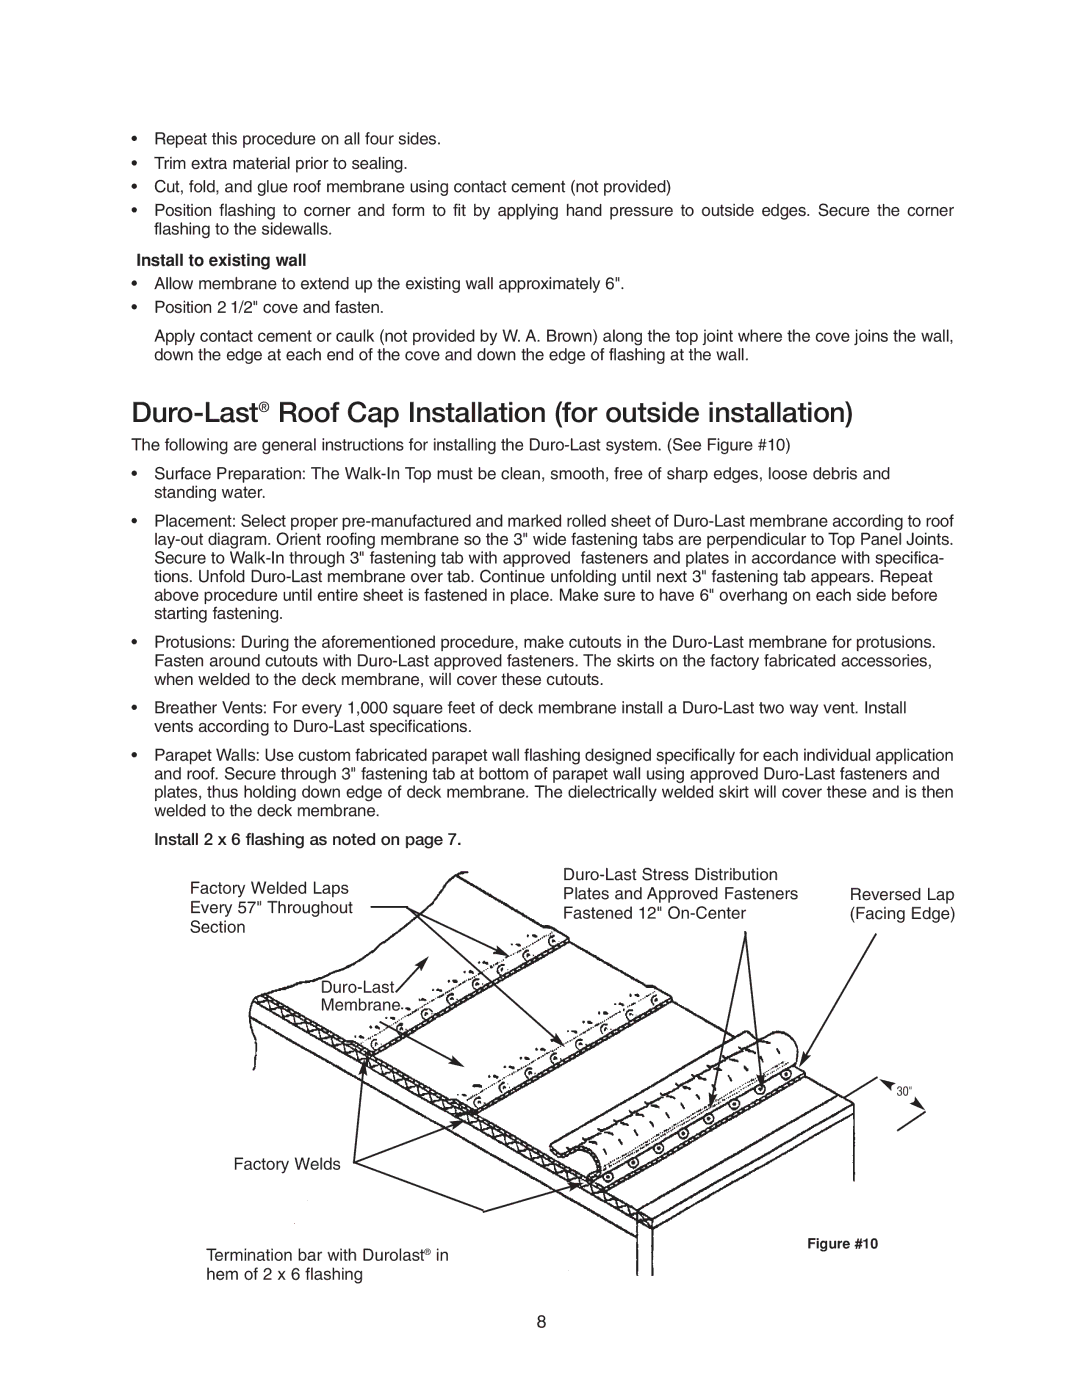
The following are general instructions for installing the
•Surface Preparation: The
•Placement: Select proper
•Protusions: During the aforementioned procedure, make cutouts in the
•Breather Vents: For every 1,000 square feet of deck membrane install a
•Parapet Walls: Use custom fabricated parapet wall flashing designed specifically for each individual application and roof. Secure through 3" fastening tab at bottom of parapet wall using approved
Install 2 x 6 flashing as noted on page 7.
Factory Welded Laps
Every 57" Throughout
Section
![]()
Membrane
Factory Welds
Termination bar with Durolast® in hem of 2 x 6 flashing
| |
Plates and Approved Fasteners |
|
Reversed Lap | |
Fastened 12" | (Facing Edge) |
|
|
![]() 30"
30"
Figure #10
8