Guidelines For Replacing Door Heater Cable
If door jamb is sweating or icing, you need to use the following guidelines.
1.Check the circuit breaker to see if it is in the on position and functioning properly.
2.Check the heater cable (#1) for current at the junction box.
3.Turn the circuit breaker off that supplies electricity to the heater cable
4.Check the heater cable for continuity. If the circuit is open you will need to replace the heater cable.
5.Remove the screws (#10) from the threshold plate (#6) but DO NOT remove the threshold at this time.
6.Remove the screws (#7) from the stainless steel jamb/heater cover (#3).
7.Remove the stainless steel jamb/heater cover (#3).
8.Remove the threshold (#6) and peel the tape off the cover channel (#9) to the bottom of the threshold.
9.Tape the heater cable in the groove around the door jamb, and run the leads in to junction box.
10.Replace the stainless steel heater covers (#3) and the threshold plate (#6). Install all screws securely.
11.Connect the electricity and turn on the circuit breaker.
12.Allow 15 minutes for the heater to warm up, feel to see if it has warmed the threshold (#6) and the heater covers (#3).
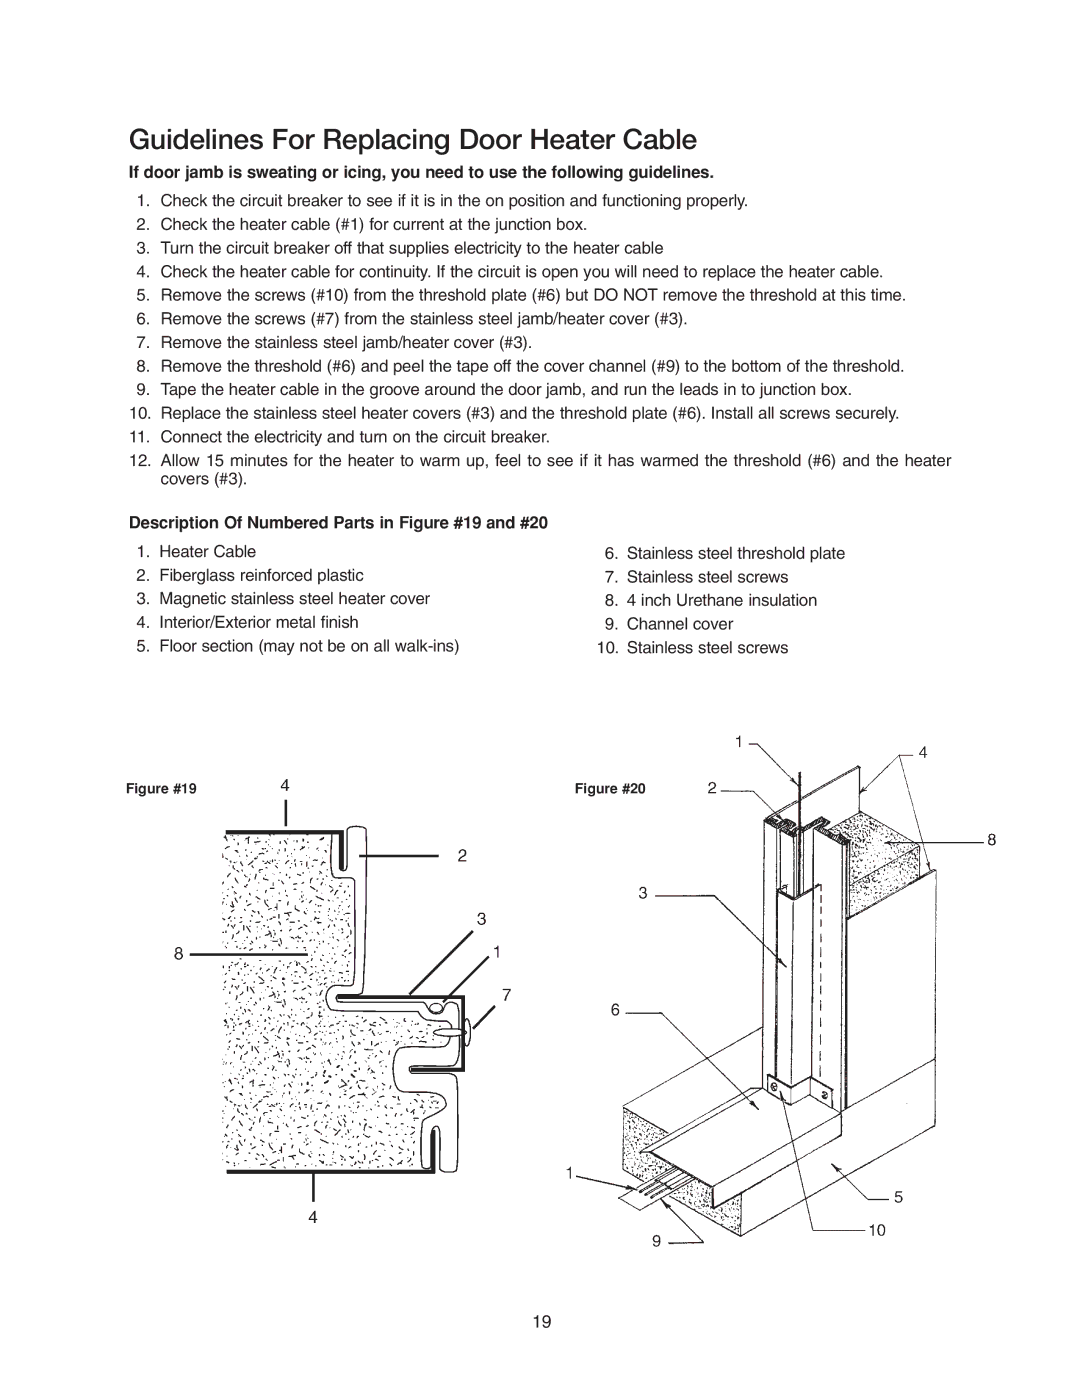
Description Of Numbered Parts in Figure #19 and #20
1.Heater Cable
2.Fiberglass reinforced plastic
3.Magnetic stainless steel heater cover
4.Interior/Exterior metal finish
5.Floor section (may not be on all
6.Stainless steel threshold plate
7.Stainless steel screws
8.4 inch Urethane insulation
9.Channel cover
10.Stainless steel screws
Figure #19 | Figure #20 |
19
