
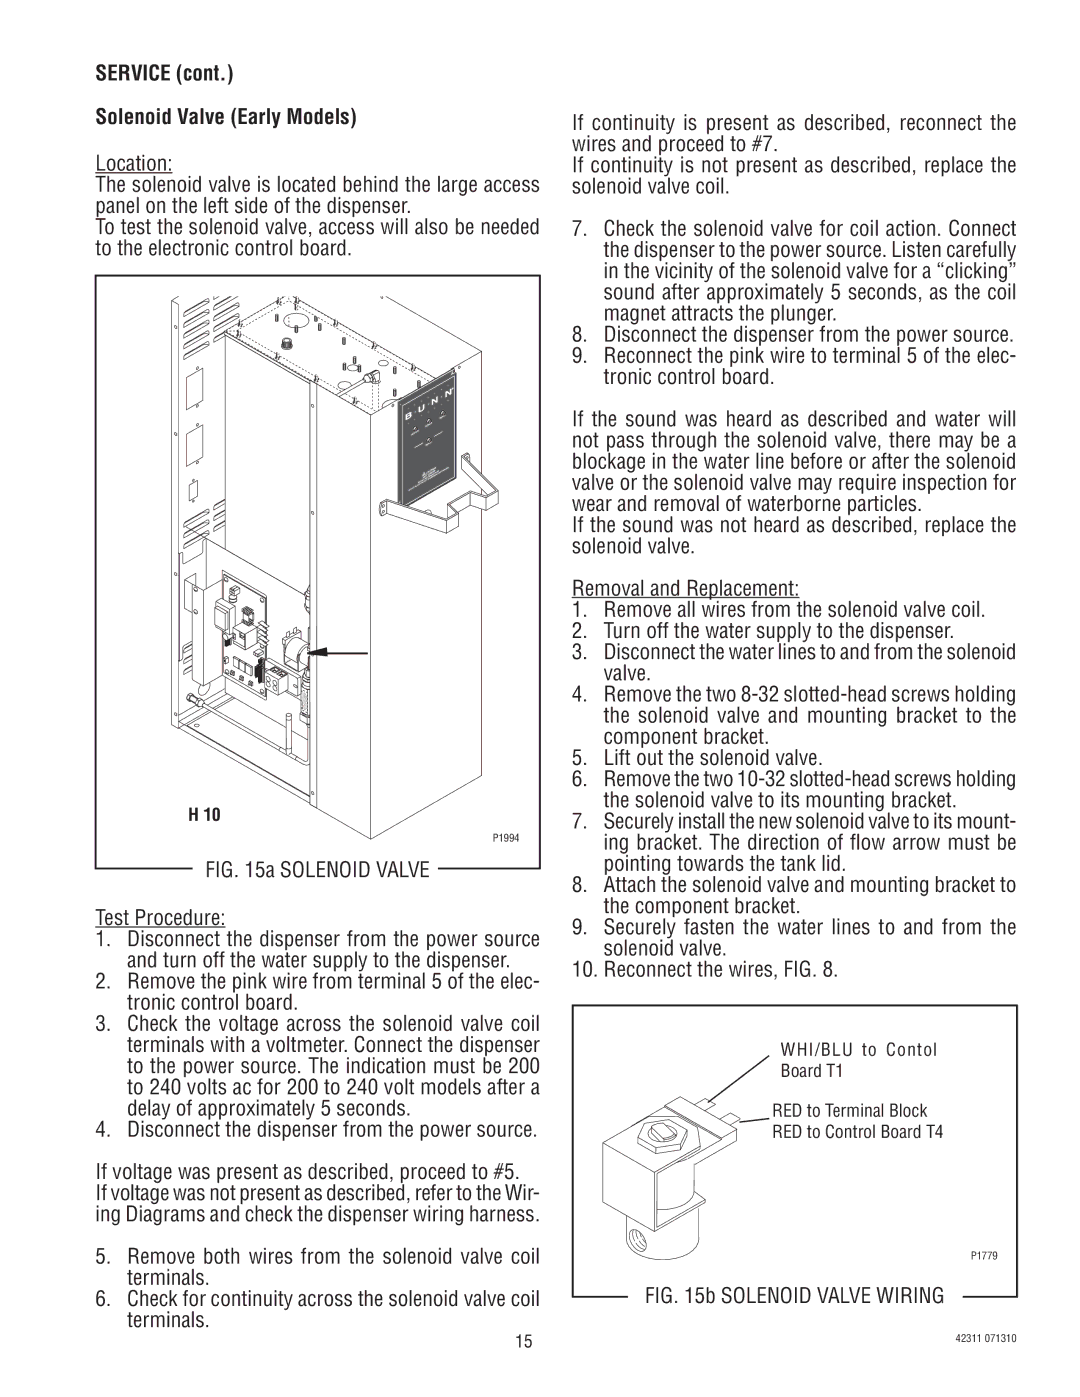
DV, H5E, H5X specifications
The Bunn H5E and H5X coffee machines represent a leap forward in brewing technology, specifically tailored for commercial use. Both models focus on delivering high-quality coffee while maximizing efficiency, making them ideal choices for busy cafés and restaurants.The Bunn H5E features a unique 5-liter dual tank system, which allows for faster brewing times and reduces wait periods for customers. This dual tank setup facilitates the simultaneous preparation of multiple coffee types, catering to a diverse clientele. The H5X, on the other hand, is equipped with advanced electronic controls that permit precise temperature adjustments to ensure that the ideal brewing conditions are maintained, enhancing flavor extraction.
One of the standout features of both models is the patented BrewOptimized Technology. This technology helps maintain optimal water temperature and consistent flow rates throughout the brewing process, ensuring that each cup of coffee meets the high standards expected in commercial settings. Additionally, the units utilize a patented stainless steel brew basket that enhances durability and simplifies cleaning, making maintenance less of a chore for busy staff.
Another significant characteristic of the H5E and H5X is their programmable settings, which allow operators to customize brewing parameters according to their specific preferences or customer needs. This flexibility means that establishments can experiment with various coffee profiles, ensuring that they serve only the best products to their patrons.
Safety is also a priority in the design of these machines. The H5E and H5X come equipped with built-in safety features such as automatic shut-off and thermal overload protection, which help to prevent accidents and enhance longevity. Moreover, their compact design allows for easy installation in a variety of settings, whether it's a small coffee stand or a large restaurant operation.
Both the Bunn H5E and H5X models are energy-efficient, with features that minimize power consumption without compromising performance. This focus on sustainability not only helps reduce overhead costs but also appeals to environmentally conscious consumers.
In summary, the Bunn H5E and H5X coffee machines are engineered for high performance, reliability, and versatility. With features designed to provide quick, quality coffee while ensuring ease of operation and maintenance, these machines are ideal for any establishment that takes its coffee seriously. Whether you’re brewing for a crowd or crafting specialty drinks, the H5E and H5X stand ready to deliver excellent results every time.