C.MOUNT REAR OBSERVATION PORT COVER Refer to Figure 16.

1.With the silastic sealant, secure the 3/16” diameter rope gasket into the groove around the perimeter of the rear observation port cover.

2.Mount the rear observation port cover onto the rear section (with the word “Top” in the upright position) using the four (4) 5/16” - 18 x 1” lg. cap screws and flat washers provided.

D.INSPECT ALL BOILER SEALS

1.A visual inspection should be made of all sealed joints and repairs made as necessary. Darken the boiler room and place a light source in the combustion space and canopy to observe any gaps or open seals. Poor seals must be repaired and rechecked before continuing.

E.JACKET ASSEMBLY - See Figure 22 for Jacket Assembly Details.

1.Open jacket carton and jacket hardware package. Unless otherwise stated, all jacket components are fastened with #8 x ½” hex head sheet metal screws. Do not drive sheet metal screws tight until jacket assembly is complete.

2.On boilers with rear flue outlet damper assembly, remove square knockout from jacket rear panel. To remove knockout, use a single hacksaw blade with handle or aviation snips to cut metal tabs between slotted holes.

3.Attach jacket front panel to front section and jacket rear panel to back section using the eight (8) #10 x ½” self tapping screws. Tighten these screws securely.

4.Attach jacket lower tie bar panel (approximately

5-5/8” high) to the bottom of the jacket front and rear panels using four (4) sheet metal screws. Repeat for opposite side.

5.Attach jacket upper tie bar panel (approximately

4-1/8” high) to the top of the jacket front and rear panels using four (4) sheet metal screws. Repeat for opposite side.

JACKET LEFT SIDE PANEL USAGE CHART

Boiler


MULTIPLE SIDE PANELS*


Model


Panel No. 1

Panel No. 2

Panel No. 3

Panel No. 4

Panel No. 5


V903A


L10

L5

---

---

---


V904A

BOILEROFREAR

L10

L11

---

---

---

BOILEROFFRONT

V905A


L10

L17

---

---

---


V906A


L10

L18

L5

---

---


V907A


L10

L18

L11

---

---


V908A


L10

L18

L17

---

---


V909A


L10

L18

L18

L5

---


V910A


L10

L18

L18

L17

---


V911A


L10

L18

L18

L17

---


V912A


L10

L18

L18

L18

L5


*NOTE: To install multiple side panels, start at the rear and work forward. To remove panels, reverse order of assembly.

Figure 20: Left Side Panel Usage Chart

6.Jacket Top Panel Attachment

a.On boilers with top flue outlet damper assembly, remove octagon shaped knockout. To remove knockout, use a single hacksaw blade with handle or aviation snips to cut metal tabs between slotted holes.

b.Remove knockout(s) for necessary supply piping in a similar manner.

c.Attach jacket top panel to the front panel, rear panel and upper tie bar panels with sheet metal screws.

7.Install Jacket side Panels

a.Snap black thumb hole bushings into all side panel holes.

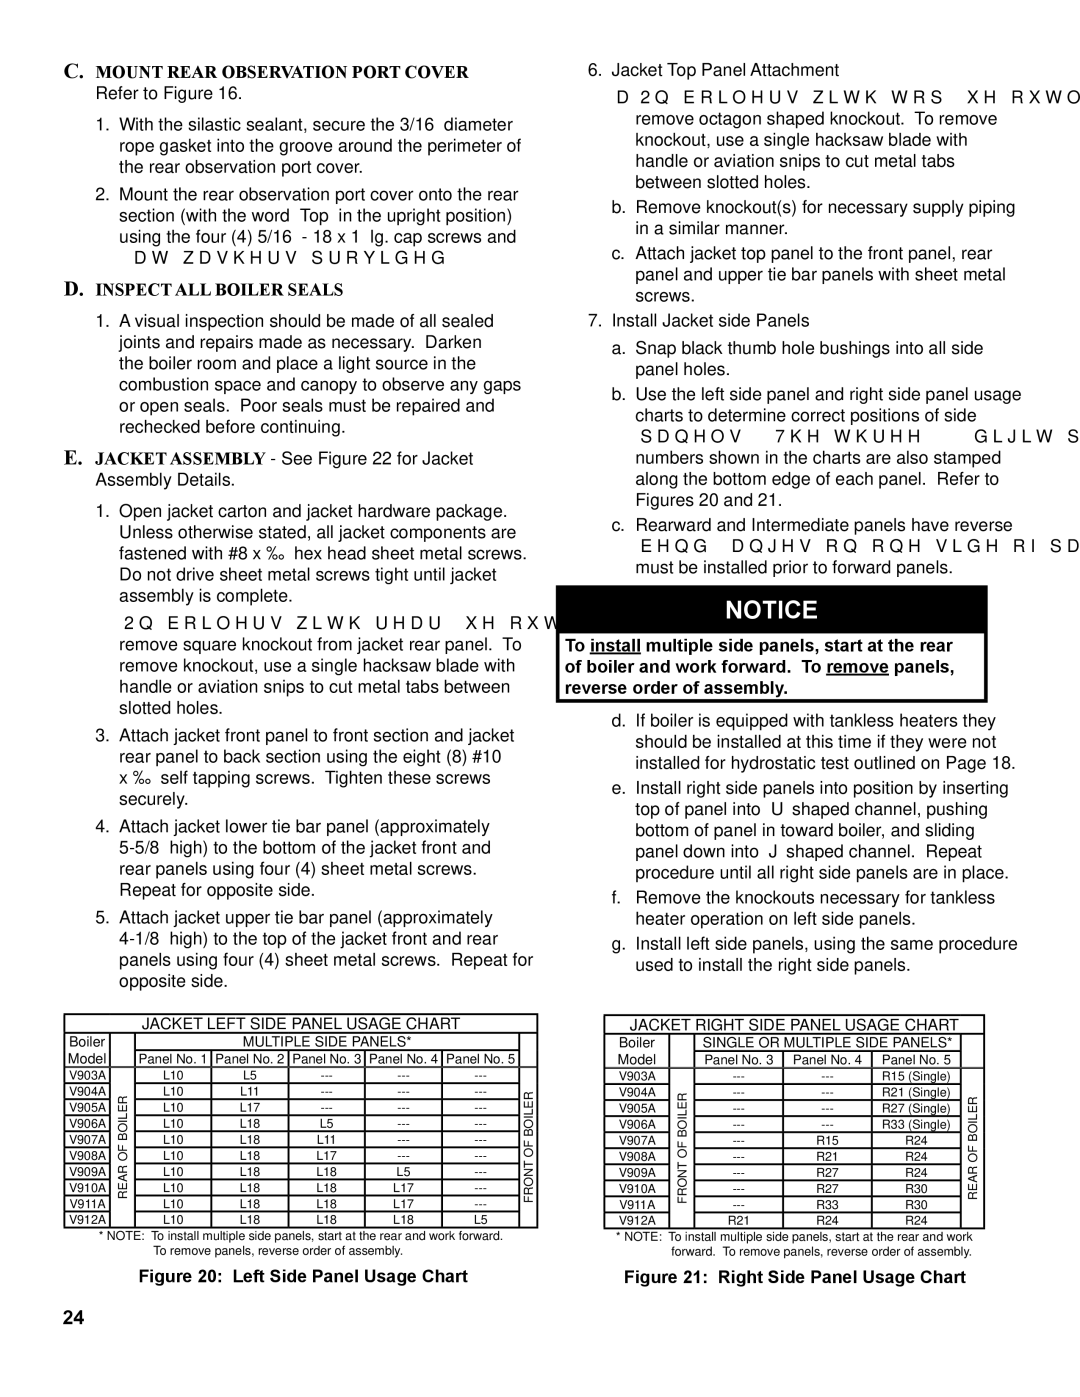
b.Use the left side panel and right side panel usage charts to determine correct positions of side panels. The three (3) digit panel identification numbers shown in the charts are also stamped along the bottom edge of each panel. Refer to Figures 20 and 21.

c.Rearward and Intermediate panels have reverse bend flanges on one side of panel. These panels must be installed prior to forward panels.

NOTICE

To install multiple side panels, start at the rear of boiler and work forward. To remove panels, reverse order of assembly.

d.If boiler is equipped with tankless heaters they should be installed at this time if they were not installed for hydrostatic test outlined on Page 18.

e.Install right side panels into position by inserting top of panel into ‘U’ shaped channel, pushing bottom of panel in toward boiler, and sliding panel down into ‘J’ shaped channel. Repeat procedure until all right side panels are in place.

f.Remove the knockouts necessary for tankless heater operation on left side panels.

g.Install left side panels, using the same procedure used to install the right side panels.

JACKET RIGHT SIDE PANEL USAGE CHART

Boiler


SINGLE OR MULTIPLE SIDE PANELS*


Model


Panel No. 3

Panel No. 4

Panel No. 5


V903A


---

---

R15 (Single)


V904A

BOILEROFFRONT

---

---

R21 (Single)

BOILEROFREAR

V905A


---

---

R27 (Single)


V906A


---

---

R33 (Single)


V907A


---

R15

R24


V908A


---

R21

R24


V909A


---

R27

R24


V910A


---

R27

R30


V911A


---

R33

R30


V912A


R21

R24

R24


*NOTE: To install multiple side panels, start at the rear and work forward. To remove panels, reverse order of assembly.

Figure 21: Right Side Panel Usage Chart

24

Page 24
Image 24
Burnham V9A manual Mount Rear Observation Port Cover Refer to Figure, Inspect ALL Boiler Seals

V9A specifications

Burnham V9A is a well-established model in the world of cast iron boilers, renowned for its efficiency and reliability in residential heating applications. As a part of Burnham's esteemed line of heating solutions, the V9A is designed to provide homeowners with consistent warmth while prioritizing fuel economy and ease of use.

One of the defining features of the Burnham V9A is its durable cast iron construction. This robust material enables the boiler to withstand high temperatures and pressures, ensuring a long service life. The V9A is engineered with several sections that are joined together, allowing for easier maintenance and potential adaptability to various heating demands. The boiler's design also promotes excellent heat retention, which not only enhances performance but contributes to overall energy efficiency.

In terms of technology, the Burnham V9A stands out with its advanced combustion design. With an efficiency rating of up to 85%, this model maximizes the heat output while minimizing fuel consumption. The boiler is compatible with both natural gas and propane, providing flexibility for users to choose their preferred fuel source. Additionally, the V9A is designed to operate with a minimum of venting requirements, making installation simpler and more cost-effective.

The Burnham V9A also features a choice of various firing rates, allowing homeowners to select the optimal heating output for their specific needs. This versatility ensures that the boiler can be effectively sized for different home environments, making it a highly adaptable option for a broad range of residential settings.

Moreover, one key characteristic of the Burnham V9A is its user-friendly control systems. It comes equipped with reliable electronic ignition and offers options for outdoor reset controls, which enhance efficiency by adjusting the boiler's operation based on the outdoor temperature. This advanced control capability not only optimizes energy use but also enhances comfort levels in the home.

Overall, the Burnham V9A represents a balance of durability, efficiency, and modern convenience, making it a top choice for homeowners seeking a reliable heating solution. Its combination of cast iron construction, advanced technology, and user-friendly features solidify its reputation in the competitive market of heating systems, ensuring comfort and peace of mind for years to come.