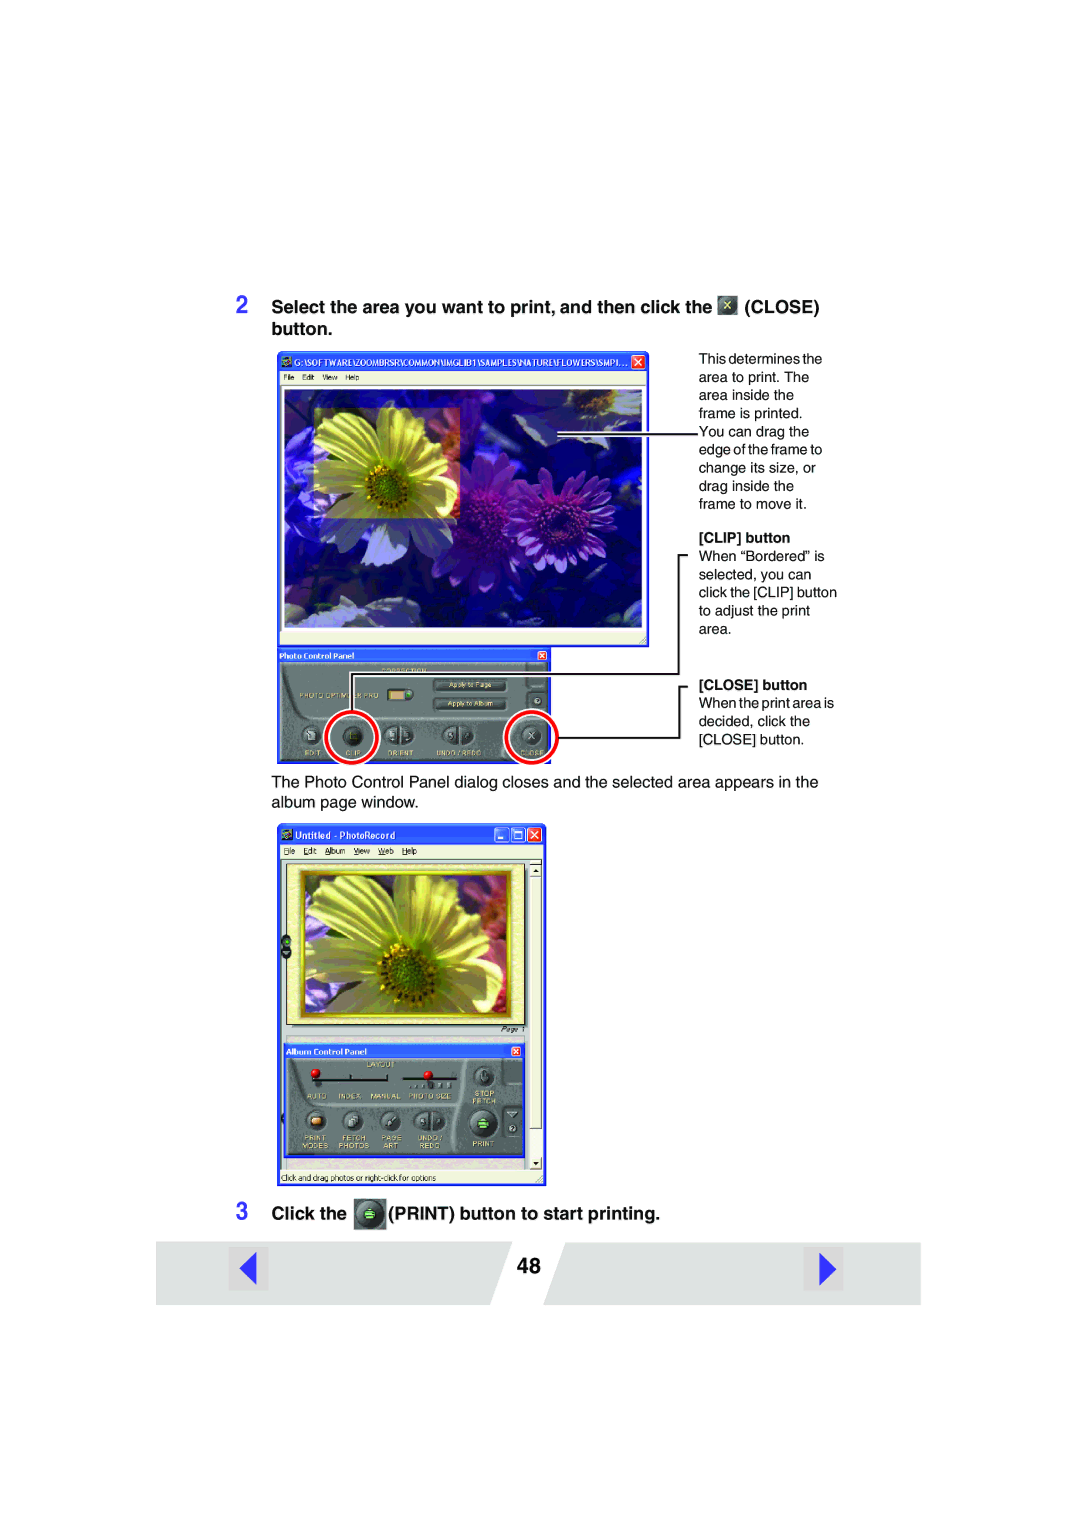
2 Select the area you want to print, and then click the ![]() (CLOSE) button.
(CLOSE) button.
This determines the area to print. The area inside the frame is printed. You can drag the edge of the frame to change its size, or drag inside the frame to move it.
[CLIP] button
When “Bordered” is selected, you can click the [CLIP] button to adjust the print area.
[CLOSE] button
When the print area is decided, click the [CLOSE] button.
The Photo Control Panel dialog closes and the selected area appears in the album page window.
3 Click the  (PRINT) button to start printing.
48