WX Technical Instructions
Photo 28b
Step 28 cont.
NOTE: The two halves of the toner hopper are still held together by two pins. Carefully pull the two halves apart.
(See Photo 28b)
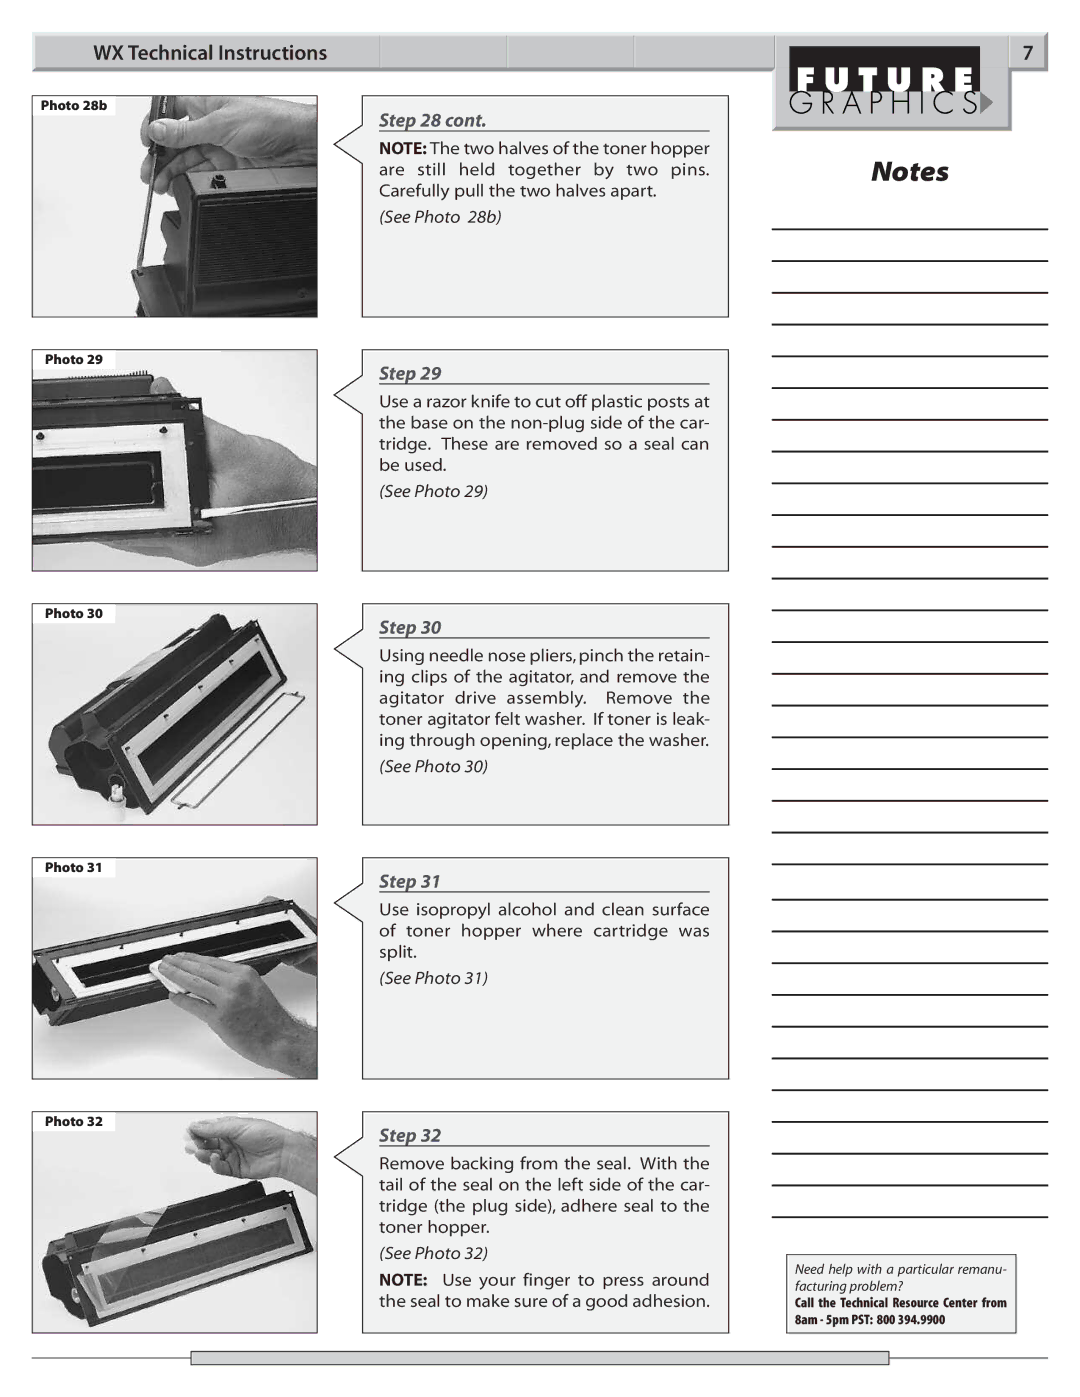
Photo 29
Step 29
Use a razor knife to cut off plastic posts at the base on the
(See Photo 29)
Photo 30
Step 30
Using needle nose pliers,pinch the retain- ing clips of the agitator, and remove the agitator drive assembly. Remove the toner agitator felt washer. If toner is leak- ing through opening, replace the washer.
(See Photo 30)
Photo 31
Step 31
Use isopropyl alcohol and clean surface of toner hopper where cartridge was split.
(See Photo 31)
Photo 32
Step 32
Remove backing from the seal. With the tail of the seal on the left side of the car- tridge (the plug side), adhere seal to the toner hopper.
(See Photo 32)
NOTE: Use your finger to press around the seal to make sure of a good adhesion.
7
Notes
Need help with a particular remanu- facturing problem?
Call the Technical Resource Center from 8am - 5pm PST: 800 394.9900