19th Century™
HANGINGTHE FAN
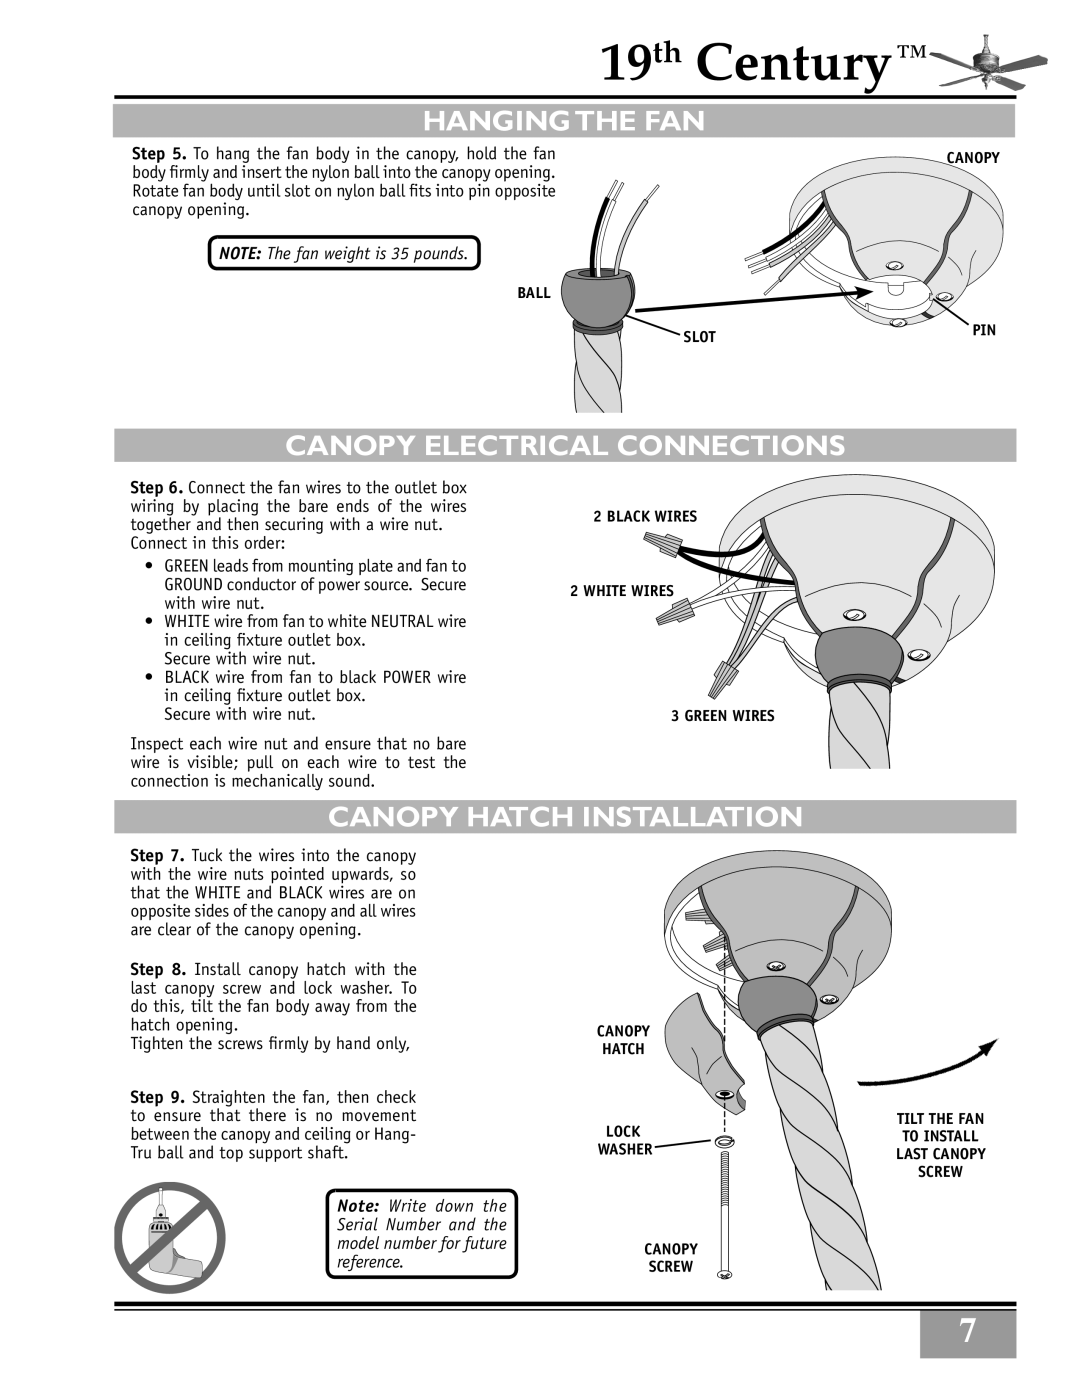
Step 5. To hang the fan body in the canopy, hold the fan body firmly and insert the nylon ball into the canopy opening. Rotate fan body until slot on nylon ball fits into pin opposite canopy opening.
NOTE: The fan weight is 35 pounds.
BALL
![]()
![]() SLOT
SLOT
CANOPY
PIN
CANOPY ELECTRICAL CONNECTIONS
Step 6. Connect the fan wires to the outlet box wiring by placing the bare ends of the wires together and then securing with a wire nut.
Connect in this order:
•GREEN leads from mounting plate and fan to GROUND conductor of power source. Secure with wire nut.
•WHITE wire from fan to white NEUTRAL wire in ceiling fixture outlet box.
Secure with wire nut.
•BLACK wire from fan to black POWER wire in ceiling fixture outlet box.
Secure with wire nut.
Inspect each wire nut and ensure that no bare wire is visible; pull on each wire to test the connection is mechanically sound.
2 BLACK WIRES
2 WHITE WIRES
3 GREEN WIRES
CANOPY HATCH INSTALLATION
Step 7. Tuck the wires into the canopy with the wire nuts pointed upwards, so that the WHITE and BLACK wires are on opposite sides of the canopy and all wires are clear of the canopy opening.
Step 8. Install canopy hatch with the last canopy screw and lock washer. To do this, tilt the fan body away from the hatch opening.
Tighten the screws firmly by hand only,
Step 9. Straighten the fan, then check to ensure that there is no movement between the canopy and ceiling or Hang- Tru ball and top support shaft.
Note: Write down the Serial Number and the model number for future reference.
CANOPY
HATCH
LOCK
WASHER ![]()
![]()
CANOPY
SCREW
TILT THE FAN
TO INSTALL
LAST CANOPY
SCREW
7