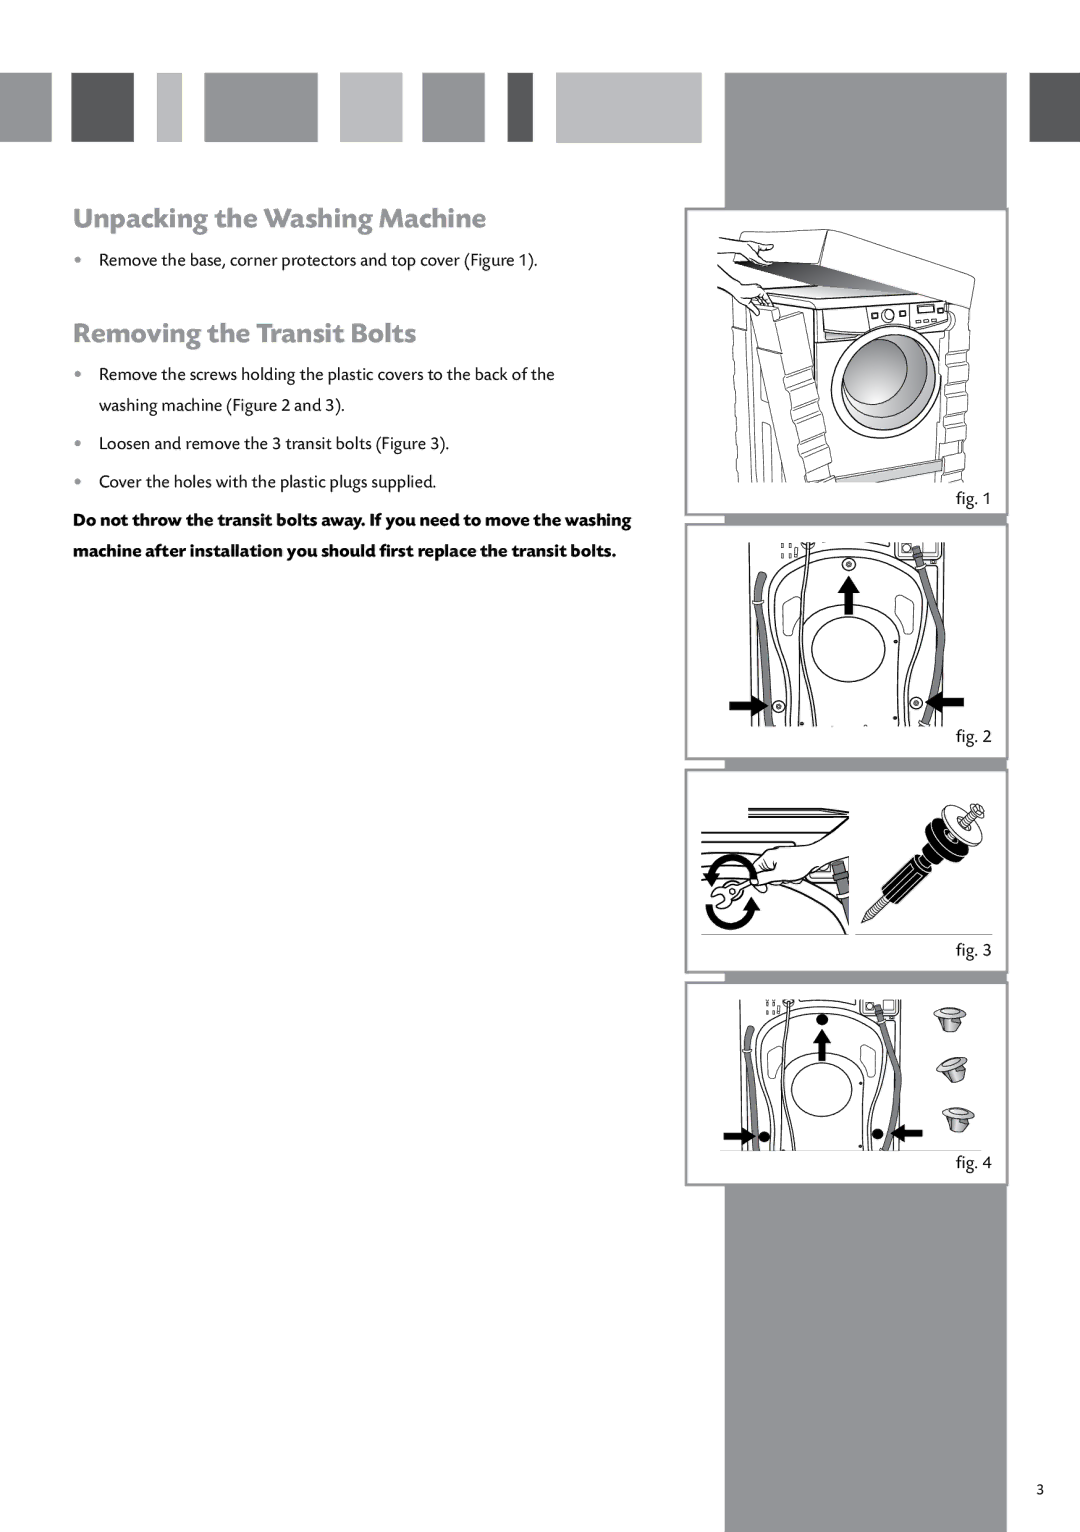
Unpacking the Washing Machine
Remove the base, corner protectors and top cover (Figure 1).
Removing the Transit Bolts
Remove the screws holding the plastic covers to the back of the washing machine (Figure 2 and 3). Loosen and remove the 3 transit bolts (Figure 3). Cover the holes with the plastic plugs supplied.Do not throw the transit bolts away. If you need to move the washing machine after installation you should first replace the transit bolts.
72
washing machine
a There are 3 blocking screws on the back
of the washing machine.
b To loose and completely remove the 3
screws together with the metal washer
and the black rubber and plastic tubes
that make up the blocking system.
c Fit the 3 plastic plugs supplied in the
holes you removed the screws from.
installation and assembly
Do not throw the blocking screws away.
You may need to move the washing
machine at a later date.
Important
a Remove the base, corner protectors and
top cover.
1UNPACKING AND
UNBLOCKING THE
WASHING MACHINE
UNBLOCKING
UNPACKING
a
c
fig. 1
72washing machinea There are 3 blocking screws on the backof the washing machine.b To loose and completely remove the 3screws together with the metal washerand the black rubber and plastic tubesthat make up the blocking system.c Fit the 3 plastic plugs supplied in theholes you removed the screws from.

installation and assembly

Do not throw the blocking screws away.You may need to move the washingmachine at a later date.Importanta Rem ove the base, corner protectors andtop cover.
1UNPACKING AND
UNBLOCKING THE
WASHING MACHINE
UNBLOCKINGUNPACKINGac
fig. 2
72
washing machine
a There are 3 blocking screws on the back
of the washing machine.
b To loose and completely remove the 3
screws together with the metal washer
and the black rubber and plastic tubes
that make up the blocking system.
c Fit the 3 plastic plugs supplied in the
holes you removed the screws from.
installation and assembly
Do not throw the blocking screws away.
You may need to move the washing
machine at a later date.
Important
a Remove the base, corner protectors and
top cover.
1UNPACKING AND
UNBLOCKING THE
WASHING MACHINE
UNBLOCKING
UNPACKING
a
c
fig. 3
72
washing machine
a There are 3 blocking screws on the back
of the washing machine.
b To loose and completely remove the 3
screws together with the metal washer
and the black rubber and plastic tubes
that make up the blocking system.
c Fit the 3 plastic plugs supplied in the
holes you removed the screws from.
installation and assembly
Do not throw the blocking screws away.
You may need to move the washing
machine at a later date.
Important
a Remove the base, corner protectors and
top cover.
1UNPACKING AND
UNBLOCKING THE
WASHING MACHINE
UNBLOCKING
UNPACKING
a
c
fig. 4
3
72
washing machine
a There are 3 blocking screws on the back
of the washing machine.
b To loose and completely remove the 3
screws together with the metal washer
and the black rubber and plastic tubes
that make up the blocking system.
c Fit the 3 plastic plugs supplied in the
holes you removed the screws from.
installation and assembly
Do not throw the blocking screws away.
You may need to move the washing
machine at a later date.
Important
a Remove the base, corner protectors and
top cover.
1UNPACKING AND
UNBLOCKING THE
WASHING MACHINE
UNBLOCKING
UNPACKING
a
c