
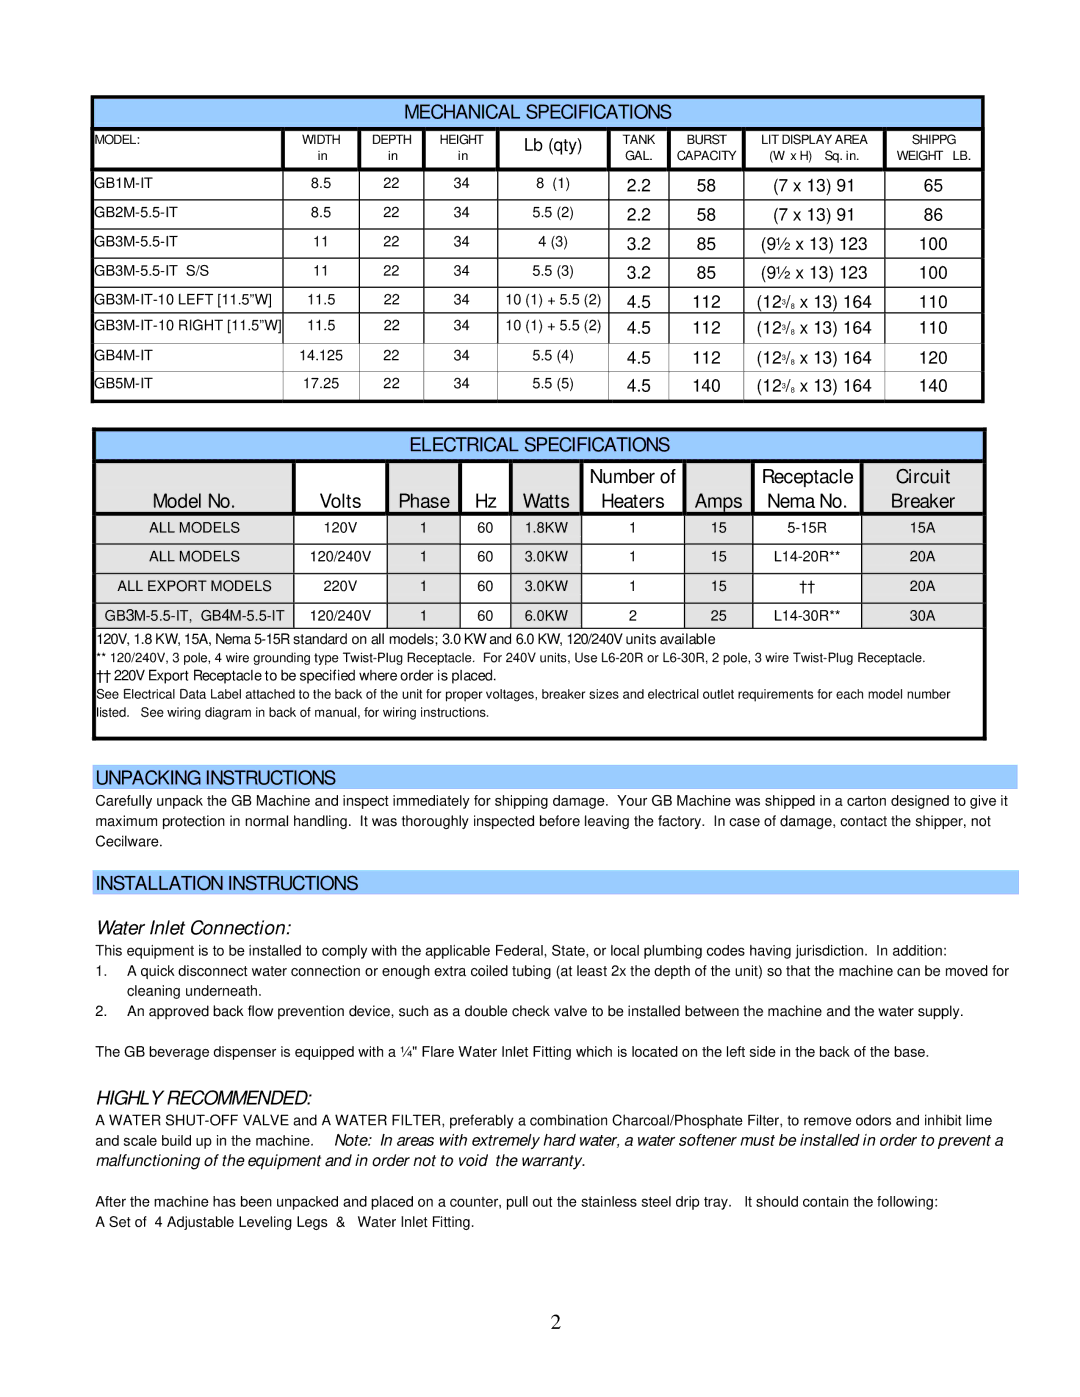
GB-IT specifications
The Cecilware GB-IT is a cutting-edge coffee brewing system designed to cater to the needs of cafes, restaurants, and other commercial establishments that require efficiency, speed, and quality in coffee production. This machine stands out for its robust construction and the use of advanced technologies, making it a reliable choice for high-demand environments.One of the primary features of the Cecilware GB-IT is its dual-purpose capability, functioning as both an automatic brewer and a tea brewer. This versatility allows businesses to serve a wide range of hot beverages without needing multiple machines, ultimately saving space and reducing operational costs. The GB-IT has a generous brewing capacity, typically handling up to 3 gallons of coffee in a single batch, which is essential for busy service periods.
The machine is equipped with a unique digital brew control that allows users to set precise brew times and temperatures. This feature ensures that each cup of coffee is brewed to perfection, providing a consistent flavor profile that loyal customers can rely on. Additionally, the GB-IT comes with programmable volumes, allowing operators to customize the amount of coffee brewed based on their specific needs and customer demand.
Another notable characteristic of the Cecilware GB-IT is its durable construction. Built with high-quality stainless steel, the machine not only has an appealing aesthetic but is also designed to withstand the rigors of daily use in a bustling commercial environment. Its compact footprint allows it to fit seamlessly into any kitchen setup, maximizing counter space while still delivering high performance.
The GB-IT also incorporates advanced safety features, including an automatic shut-off system that activates when the water reservoir runs low or the brewing cycle is complete. This thoughtful design minimizes the risk of overheating and ensures the longevity of the machine.
In terms of maintenance, the Cecilware GB-IT is designed for easy cleaning and servicing, with components that can be easily accessed. This ensures that operators can perform routine maintenance without significant downtime, contributing to overall operational efficiency.
In summary, the Cecilware GB-IT stands as an excellent solution for businesses that prioritize quality, efficiency, and versatility in their beverage offerings. With its advanced features, durable construction, and user-friendly design, it is a worthwhile investment for any establishment looking to elevate their coffee and tea service.