Installing Outside Air Kit
An outside air kit is installed in all WMC Series Fire- places. If desired, or if local codes mandate the use of an air kit, then an
WMC Series Woodburning Fireplace
Inner Pipe Section
Pipe
Rim
UP
![]() Hem
Hem
Lance
Pipe
Rim
CLOSED
OPEN
FP710
Fig. 16 Outside air operation.
Installing the Chimney System
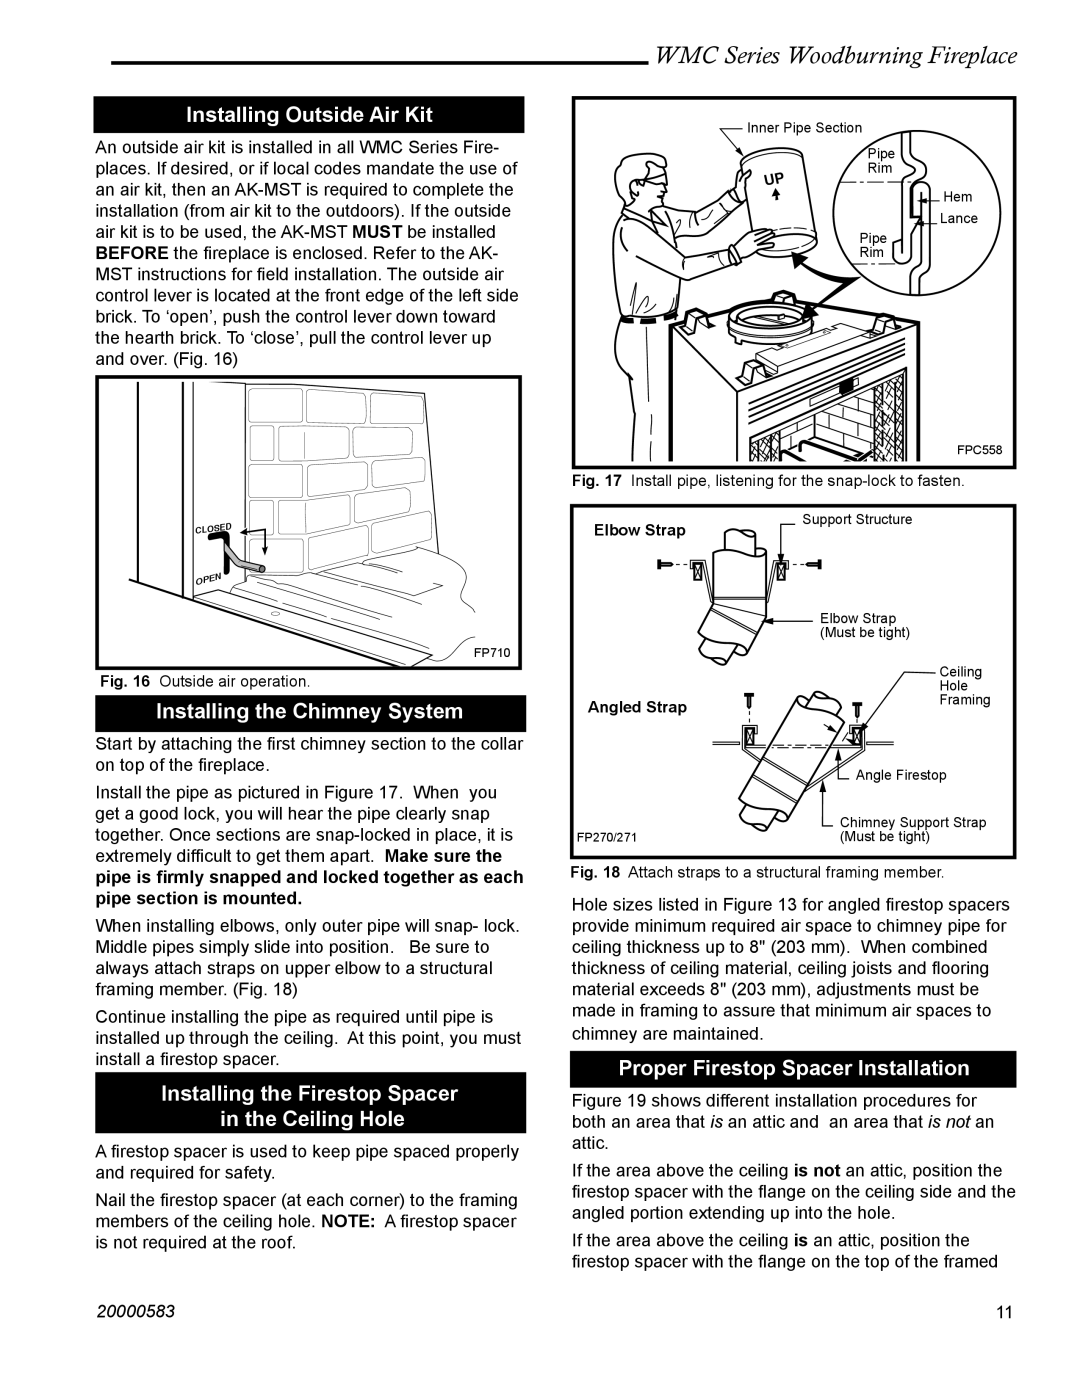
Start by attaching the first chimney section to the collar on top of the fireplace.
Install the pipe as pictured in Figure 17. When you get a good lock, you will hear the pipe clearly snap together. Once sections are
When installing elbows, only outer pipe will snap- lock. Middle pipes simply slide into position. Be sure to always attach straps on upper elbow to a structural framing member. (Fig. 18)
Continue installing the pipe as required until pipe is installed up through the ceiling. At this point, you must install a firestop spacer.
Installing the Firestop Spacer
in the Ceiling Hole
A firestop spacer is used to keep pipe spaced properly and required for safety.
Nail the firestop spacer (at each corner) to the framing members of the ceiling hole. NOTE: A firestop spacer is not required at the roof.
FPC558
Fig. 17 Install pipe, listening for the | |
Elbow Strap | Support Structure |
| |
| Elbow Strap |
| (Must be tight) |
| Ceiling |
| Hole |
Angled Strap | Framing |
| |
| Angle Firestop |
| Chimney Support Strap |
FP270/271 | (Must be tight) |
Fig. 18 Attach straps to a structural framing member.
Hole sizes listed in Figure 13 for angled firestop spacers provide minimum required air space to chimney pipe for ceiling thickness up to 8" (203 mm). When combined thickness of ceiling material, ceiling joists and flooring material exceeds 8" (203 mm), adjustments must be made in framing to assure that minimum air spaces to
chimney are maintained.
Proper Firestop Spacer Installation
Figure 19 shows different installation procedures for both an area that is an attic and an area that is not an attic.
If the area above the ceiling is not an attic, position the firestop spacer with the flange on the ceiling side and the angled portion extending up into the hole.
If the area above the ceiling is an attic, position the firestop spacer with the flange on the top of the framed
20000583 | 11 |