3.SETUP
AC Power
This product has an
To determine the power requirements for a particular fixture, see the label affixed to the back plate of the fixture or refer to the fixture’s specifications chart. A fixture’s listed current r ating indicates its average current draw under normal conditions.
Always connect this product to a protected circuit (circuit breaker or fuse), making sure that it has an appropriate electrical ground to avoid the risk of electrocution or fire.
Never connect this product to a rheostat (variable resistor) or dimmer circuit, even if the rheostat or dimmer channel serves only as a 0 to 100% switch.
Power Linking
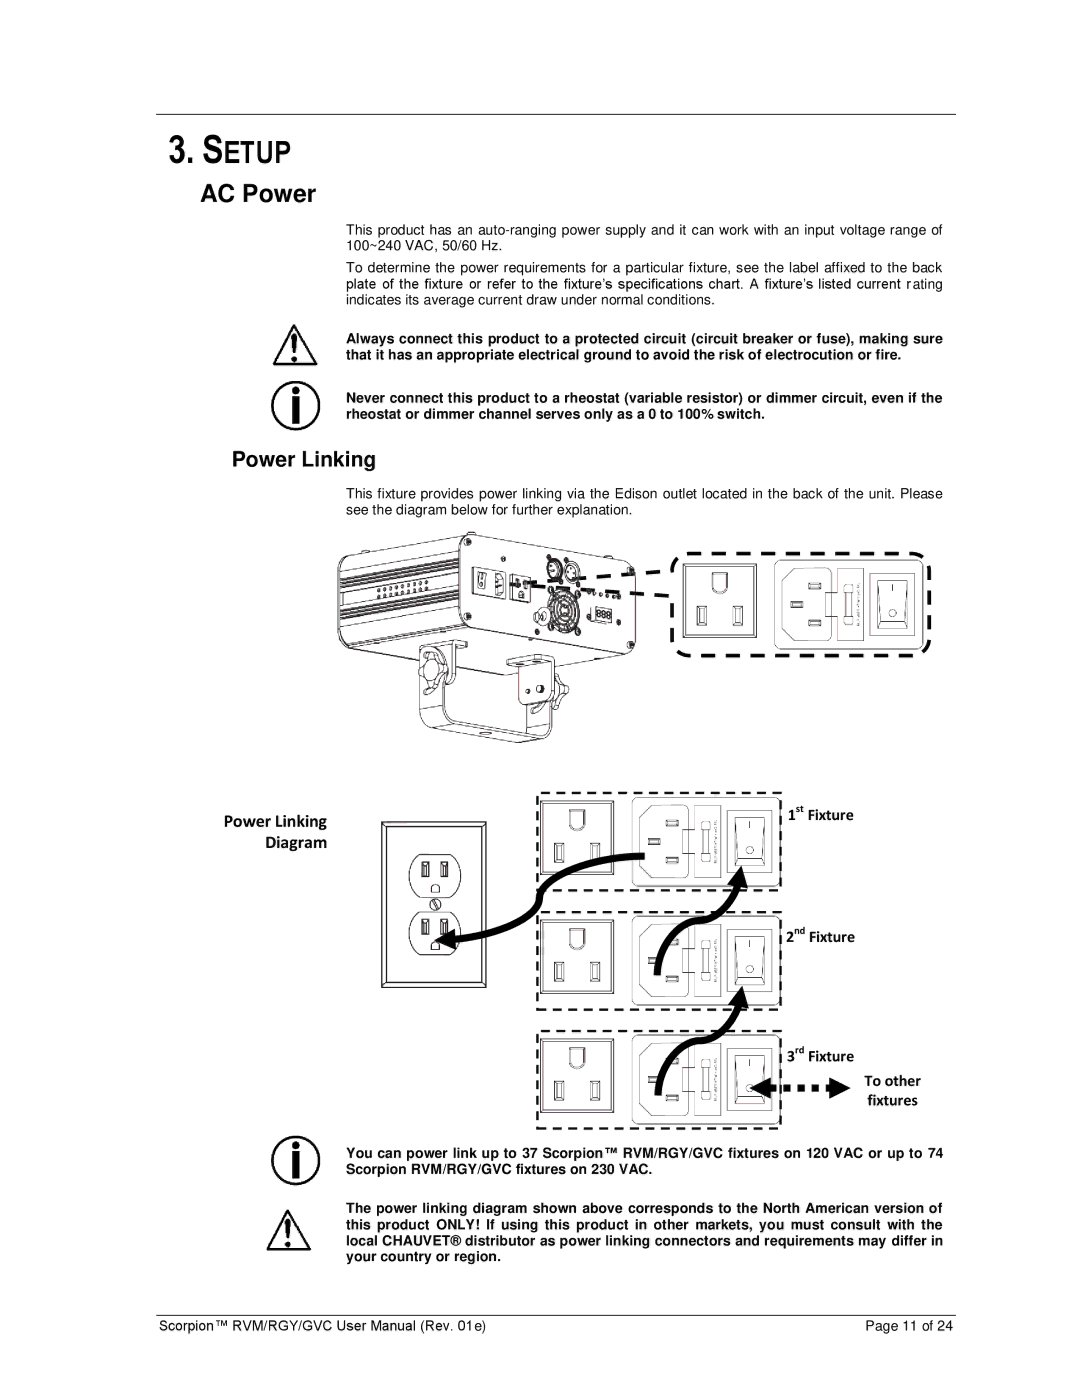
This fixture provides power linking via the Edison outlet located in the back of the unit. Please see the diagram below for further explanation.
Power Linking Diagram
1st Fixture
2nd Fixture
3rd Fixture
To other
fixtures
You can power link up to 37 Scorpion™ RVM/RGY/GVC fixtures on 120 VAC or up to 74 Scorpion RVM/RGY/GVC fixtures on 230 VAC.
The power linking diagram shown above corresponds to the North American version of this product ONLY! If using this product in other markets, you must consult with the local CHAUVET® distributor as power linking connectors and requirements may differ in your country or region.
Scorpion™ RVM/RGY/GVC User Manual (Rev. 01e) | Page 11 of 24 |